How to Grow and Care Tips for Indoor Trailing Jade

Trailing Jade

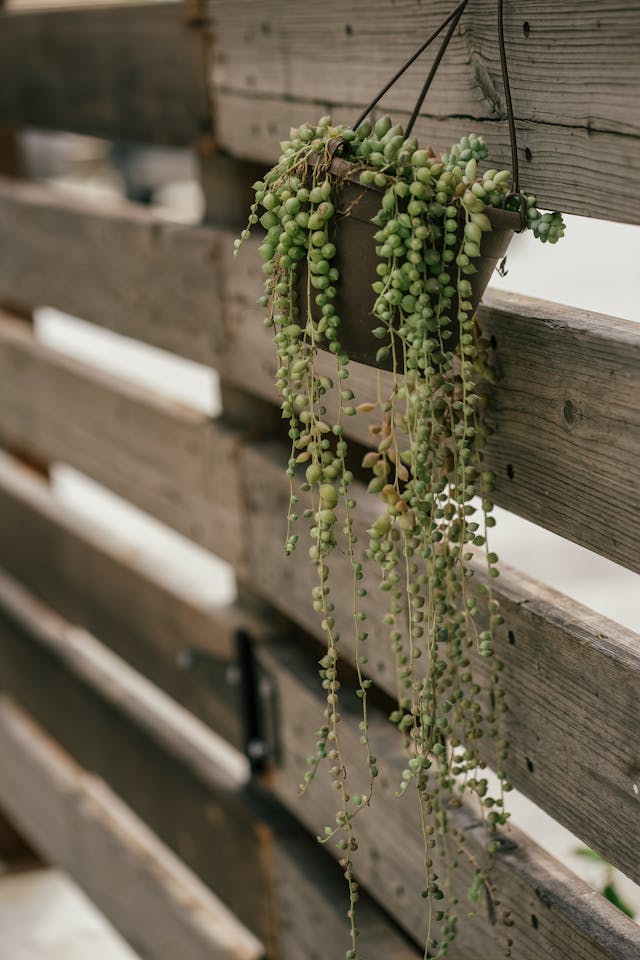
The Trailing Jade, scientifically known as Crassula perfoliata var. The Trailing Jade (Senecio jacobsenii), also known as String of Nickels or Necklace Plant. Trailing Jade is a succulent that thrives in various indoor environments. It’s a captivating succulent renowned for its trailing growth and distinctive appearance. Native to South Africa, this plant is celebrated for its striking foliage and ease of care. It’s a favorite among indoor gardeners.


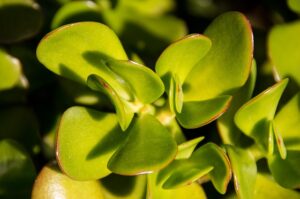
Often confused with the more common Crassula ovata (jade plant). The trailing jade stands out for its cascading growth habit and distinctive leaf shape.It’s most distinctive feature is its thick, fleshy leaves, which are often shaped like a half-moon or teardrop. They are typically a rich, green color, sometimes with a hint of red at the edges when exposed to direct sunlight. Unlike its upright relatives. The Trailing Jade grows in a trailing or cascading manner.


It makes an excellent choice for hanging baskets or as a cascading plant in a pot. This growth pattern gives it a lush, draping appearance that adds a touch of elegance to any space. This plant is relatively compact, making it suitable for small to medium-sized pots. It can grow up to 12 inches (30 cm) long, with its trailing stems creating a beautiful, cascading effect.

Types of Trailing Jade
 

1. Trailing Jade (Senecio jacobsenii)
  • Appearance: Features small, round, coin-shaped leaves along trailing stems. It’s known for its cascading growth and lush green foliage with occasional blue-gray hues.
2. String of Pearls (Senecio rowleyanus)
  • Appearance: Characterized by its spherical, bead-like leaves that resemble pearls strung along long, trailing stems. It’s often used in hanging baskets for its unique, cascading look.
3. String of Bananas (Senecio radicans)
  • Appearance: This variety has elongated, banana-shaped leaves and trails gracefully. It’s known for its vibrant green color and is also popular in hanging baskets.
4. String of Hearts (Ceropegia woodii)
  • Appearance: Although not a true Senecio, it’s often grouped with trailing succulents. It has heart-shaped leaves and thin, trailing stems, making it a favorite for its delicate and attractive foliage.
5. Burro’s Tail (Sedum morganianum)
  • Appearance: Features thick, fleshy, trailing stems covered with tiny, tear-shaped leaves. It’s known for its lush, cascading growth and is often used in hanging pots.

These varieties each offer unique aesthetic qualities while sharing the common trait of trailing growth, making them popular choices for indoor plant enthusiasts.


Trailing Jade
Trailing Jade


Indoor Care

Choosing the Right Location

Light Requirements: Trailing Jade thrives in bright, indirect light. Place it near a south- or east-facing window where it can receive ample natural light without being exposed to harsh, direct sunlight, which can scorch its leaves. If natural light is limited, you can supplement with a grow light to ensure the plant receives enough light to flourish.


Temperature: Ideal indoor temperatures for Trailing Jade range from 65°F to 75°F (18°C to 24°C). Avoid exposing the plant to temperatures below 50°F (10°C) or to drafts from air conditioners or heaters, as sudden temperature changes can stress the plant.

Potting and Soil

Pot Selection: Choose a pot with drainage holes to prevent water from accumulating at the bottom, which can lead to root rot. Hanging baskets or decorative pots with drainage are ideal for Trailing Jade, as they allow the plant’s vines to cascade freely.


Soil: Make use of a well-draining soil mixture designed especially for cacti or succulents. It is effective to use a mixture of potting soil, sand, and perlite. This ensures that excess water drains quickly and prevents waterlogged conditions.

Watering

Watering frequency: Let the soil dry fully between waterings. Overwatering is a common issue with succulents and can lead to root rot. Typically, watering every 2-3 weeks is sufficient, but this can vary depending on light conditions, temperature, and humidity.


Watering Technique: Make sure to completely submerge the soil in water until it runs out of the pot’s bottom while watering. Make sure the pot is not sitting in standing water. Watering should be lessened in the winter when the plant’s development slows.

Fertilizing

Fertilizer Type: Feed your Trailing Jade with a balanced, water-soluble fertilizer diluted to half strength. A cactus or succulent fertilizer is also suitable.


Fertilizing Schedule: Apply fertilizer every 4-6 weeks during the growing season (spring and summer). Avoid fertilizing during the fall and winter, as the plant is in a dormant period and does not require additional nutrients.

Pruning and Maintenance

Pruning: Trim back any lanky or overgrown stems to promote a bushier growth pattern. For cutting cleanly, use clean cutting instruments or pruning shears. Pruning also helps maintain the plant’s attractive trailing appearance.


Cleaning: Occasionally dust the leaves with a soft brush or cloth to keep them clean and ensure optimal light absorption. Avoid using water on the leaves, as this can lead to rot.

Propagation of Trailing Jade

Materials Needed:

  • Scissors or pruning shears
  • Small pots
  • Well-draining succulent soil

Steps:

  1. Cuttings: Snip a 3-4 inch (7.5-10 cm) healthy stem segment. Allow the cut end to callous for 1-2 days.
  2. Planting: Insert the callused end into a pot with well-draining soil. Press soil around the cutting.
  3. Watering: Water lightly and place in bright, indirect light.
  4. Rooting: After 2-4 weeks, check for roots by gently tugging. Once roots are established, start regular watering.

Alternate Method (Leaf Cuttings):

  1. Remove Leaf: Twist off a healthy leaf and let it callous for 1-2 days.
  2. Lay on Soil: Place the leaf on top of well-draining soil. Mist lightly.
  3. Rooting: New plantlets will form under the leaf. Once established, transplant them.

Tips: Use bright, indirect light and avoid overwatering.


Pests and Problems

Pests: Trailing Jade is relatively pest-resistant but can occasionally attract mealybugs, spider mites, or aphids. Inspect the plant regularly and treat any infestations with an appropriate insecticidal soap or neem oil.


Common Issues: Watch for signs of overwatering, such as yellowing leaves or root rot. If you notice these symptoms, reduce watering and ensure the plant is in well-draining soil. Conversely, underwatering may cause the leaves to shrivel and drop.

Repotting

When to Repot: Repot your Trailing Jade every 2-3 years or when it outgrows its pot. Repotting is also a good opportunity to refresh the soil and inspect the roots for any signs of rot.


Repotting Procedure: Choose a pot that is slightly larger than the current one. Gently remove the plant from its pot, trim any damaged or rotted roots, and place it in the new pot with fresh soil. Water thoroughly after repotting.


The Trailing Jade (Senecio jacobsenii) is a beautiful and low-maintenance succulent that can add charm and elegance to your indoor space. By following these care tips—providing adequate light, proper watering, and occasional maintenance—you can enjoy a healthy, thriving Trailing Jade that enhances your home decor with its unique, cascading vines. Whether you’re a seasoned plant enthusiast or a beginner, this succulent is a wonderful addition to any indoor garden.

How to Grow and Care Tips for Indoor Golden Pothos

Golden Pothos

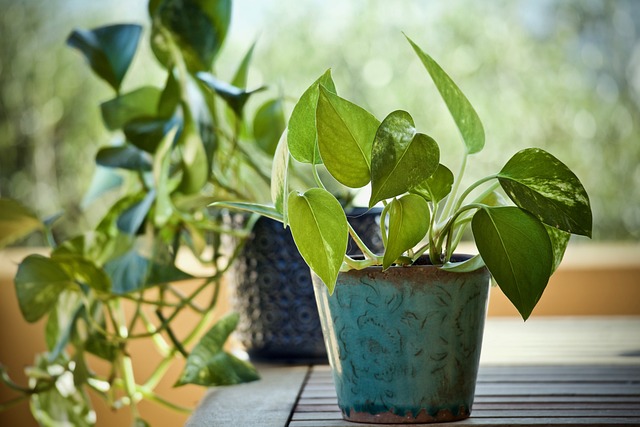
The Golden Pothos, scientifically known as Epipremnum aureum, is a beloved houseplant renowned for its attractive foliage and ease of care. Often referred to as Devil’s Ivy, this plant is not only a popular choice for both novice and experienced plant enthusiasts but also a versatile addition to any indoor garden.
 

The Golden Pothos is native to the Solomon Islands in the South Pacific. In its natural habitat, it thrives in tropical forests where it can climb trees and spread across the forest floor. This plant is an epiphyte, which means it naturally grows on other plants or structures, deriving nutrients and moisture from the air and surrounding environment rather than the soil.


Golden pothos is known for its heart-shaped leaves, which can vary in color from rich green to a striking golden yellow. The color variation often depends on the light conditions and the specific variety of the plant. Some popular varieties include:


  • Neon Pothos: This variety features bright, chartreuse-green leaves that can add a vibrant touch to any space.
  • Marble Queen: Known for its marbled white and green leaves, this variety offers a more varied look.
  • Jade Pothos: This variant has deep green leaves with minimal variegation, giving it a more uniform appearance.


Golden Pothos
Golden Pothos


Common Name Pothos, Golden Pothos, Devil’s Vine, Devil’s Ivy
Botanical Name Epipremnum aureum
Family Araceae
Plant Type Vine
Mature Size 20–40 ft. long, 3–6 ft. wide
Sun Exposure Full sun, partial shade
Soil Type Moist but well-drained
Soil pH Neutral to slightly acidic
Bloom Time Rarely flowers
Flower Color Gold/Yellow, Purple/Lavender
Hardiness Zones 10–12 (USDA)
Native Areas Asia
Toxicity Toxic to dogs and cats


Indoor Care

Soil

  • Type: Use a well-draining potting mix, such as a peat-based mix with added perlite or coarse sand.
  • pH: Likes somewhat acidic to neutral soil (pH 6.0–7.0).
  • Maintenance: Refresh the top layer or repot into fresh mix every 1-2 years.

Potting

  • Size: Choose a pot slightly larger than the root system. Avoid pots that are too large to prevent excess moisture.
  • Material: terracotta for good airflow, plastic for moisture retention, or ceramic for decoration (ensure all have drainage holes).
  • Drainage: Make sure the pot’s drainage openings stop waterlogging. Use a saucer to catch excess water, keeping the pot elevated above it.

Light 

Golden Pothos thrives in bright, indirect light but can tolerate lower light conditions. Because direct sunlight can scorch its leaves, keep it out of the direct sun. If the plant is too far from a light source, it may become leggy, and the leaf coloration may fade.

Temperature and Humidity

Ideal temperatures for Golden Pothos range from 65-85°F (18-29°C). It prefers higher humidity, but it can adapt to the average indoor humidity levels. Use a humidifier or put a tray of water close to the plant to add more moisture if your house is too dry, especially in the winter.

Watering

  • Watering Frequency: Water your Golden Pothos when the top 1-2 inches of soil are dry. This typically means watering every 1-2 weeks, but frequency may vary based on light, temperature, and humidity levels.

Fertilization

  • Type of Fertilizer: Feed your Golden Pothos with a balanced, water-soluble fertilizer. A general-purpose houseplant fertilizer works well.
  • Frequency: Apply fertilizer monthly during the developmental period of spring and summer. Reduce or stop feeding during the fall and winter months when the plant’s growth slows down.


Pruning

Frequent trimming promotes busher development and allows the plant to keep its form. Trim back any long, leggy vines to promote new growth and keep the plant looking full.

Training

Golden Pothos can be trained to climb or trail. Use a moss pole or trellis for climbing, or allow the vines to cascade from hanging baskets or shelves.

Propagation

  1. Cuttings: To propagate, take a cutting that includes at least 2-3 nodes (the points on the stem where leaves emerge). Ensure each cutting has a few leaves attached.
  2. In Water: Place the cuttings in a jar of water, making sure the nodes are submerged. Every few days, change the water so that it doesn’t stay the same.
  3. In Soil: Alternatively, plant the cuttings directly into moist potting soil. Make sure the dirt stays wet until the roots start to grow.
  4. Transplanting: Once the cuttings have developed a healthy root system (a few inches long), transplant them into individual pots with soil.

Common Issues and Solutions

  1. Yellowing Leaves: This can be due to overwatering, poor drainage, or lack of nutrients. Adjust your watering schedule and ensure the potting mix and container have good drainage. If the issue persists, consider fertilizing.
  2. Brown Leaf Tips: Typically a sign of low humidity or underwatering. Increase humidity around the plant and adjust your watering routine.
  3. Pest Problems: Common pests include spider mites, mealybugs, and scale. Check the undersides of leaves regularly and treat infestations with insecticidal soap or neem oil.

General Tips

  • Leaf Cleaning: Dust can accumulate on the leaves, which can hinder the plant’s ability to photosynthesize. Wipe the leaves gently with a damp cloth or give the plant a shower using lukewarm water.
  • Avoid Toxicity: Golden Pothos is mildly toxic if ingested. Keep it out of reach of small children and pets, and be cautious when handling the plant.
  • Rotate the Plant: To ensure even growth, rotate your plant periodically so that all sides receive equal light.

By following these guidelines, you can ensure your Golden Pothos remains a thriving, beautiful part of your indoor space. Its resilience and adaptability make it a perfect companion for adding a touch of nature to your home.

How to Grow and Care Tips for Indoor English Ivy

English Ivy

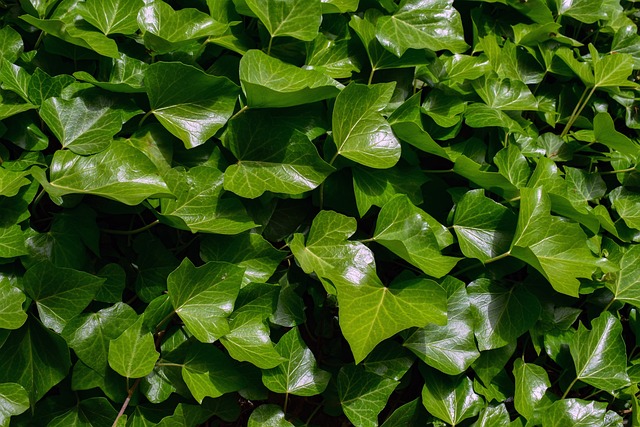
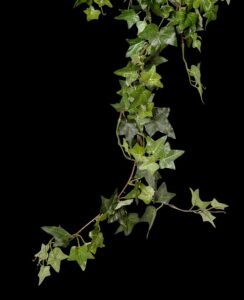
English ivy (Hedera helix) is a multipurpose and hardy plant that has been treasured for ages. It is famous among plant enthusiasts because of its luxuriant, trailing vines and evergreen leaves, which can survive both indoors and outdoors.

Characteristics

  • Foliage: heart-shaped leaves with three to five lobes; primarily rich green, with variegated varieties in white, yellow, or silver.
  • Growth Habit: Versatile; trails from hanging baskets or climb supports like trellises. Vines can grow up to 10-15 feet (3-4.5 meters).
  • Root System: Produces adventitious roots along stems, aiding in climbing and ground cover.
  • Flowers & Fruit: Small, greenish-yellow flowers and dark berries, rarely seen indoors. Berries are toxic.
  • Longevity: perennial; can thrive indoors for many years.
  • Toxicity: If consumed, this substance is harmful to both people and dogs.
  • Air Purification: Helps remove toxins like formaldehyde and benzene from the air.


Types of English Ivy

  • Common English Ivy: Classic dark green, lobed leaves.
  • Baltic: compact with small dark green leaves.
  • Goldchild: Variegated with green and golden-yellow edges.
  • Goldheart: More pronounced golden-yellow variegation.
  • Creeping Charlie: Fast-growing ground cover with small rounded leaves.
  • Needlepoint: narrow, pointed leaves; good for topiary.
  • Ivalace: dense, cascading growth; small, leathery leaves.
  • Glacier: silver-gray leaves with green veins.


English Ivy
English Ivy


Common Name English ivy, common ivy, European ivy
Botanical Name Hedera helix
Family Araliaceae
Plant Type Perennial, evergreen climbing vine
Mature Size N/A; climbs and spreads as much as possible
Sun Exposure Part shade to full shade
Soil Type Fertile and moist
Soil pH Neutral to slightly alkaline
Bloom Time Fall
Flower Color Greenish-white, greenish-yellow
Hardiness Zones 4-13 (USDA)
Native Area Europe, Scandinavia, Russia
Toxicity Toxic to people and pets


Growing Indoor English Ivy

Choosing the Right Variety

There are several varieties of English Ivy, each with unique leaf shapes and colors. For indoor growth, consider varieties like ‘Glacier’ or ‘Needlepoint’ for their compact size and adaptability to indoor conditions. Choose a variety that fits your aesthetic preferences and available space.

Planting

When planting English Ivy indoors, select a pot with good drainage holes. Ivy prefers slightly alkaline, well-draining soil. A standard potting mix combined with a small amount of sand or perlite will work well. Plant your ivy at the same depth it was growing in its nursery pot, ensuring that the roots are covered and the plant is secure in the soil.

Light

English Ivy thrives in bright, indirect light. Your plant will benefit from lots of natural light if it is placed next to a window, but direct sunlight should be avoided since it might burn the leaves. If your home has low light conditions, English Ivy can adapt, though its growth may slow.

Potting and Soil

  • Pot Selection: Use a pot with adequate drainage holes to prevent water from accumulating at the bottom, which can cause root rot.
  • Soil: A well-draining potting mix is essential. English Ivy does well in soil that retains some moisture but drains excess water efficiently. You can enhance drainage by adding perlite or sand to the potting mix.

Caring for Indoor English Ivy

Watering

English Ivy prefers to be kept on the slightly dry side, so allow the top inch of soil to dry out before watering. When watering, give the plant a thorough soak, allowing excess water to drain out of the pot. Be careful not to overwater, as English Ivy is prone to root rot in soggy soil.

Humidity and Temperature

English Ivy thrives in moderate humidity and cooler temperatures, ideally between 50°F and 70°F (10°C to 21°C). If your home is particularly dry, especially in winter, increase humidity by misting the plant regularly or placing it near a humidifier. Avoid placing the plant near heat sources like radiators, which can dry out the leaves.

Fertilizing

Feed your English Ivy with a balanced, water-soluble fertilizer every two to four weeks during the growing season (spring and summer). In fall and winter, reduce feeding to once a month or stop altogether, as the plant’s growth naturally slows down during these months.

Pruning

Regular pruning is essential for maintaining the shape and health of your English Ivy. Trim back any leggy or overgrown vines to encourage fuller growth. You can also pinch back the tips of the vines to promote bushier growth. Pruning not only keeps the plant looking neat but also prevents it from becoming too invasive.

Repotting

As your English Ivy grows, it may outgrow its pot. Repot the plant every two to three years or when you notice that the roots are filling the pot. Choose a pot that is one size larger than the current one, and refresh the soil with a new potting mix.

Pest Control

While English Ivy is relatively pest-resistant, it can occasionally attract pests like spider mites, aphids, or mealybugs. Inspect your plant regularly for signs of pests, such as small webs, sticky residue, or discolored leaves. If you notice an infestation, treat the plant with insecticidal soap or neem oil, and isolate it from other plants to prevent the pests from spreading.

Propagating English Ivy

English Ivy is easy to propagate, allowing you to grow new plants from cuttings. Here’s how:

  • Take Cuttings: Using clean, sharp scissors, cut a 4-6 inch section of vine from the parent plant, making sure it includes at least two leaves.
  • Remove Lower Leaves: Strip the leaves from the lower part of the cutting, leaving just a few at the top.
  • Rooting in Water or Soil: Place the cutting in a glass of water, ensuring the stripped part is submerged, or plant it directly into moist potting soil.
  • Wait for Roots: If rooting in water, change the water every few days and wait for roots to develop, which should take a few weeks. If rooting in soil, keep the soil moist and place the cutting in indirect light.
  • Transplant: Once the cutting has developed a strong root system, transplant it into a pot with well-draining soil and care for it as you would a mature plant.

Common Issues and Troubleshooting

  • Yellowing foliage: This could indicate overwatering or poor drainage. Ensure your pot has drainage holes, and allow the soil to dry out slightly between waterings.
  • Leggy Growth: If your English Ivy is becoming leggy, it may not be getting enough light. Move it to a brighter spot, or supplement with a grow light if natural light is insufficient.
  • Pests: Regularly check the underside of leaves for pests. A healthy, well-maintained plant is less likely to attract pests, so keeping up with care is your best defense.


English Ivy is a timeless indoor plant that, with proper care, can thrive for many years. Its elegant, trailing vines can enhance any space, and its air-purifying qualities make it a healthy addition to your home. By following the growing and care tips outlined in this guide, you can enjoy the beauty of English Ivy and ensure it remains a vibrant part of your indoor garden.

How to Grow and Care Tips for Indoor String of Pearls

String of Pearls Plant

String of Pearls (Senecio rowleyanus) is a unique and eye-catching succulent known for its cascading strands of small, bead-like leaves. This plant is not only beautiful but also relatively easy to care for, making it a popular choice for indoor gardening enthusiasts. Native to the dry regions of Southwest Africa, the String of Pearls has adapted to thrive in low-water environments, making it relatively easy to care for as a houseplant.

Types String of Pearls Plant

Here are the types related to String of Pearls:

  1. String of Pearls (Senecio rowleyanus):


    • Round, bead-like green leaves.
    • Trailing growth, ideal for hanging baskets.
    • Small white flowers with a cinnamon scent.


  1. String of Bananas (Senecio Radicans):


    • Banana-shaped, curved leaves.
    • Vigorous, trailing growth.
    • Similar care to String of Pearls.


  1. String of Tears (Senecio herreianus):


    • Teardrop-shaped leaves, slightly more elongated.
    • Trailing stems, similar to Pearls but with a distinct shape.


  1. String of Beads (Senecio herreianus var. ‘Beads’):
    • Similar to String of Pearls but with slightly larger, bead-like leaves.


Each type has a unique shape but similar care requirements, making them easy to mix and match for a varied succulent display.


String of Pearls Plant


Common Name String of pearls, string of beads, string of peas, rosary vine
Botanical Name Curio rowleyanus (formerly Senecio rowleyanus)
Family Asteraceae
Plant Type Succulent
Mature Size 1-2 feet . tall and long
Sun Exposure Full, partial
Soil Type Sandy, well-drained
Soil pH Neutral, acidic
Bloom Time Summer
Flower Color White
Hardiness Zones 9-12 (USDA)
Native Area Africa
Toxicity Toxic to humans and pets

String of Pearls Care

Pot

String of Pearls thrives best in shallow pots with good drainage. Opt for a pot with drainage holes to prevent water from sitting at the bottom, which can cause root rot.

Soil

Like most succulents, String of Pearls requires well-draining soil. Cactus or succulent potting soil works nicely. Additionally, you can make your own mix by adding sand or perlite to ordinary potting soil in order to enhance drainage.

Light

String of Pearls prefers bright, indirect light. Place the plant near a window where it can receive ample sunlight, but avoid direct sun, especially during the hottest parts of the day, as this can scorch the leaves. If your home doesn’t get enough natural light, consider using a grow light to supplement.

Watering

One of the most crucial aspects of caring for String of Pearls is getting the watering schedule right. This succulent prefers its soil to dry out completely between waterings. Water the plant thoroughly, then wait until the top 1-2 inches of soil are dry before watering again. One typical error that can cause root rot is overwatering.

Humidity

String of Pearls can adapt to a range of humidity levels, but it generally prefers a dry environment. It’s well-suited for indoor environments where humidity is low to moderate.

Temperature and Environment

String of Pearls does well in average indoor temperatures between 70-80°F (21-27°C) during the day and slightly cooler temperatures at night. It can tolerate lower temperatures, down to 50°F (10°C), but it’s best to keep it away from drafts, cold windows, or sudden temperature changes.

Fertilizing

During the growing season (spring and summer), feed your String of Pearls with a balanced, water-soluble fertilizer that has been diluted by half. Fertilize once a month to promote healthy growth. Since the plant is dormant in the fall and winter, do not fertilize.

Pruning

To keep your String of Pearls looking tidy and encourage new growth, prune any dead or discolored stems. You can also trim the plant to maintain your desired length and shape.

Propagation

String of Pearls is easily propagated from cuttings. Simply snip a healthy strand, remove a few beads from the bottom, and place the cut end in moist soil. The cutting should root within a few weeks, and you’ll have a new plant ready to thrive.

Common Problems and Solutions

Overwatering

As mentioned, overwatering is the most common issue. Signs include yellowing, mushy leaves, and root rot. To prevent this, always ensure the soil dries out between waterings.

Pests

String of Pearls can occasionally attract pests like aphids or mealybugs. If you see any bugs, spray the plant with insecticidal soap or Neem oil.

Growth

If the plant isn’t getting enough light, it may become leggy with long, stretched-out strands. Move it to a brighter location to encourage more compact growth.

Decorative Ideas

String of Pearls makes an excellent hanging plant, thanks to its trailing vines. It looks stunning in hanging baskets, on shelves, or draped over the edge of a tall pot. Pair it with other succulents or contrast it with plants that have different leaf shapes and colors for a striking display.


String of Pearls is a delightful plant that adds a touch of elegance to any indoor space. With the right care, it can thrive and bring joy to your home for years to come. Remember to provide it with plenty of light, avoid overwatering, and enjoy watching your String of Pearls grow and cascade beautifully.

How to Grow and Care Tips for Indoor Passionflower

Passionflower

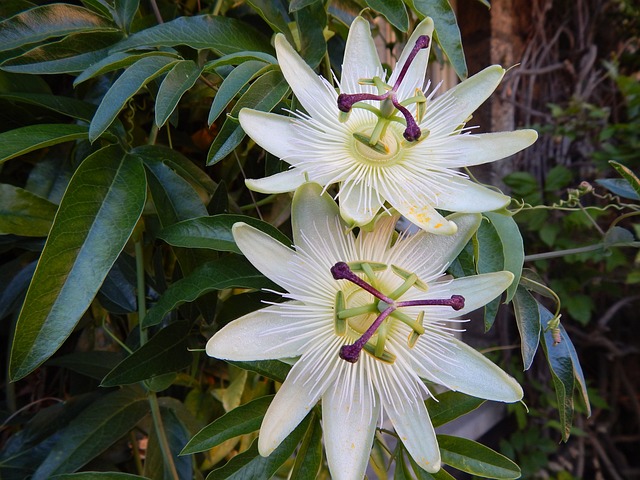
Passionflower, known botanically as Passiflora spp., is a striking and exotic plant that can add a touch of tropical elegance to any indoor space. While there are over 500 species of Passiflora, the most common for indoor growing are Passiflora caerulea (Blue Passionflower) and Passiflora edulis (the edible variety, which produces passionfruit).


The plant is also known for its medicinal properties, particularly in the form of passionflower tea, which is used to reduce anxiety and improve sleep. Passionflower is native to the tropical and subtropical regions of the Americas. Its unique and intricate flowers, often featuring a stunning mix of colors and patterns, are a primary draw for gardeners. While commonly associated with outdoor gardens, these beautiful climbers can be successfully grown indoors with the right care and attention.


Types 


Here’s a brief overview of the main types of Passionflower (Passiflora spp.) commonly grown indoors:


Passiflora caerulea (Blue Passionflower):
    • Flowers: blue and white, large and showy.
    • Features: vigorous grower, hardy, and often the easiest to grow indoors.


Passiflora edulis (Purple Passionflower):
    • Flowers: white and purple.
    • Features: Produces edible passionfruit; needs more warmth and light.


Passiflora incarnata (Maypop):
    • Flowers: Lavender petals with a central crown of pink and purple filaments.
    • Features: hardy and cold-tolerant, often used for medicinal purposes.


Passiflora quadrangularis (Giant Granadilla):
    • Flowers: large with red, purple, and white colors.
    • Features: Produces large, edible fruit; requires plenty of space and strong support.


Passiflora alata (Winged-Stem Passionflower):
    • Flowers: bright red and fragrant.
    • Features: Requires high humidity and warmth, ideal for indoor greenhouse conditions.

Each type offers unique characteristics, making it important to choose the one that best suits your indoor environment and gardening goals.


Passionflower
Passionflower


Common Names Passionflower, passion flower vine, maypop, granadilla
Botanical Name Passiflora spp.
Family Passifloraceae
Plant Type Perennial, vine
Mature Size 10–30 ft. tall, 3–6 ft. wide
Sun Exposure Full, partial
Soil Type Moist but well-drained
Soil pH Neutral, acidic
Bloom Time Summer
Flower Color Purple, blue, pink, red, white, green
Hardiness Zones 7–10 (USDA)
Native Area North America, South America

Care


Light 

Bright Light: Passionflower requires at least 6 hours of direct sunlight daily. Place it in a south- or west-facing window where it can get plenty of light. If natural light is insufficient, consider utilizing grow lights to give adequate illumination.

Temperature

Warmth: Ideal temperatures range from 60-85°F (15-29°C). While it can tolerate slightly cooler temperatures, avoid letting it drop below 50°F (10°C).

Stable Environment: Keep your passionflower away from drafts, air conditioning vents, and heaters to maintain a consistent temperature.

Humidity

High Humidity: Passionflower thrives in high humidity environments. Use a humidifier, or place the plant on a tray filled with water and pebbles to maintain moisture in the air.

Regular Misting: Mist the plant occasionally to keep the humidity levels up, especially in dry indoor conditions.

Watering

Consistent Moisture: Water your passionflower when the top inch of soil feels dry. Make sure the soil is constantly damp but not drenched.

Reduced Watering in Winter: During the dormant season, reduce the frequency of watering to prevent overwatering and root rot.

Soil

Well-Draining Mix: Use a potting mix that drains well, such as a standard mix combined with perlite or sand. This will assist in preventing waterlogging, which can result in root rot.

Pot with Drainage: Choose a container with drainage holes to allow excess water to escape, keeping the roots healthy.

Fertilizing

Regular Feeding: Fertilize every two weeks during the growing season (spring and summer) with a balanced liquid fertilizer to support healthy growth and flowering.

Reduce in Winter: Cut back on fertilization during the dormant season to once a month or stop entirely.

Pruning and Training

Regular Pruning: Prune your passionflower in late winter or early spring to encourage bushy growth and manage its size. Remove any dead or broken stems to keep the plant healthy.

Support Structure: Provide a trellis or support for the plant to climb. Train the vines by gently tying them to the support with soft ties.

Pest Management

Regular Inspection: Check your passionflower for common pests like aphids, spider mites, and whiteflies. If you notice any, treat them promptly with insecticidal soap or neem oil.

Disease Prevention: Ensure good air circulation around the plant and avoid overhead watering to prevent fungal diseases.

Propagation

Stem Cuttings: The easiest way to propagate passionflower indoors is by taking stem cuttings in the spring or early summer. Keep the cuttings warm and well-lit, and they should root within a few weeks.

Repotting

Repot as Needed: Passionflowers grow rapidly and may need repotting every couple of years. Move the plant to a slightly larger pot in early spring to give the roots more room to grow.

Tips

  • Watch for Stress: Indoor passionflowers may show signs of stress, like yellowing leaves, if they don’t get enough light or water. Adjust care as needed.
  • Enjoy the Blooms: With the right care, your passionflower will reward you with its stunning flowers and vigorous growth, making it a delightful addition to your indoor plant collection.

By following these tips, you can successfully grow and care for passionflower indoors, bringing a touch of the tropics into your home.

How to Grow and Care Tips for Indoor Morning Glory

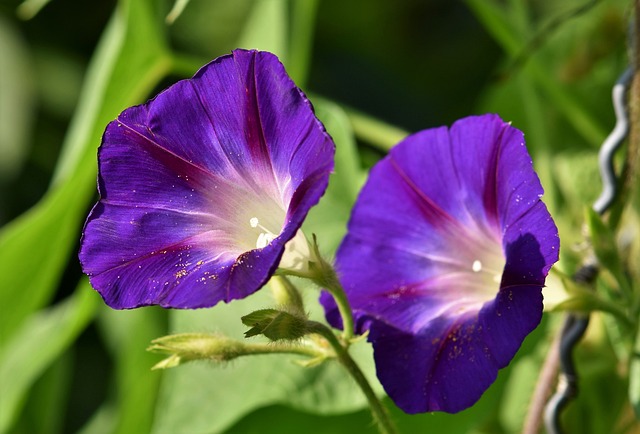
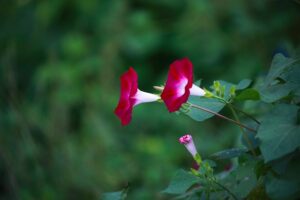
Morning Glory belongs to the Convolvulaceae family, which encompasses over 1,000 species. The Morning Glory, scientifically known as Ipomoea spp., is a stunning flowering plant that has captured the hearts of gardeners and nature lovers alike. Its common name, “Morning Glory,” comes from the unique characteristic of its flowers, which bloom early in the morning and close by the afternoon or evening.


Renowned for its vibrant, trumpet-shaped blooms and heart-shaped leaves, this plant brings a splash of color to any garden, fence, or trellis. But Morning Glory is more than just a pretty face; it’s a resilient and easy-to-grow plant that can thrive in various environments with the right care. Originating from tropical and subtropical regions, the plant is well-adapted to warm climates.

Popular Types of Morning Glory


Here’s a brief overview of popular Morning Glory types:

  1. Ipomoea tricolor (Heavenly Blue): Sky-blue flowers with a white/yellow center; large, vibrant blooms; ideal for trellises.
  2. Ipomoea purpurea (Common Morning Glory):Comes in purple, pink, blue, and white; prolific bloomer; easy to grow.
  3. Ipomoea nil (Japanese Morning Glory): Wide color range with unique patterns; prized in Japanese gardens.
  4. Ipomoea alba (Moonflower): Large, fragrant white flowers that bloom at night; perfect for evening gardens.
  5. Ipomoea lobata (Spanish Flag): Cascading red to yellow flowers; adds striking color to gardens.
  6. Ipomoea quamoclit (Cypress Vine): Delicate, star-shaped red, pink, or white flowers; feathery, fern-like foliage.
  7. Ipomoea batatas (Sweet Potato Vine): Ornamental foliage in various colors; used for ground cover or containers.
  8. Ipomoea indica (Blue Morning Glory): Deep blue to purple flowers; vigorous climber, great for large areas.


Morning Glory
Morning Glory


Common Name Morning glory, common morning glory
Botanical Name Ipomoea purpurea
Family Convolvulaceae
Plant Type Perennial, annual
Mature Size 6–10 ft. tall, 3–6 ft. wide
Sun Exposure Full
Soil Type Moist, well-drained
Soil pH Neutral, acidic
Bloom Time Summer, fall
Flower Color Purple, pink, blue, white
Hardiness Zones 2–11 (USDA)
Native Area North America
Toxicity Toxic to people, pets


Care

Choosing the Right Variety

When growing Morning Glory indoors, it’s important to choose a variety that is well-suited for container growth. Smaller, compact varieties such as Ipomoea purpurea or Ipomoea tricolor are ideal choices. These varieties are more manageable indoors and still provide the beautiful blooms that Morning Glory is known for.

Step-by-Step Guide to Growing Indoor Morning Glory

Selecting the Container

Choose a container with good drainage, as Morning Glory does not like to sit in waterlogged soil. A pot with a diameter of at least 12 inches is recommended to give the roots enough room to spread. Make sure the pot has drainage holes.

Soil Preparation

Use potting soil that drains well and has a pH that ranges from slightly acidic to neutral. To enhance drainage, add some sand or perlite. Morning Glory prefers soil that is not too rich in nutrients, as overly fertile soil can lead to more foliage at the expense of blooms.

Planting Seeds

Before planting, soak the seeds in water overnight to soften their hard outer shell and improve germination. Sow the seeds a quarter of an inch deep in the ground. Water the soil lightly to keep it moist, but avoid overwatering. Place the pot in a warm, sunny spot, as Morning Glory needs warmth and light to germinate.

Light Requirements

Morning Glory requires plenty of sunlight to thrive indoors. Place the pot near a south-facing window where it can receive at least 6 hours of direct sunlight each day. If natural light is insufficient, you can supplement it with a grow light to ensure the plant gets enough light for healthy growth.

Watering

Water the plant frequently, making sure the soil is continuously damp but not swampy. Water the plant periodically, keeping the soil moist but not saturated. Morning Glory prefers slightly dry conditions between waterings, so allow the top inch of soil to dry out before watering again. Take care not to overwater since this can cause rot in the roots.

Providing Support

Even indoors, Morning Glory is a climber and will need support. Place a small trellis, bamboo stakes, or other vertical supports in the pot to allow the vines to climb. You can also train the vines to grow along a nearby window or wall, creating a beautiful display.

Temperature and Humidity

Morning Glory thrives in warm temperatures, ideally between 65°F to 75°F (18°C to 24°C). While it can tolerate lower temperatures, growth may slow down. Indoor humidity levels should be moderate; avoid placing the plant near drafts or heating vents that could dry out the air.

Fertilization

Indoor Morning Glory does not require heavy fertilization. During the spring and summer growing seasons, feed the plant once a month with a balanced, water-soluble fertilizer. Avoid fertilizers high in nitrogen, as they can promote leaf growth at the expense of flowers.

Pruning and Maintenance

Regular pruning will help manage the plant’s size and encourage more blooms. Trim back leggy growth and remove any dead or yellowing leaves to keep the plant looking tidy. Pruning also encourages bushier growth and prevents the plant from becoming too large for its indoor space.

Pests

While indoor plants are less prone to pests, Morning Glory can sometimes attract aphids, spider mites, or whiteflies. Regularly inspect the plant, and if you notice any pests, treat them with insecticidal soap or neem oil. Keeping the plant healthy with proper care will help prevent infestations.

Additional Tips 

  • Rotate the Pot: To ensure even growth, rotate the pot every few days so that all sides of the plant receive adequate light.
  • Watch for Overgrowth: Morning Glory can grow rapidly, so be prepared to trim and train the vines regularly to keep them manageable indoors.
  • Winter Care: If you live in a colder climate, ensure the plant stays away from cold drafts or windows during the winter months. The plant may enter a dormant phase during winter, with reduced growth and fewer blooms, which is normal.


Growing Morning Glory indoors is a wonderful way to bring the beauty of this flowering vine into your home. With proper care, including adequate light, water, and support, your indoor Morning Glory can thrive, offering stunning blooms that brighten any room. Whether you’re a seasoned gardener or a beginner, these tips will help you successfully cultivate and enjoy Morning Glory in your indoor garden.

How to Grow and Care Tips for Indoor Clematis

Clematis

Growing Clematis indoors can be a rewarding endeavor, allowing you to enjoy the vibrant, climbing beauty of this plant within your home. While Clematis is traditionally an outdoor garden plant, with the right conditions and care, it can flourish indoors, bringing lush greenery and stunning flowers to your living space.


Best Clematis Types

  • Clematis ‘Pixie’: dwarf, evergreen variety with small, fragrant white flowers. Ideal for compact spaces with minimal climbing needs.


  • Clematis ‘Bijou’: non-climbing, low-growing with lavender-pink blooms. Perfect for containers; requires little support.


  • Clematis ‘Arabella’: semi-herbaceous with purple-blue flowers. Easy care, spreading habit; great for cascading over pots.


  • Clematis ‘Sugar Candy’: compact climber with large mauve-pink flowers. Suitable for small supports indoors.


  • Clematis ‘Princess Diana’: Vibrant pink, tulip-shaped flowers. Moderate climber that adds bold color.


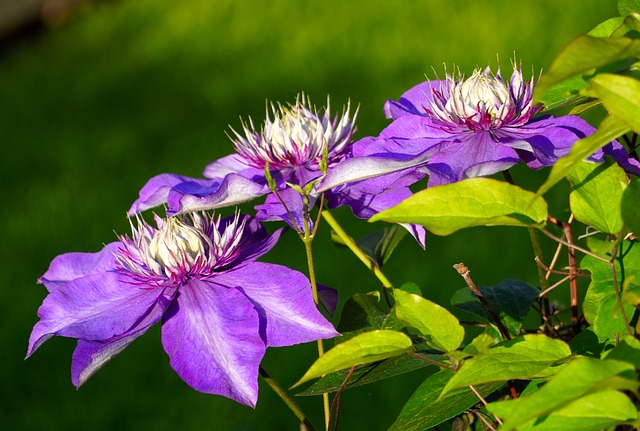
  • Clematis ‘Multiblue’: compact with double blue-violet spiky flowers. Eye-catching and great for bright indoor spots.


  • Clematis ‘Little Lemons’: non-climbing, lemon-yellow flowers with a mounding habit. Perfect for low-growth indoor displays.

These varieties offer manageable sizes, stunning blooms, and adaptability, making them excellent choices for indoor gardening.


Clematis
Clematis


Common Name Clematis, Leather flower
Botanical Name Clematis spp.
Family Ranunculaceae
Plant Type Perennial, shrub, vine
Mature Size 8-20 ft. long (large flower varieties), 3 to 5 feet long (small flower varieties)
Sun Exposure Full
Soil Type Loamy, well-drained
Soil pH Neutral
Bloom Time Winter, spring, summer, and fall
Flower Color Blue, purple, red, pink, green, yellow, white, bi-color
Hardiness Zones 4-9 (USDA)
Native Area North America
Toxicity Toxic to pets, toxic to people


Care


Planting Indoor Clematis

Proper planting is key to growing a healthy indoor Clematis. Here are essential steps:

Choosing the Right Container

Use a large pot with good drainage to accommodate the plant’s deep root system. A container that’s at least 18-24 inches deep and wide is ideal.

Make sure the pot has drainage holes to avoid waterlogging, which can lead to root rot.

Soil Requirements

  • Clematis likes well-drained soil with a slightly alkaline pH. Inspect your plant on a daily basis and treat any infestations right away using insecticidal soap or neem oil. A high-quality potting mix combined with perlite or coarse sand for improved drainage is recommended.
  • Adding a small amount of garden lime can help achieve the slightly alkaline conditions Clematis favors.


Support Structure

  • Provide a small trellis, plant support, or decorative sticks for the plant to climb on. Even compact varieties appreciate a little support to help maintain an upright and attractive growth habit.

Light Requirements

Clematis thrives in bright, indirect light. Ensuring the right light conditions is crucial for robust growth and blooming:

Light Exposure

  • Place your Clematis near a south- or west-facing window where it can receive at least 6 hours of bright light each day.
  • If natural light is insufficient, supplement with a grow light to provide the intensity Clematis needs, especially during shorter winter days.

Temperature and Humidity

  • Clematis prefers moderate indoor temperatures, ideally between 60-75°F (15-24°C). Avoid placing the plant near drafts, heaters, or air conditioning units.
  • Maintain moderate humidity. If the indoor air is dry, especially in winter, use a humidifier or place a water-filled tray with pebbles near the plant to enhance humidity levels.

Watering and Feeding

Proper watering and feeding are essential to keep your indoor Clematis healthy:

Watering
  • Make sure the soil is constantly damp but not drenched. Water when the top inch of the soil feels dry, ensuring the water drains well to prevent root issues.
  • Reduce watering slightly during the plant’s dormant period in late fall and winter when growth slows.
Fertilizing
  • Feed your Clematis with a balanced, water-soluble fertilizer every 4-6 weeks during the growing season (spring and summer). A 10-10-10 fertilizer is ideal to support both foliage and flower development.
  • Reduce feeding during the dormant months to avoid over-fertilization.

Maintenance and Pruning

Pruning helps maintain the shape and vigor of indoor Clematis:

Pruning Guidelines
  • Lightly prune indoor Clematis in late winter or early spring before new growth starts. Remove dead, weak, or overcrowded stems.
  • For compact varieties, minimal pruning is often sufficient. For larger, repeat-blooming types, trim back to healthy buds to encourage more flowers.
Cleaning and Care
  • Dust can accumulate on the leaves, reducing the plant’s ability to photosynthesize efficiently. Wipe the leaves gently with a damp cloth to keep them clean and free of pests.

Propagation

  1. Stem Cuttings:
    • When: Late spring to early summer.
    • How: Take 4-6 inch cuttings, remove lower leaves, dip in rooting hormone, and plant in a peat-perlite mix. Cover with plastic for humidity; roots in 4-6 weeks.
  2. Layering:
    • When: Early spring or late summer.
    • How: Bury a low stem section in soil, secure with a stake, and water regularly. Once rooted, cut and pot separately.
  3. Division:
    • When: Early spring.
    • How: Split the root ball into sections with shoots, replant in new pots, and water thoroughly.
  4. Seeds:
    • When: Ideally in spring.
    • How: Sow seeds in a seed tray with well-draining soil; keep moist; germination can take weeks to months.

Common Challenges and Solutions

Yellowing Leaves
Poor Flowering
  • Insufficient light, incorrect pruning, or lack of nutrients can hinder blooming. Ensure proper light exposure, follow the correct pruning routine, and provide balanced fertilization.
Pests
  • Indoor Clematis can attract pests like aphids, spider mites, and mealybugs. Inspect your plant on a daily basis and treat any infestations right away using insecticidal soap or neem oil.

Growing Clematis indoors can be a delightful way to bring this stunning climber into your home environment. By selecting the right variety, providing appropriate light, water, and support, and maintaining a consistent care routine, your indoor Clematis will reward you with lush growth and beautiful blooms. With attention to its needs, this elegant plant can become a striking focal point in your indoor garden, adding a touch of natural beauty to your living space.

How to Grow and Care Tips for Indoor Bougainvillea

Bougainvillea

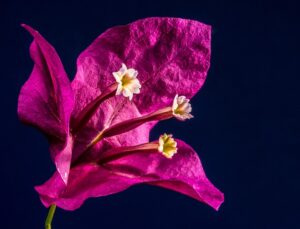
Bougainvillea, known for its stunning, vibrant bracts and hardy nature, is a popular choice for gardeners looking to add a splash of color to their landscapes. Native to South America, this tropical and subtropical plant is celebrated for its resilience, minimal care requirements, and ability to thrive in various conditions. Whether cascading over a garden wall, climbing a trellis, or adorning a hanging basket, Bougainvillea’s explosion of color is a showstopper.

Characteristics 

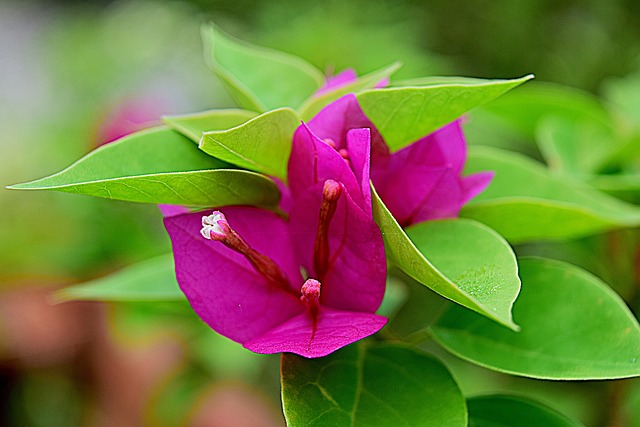
Appearance and Varieties: Bougainvillea is not primarily known for its flowers but for its brightly colored bracts, which are modified leaves that surround the small, typically white flowers. The bracts come in a wide range of colors, including pink, magenta, purple, red, orange, and white. There are several popular species and hybrids, each with unique growth habits, from compact, bushy types to vigorous climbers that can reach up to 30 feet.


Growth Habit: Bougainvillea is a fast-growing, thorny, and woody vine, often grown as a shrub or trained as a tree. It is an evergreen in warm climates but can shed leaves during dry or cold periods. With proper support, it can be trained to climb, making it perfect for covering fences, pergolas, and walls.


Climate and Hardiness: Bougainvillea thrives in warm, frost-free climates, typically in USDA Hardiness Zones 9-11. It can tolerate short periods of cold but may lose leaves or die back in temperatures below 30°F (-1°C). In cooler climates, it is often grown as an annual or in containers that can be brought indoors during winter.


Bougainvillea
Bougainvillea

Scientific Classification

Kingdom: Plantae
Clade: Tracheophytes
Clade: Angiosperms
Clade: Eudicots
Order: Caryophyllales
Family: Nyctaginaceae
Tribe: Bougainvilleae
Genus: Bougainvillea

Popular Types 

  1. ‘Helen Johnson’: compact, salmon-pink bracts; ideal for small pots and indoor growing.
  2. ‘Raspberry Ice’: variegated leaves with raspberry-pink bracts; great for containers.
  3. ‘Mini Thai’: small, pink bracts; perfect for bonsai and indoor displays.
  4. ‘Barbara Karst’: Vibrant magenta-red bracts; vigorous growth, suitable for large containers.
  5. ‘Afterglow’: orange-bronze turning to peach; good for patios and sunny indoor spots.
  6. ‘Singapore Pink’: Light pink bracts; profuse bloomer for indoor gardens.
  7. ‘Purple Queen’: Deep purple bracts; ideal for trellises and pergolas.
  8. ‘California Gold’: golden-yellow bracts; perfect for sunny, warm areas.
  9. ‘James Walker’: Magenta-purple bracts; blooms nearly year-round.
  10. ‘White Madonna’: Pure white bracts; elegant for indoor and outdoor use.

These varieties offer various colors and sizes, making them versatile for both indoor and outdoor settings!


Care

Growing Indoors

Choosing the Right Variety

Not all Bougainvillea varieties are suitable for indoor growing. Compact or dwarf varieties, such as ‘Helen Johnson,’ ‘Mini Thai,’ and ‘Raspberry Ice,’ are ideal for containers and small spaces. These varieties have a more manageable growth habit and are less vigorous than their outdoor counterparts.


Selecting a Container

Choose a pot with good drainage, as Bougainvillea dislikes wet feet. Terracotta pots are a great option because they allow the soil to dry out quickly, preventing root rot. Ensure the pot is appropriately sized, allowing room for growth without being excessively large.


Soil requirements

Use well-draining potting soil mixed with sand or perlite to enhance drainage. A combination made specifically for cactus or succulents usually works nicely. Avoid heavy, moisture-retentive soils, as these can lead to root problems.


Location and Light

Bougainvillea needs at least 5-6 hours of direct sunlight daily, even indoors. Place the plant near a south-facing window or under grow lights to provide adequate light. Insufficient light is the most common reason indoor Bougainvillea fails to bloom.


Temperature and Humidity

Bougainvillea prefers warm temperatures, ideally between 60-80°F (15-27°C). Avoid placing the plant in drafty areas or near cold windows in winter. It thrives in moderate humidity but can tolerate the lower indoor humidity typical in most homes.

Caring for Indoor 

Watering

Bougainvillea prefers slightly dry conditions. Water thoroughly when the top 1-2 inches of soil feel dry, but allow the pot to drain completely. Overwatering can cause root rot, so err on the side of less water rather than too much.


Fertilization

To encourage blooming, feed your Bougainvillea every 4-6 weeks during the growing season (spring to early fall) with a balanced fertilizer or one with higher phosphorus content. Reduce or discontinue feeding during the winter months, when the plant’s growth slows.


Pruning

Prune Bougainvillea regularly to maintain its shape and encourage bushier growth. Trim back leggy or overgrown branches after a bloom cycle, and pinch the tips of new growth to promote branching. Pruning also helps to manage the size of the plant indoors.


Training and Support

Bougainvillea is a natural climber, so providing a small trellis or support structure in the pot can help train it upward rather than outward. This is especially useful in smaller indoor spaces.


Repotting

Bougainvillea prefers to be slightly root-bound, which encourages blooming. Repot only when necessary—usually every 2-3 years or when roots become excessively crowded. When repotting, choose a slightly larger pot to avoid overwatering issues.

Common Challenges and Solutions

Leaf Drop: Bougainvillea may drop leaves due to sudden changes in light, temperature, or watering routines. Gradually acclimate the plant to changes and maintain a consistent care routine.


Lack of Blooms: Insufficient light is the primary reason Bougainvillea fails to bloom indoors. Ensure it receives ample sunlight or consider supplemental lighting with grow lights.


Pests: Indoor Bougainvillea can attract pests like aphids, mealybugs, and spider mites. Regularly inspect the plant and treat infestations with insecticidal soap or neem oil.


Overwatering Issues: Root rot is a common problem with indoor Bougainvillea, often caused by overwatering or poor drainage. Ensure proper soil and pot drainage, and water only when the soil is dry.


Growing Bougainvillea indoors is a rewarding way to bring the vibrancy of this plant into your home. With proper sunlight, careful watering, and occasional pruning, your indoor Bougainvillea can thrive and bloom beautifully. Whether trained as a climber or maintained as a compact shrub, Bougainvillea’s bright bracts will provide a stunning display, making it a standout addition to your indoor garden.

Propagation Methods

  1. Cuttings:
    • Select: Use 4-6 inch semi-hardwood cuttings.
    • Prepare: Remove lower leaves, dip in rooting hormone (optional).
    • Plant: Insert in sandy, well-draining soil, cover with a plastic bag for humidity.
    • Care: Keep in bright, indirect light; roots form in 4–8 weeks.
  2. Layering:
    • Select: Choose a low, flexible branch.
    • Wound & Bury: Slightly wound the stem and bury it under soil, securing it with a pin.
    • Separate: Once rooted, cut from the parent plant and pot.
  3. Seeds:
    • Sow: Plant seeds in a moist, well-draining mix.
    • Germination: takes weeks to months; less common due to variable success.

Cuttings are the quickest and most reliable method for propagating Bougainvillea!

How to Grow and Care Tips for Indoor Star Jasmine

Star Jasmine

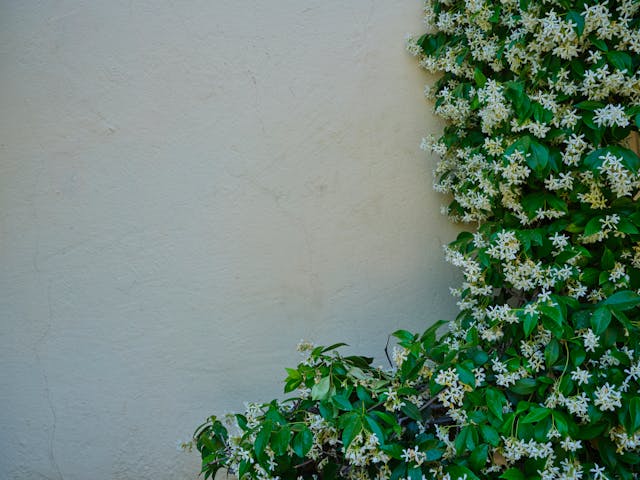
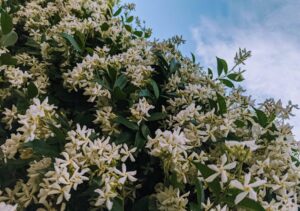
Star Jasmine (Trachelospermum asiaticum), also known as Asian Jasmine, is a versatile and resilient evergreen vine native to East Asia. This plant is admired not only for its beautiful, star-shaped flowers but also for its fragrant aroma and adaptability in various garden settings. While commonly grown outdoors as a vine or ground cover, Star Jasmine can also thrive indoors with the right care.


Growing Star Jasmine indoors allows you to enjoy its beauty and scent year-round, making it an excellent addition to your indoor plant collection. Whether you’re an experienced gardener or a beginner, Star Jasmine offers an easy-to-maintain option that adds elegance and a delightful scent to your outdoor spaces.

Characteristics


Star jasmine belongs to the Apocynaceae family and is a woody, evergreen vine that can be trained to grow as a ground cover or on trees and walls. The plant is known for its small, glossy, dark green leaves that provide a lush backdrop to the clusters of star-shaped white flowers it produces. The flowers typically bloom from late spring to early summer, filling the air with a sweet, intoxicating fragrance reminiscent of traditional jasmine, though it is not a true jasmine.


Star Jasmine
Star Jasmine


Common Name Star jasmine, confederate jasmine
Botanical Name Trachelospermum jasminoides
Plant Type Vine, perennial
Family Apocynaceae
Mature Size 3-6 feet . tall, 3-6 feet . wide
Sun Exposure Full, partial
Soil Type Moist but well-drained
Soil pH Neutral, acidic
Bloom Time Spring
Flower Color White, yellow
Hardiness Zones 7–10 (USDA)
Native Area Asia


Types of Star Jasmine

While Trachelospermum asiaticum (Star Jasmine) is commonly known and used in gardens, there are several varieties and related species that offer different characteristics in terms of leaf color, growth habits, and bloom patterns. Here are some notable types and varieties of Star Jasmine and its relatives:


Trachelospermum asiaticum ‘Minima’ (Dwarf Asian Jasmine):
    • Description: This variety features smaller, more compact growth compared to the typical Star Jasmine, making it an excellent choice for ground covers or container gardening.
    • Leaves: small, dense, and dark green.
    • Flowers: Produces fewer flowers than the standard variety but still provides a pleasant aroma.


Trachelospermum asiaticum ‘Ogon Nishiki’ (Golden Star Jasmine):
    • Description: Known for its unique golden-yellow variegated leaves, this variety adds a pop of color to gardens and indoor spaces.
    • Leaves: green and yellow variegated leaves that turn slightly bronze in cooler temperatures.
    • Flowers: Produces small, white flowers similar to the common Star Jasmine.


Trachelospermum asiaticum ‘Tricolor’ (variegated Asian jasmine):
    • Description: This variety is prized for its striking tricolor foliage that combines shades of green, pink, and white.
    • Leaves: The leaves are variegated with creamy white edges and a hint of pink, especially in cooler weather.
    • Flowers: small white flowers that provide the characteristic jasmine fragrance.


Trachelospermum jasminoides (Confederate Jasmine):
    • Description: Often confused with Trachelospermum asiaticum, Confederate Jasmine is another popular species known for its vigorous growth and highly fragrant flowers.
    • Leaves: glossy, dark green leaves that are larger than those of the Asiatic variety.
    • Flowers: produces abundant clusters of star-shaped, white flowers with a stronger fragrance than other varieties.


Trachelospermum jasminoides ‘Madison’ (Cold Hardy Confederate Jasmine):
    • Description: A harder version of Confederate Jasmine, ‘Madison’ can withstand slightly colder temperatures, making it suitable for cooler climates.
    • Leaves: Evergreen, dark green leaves that remain attractive year-round.
    • Flowers: white, star-shaped flowers with a sweet jasmine scent.


Trachelospermum jasminoides ‘Star of Toscane’ (Yellow Star Jasmine):
    • Description: Known for its unique yellow flowers, this variety adds a warm tone to gardens and is highly fragrant.
    • Leaves: Glossy green foliage similar to Confederate Jasmine.
    • Flowers: distinctive pale yellow flowers that bloom in spring and early summer.


Trachelospermum asiaticum ‘Pink Showers’:
    • Description: This is a rarer variety that features pink-tinged flowers, adding a subtle hint of color different from the traditional white.
    • Leaves: Dark green leaves that provide a contrasting backdrop to the light pink blooms.
    • Flowers: Delicate, pink flowers with a mild fragrance.


Trachelospermum asiaticum ‘Summer Sunset’:
    • Description: Known for its foliage that features a mix of green, gold, and bronze shades, giving the plant a sunset-like appearance.
    • Leaves: colorful variegated leaves that change with the seasons.
    • Flowers: white, star-shaped flowers, though the primary attraction is the vibrant foliage.

Each of these varieties offers unique features that can suit different garden or indoor settings, from colorful foliage to varied flower colors and scents. Selecting the right type of Star Jasmine can enhance the aesthetic and functional appeal of your space, depending on your preferences and climate conditions.


Care

Choosing the Right Container

When growing Star Jasmine indoors, the choice of container is crucial. Opt for a pot with good drainage to prevent water from accumulating at the bottom, which can lead to root rot. A pot with drainage holes and a saucer is ideal. The container should be large enough to accommodate the plant’s root system, allowing room for growth.

Soil 

Star Jasmine likes its soil to be rich in organic content and well-drained. A high-quality potting mix with added perlite or sand for drainage works well. You can also mix in some compost to provide additional nutrients. The pH of the soil should be between 6.0 and 7.0, which is slightly acidic to neutral.

Light Conditions

Indoors, Star Jasmine needs plenty of bright, indirect light to thrive. A location near a south- or west-facing window is ideal, where it can receive several hours of sunlight each day. However, direct sunlight can scorch the leaves, so it’s important to provide some protection, such as sheer curtains or by placing the plant a few feet away from the window.

If natural light is insufficient, especially during the winter months, consider using a grow light to supplement the light levels. Aim for at least 6-8 hours of light per day to encourage healthy growth and flowering.

Watering

Proper watering is key to maintaining a healthy indoor Star Jasmine. It’s important to maintain the soil continuously damp but not soggy. Water the plant when the top inch of soil feels dry to the touch. During the growing season (spring and summer), you may need to water more frequently, while in the dormant season (fall and winter), reduce watering to prevent overwatering.

The plant should not be left submerged in water, as this can cause root rot. Always empty the saucer after watering to prevent standing water.

Humidity and Temperature

Star Jasmine thrives in warm, humid conditions. Indoor environments can often be dry, particularly during the winter months when heating systems are in use.

  • Place the pot on a tray filled with water and pebbles, ensuring the bottom of the pot doesn’t touch the water.
  • Use a room humidifier to maintain humidity levels between 50% and 60%.
  • Mist the leaves regularly with water to add moisture to the air.

The ideal temperature range for indoor Star Jasmine is between 60°F and 75°F (15°C to 24°C). Avoid placing the plant near drafts, heating vents, or air conditioners, as sudden temperature changes can stress the plant.

Fertilizing

To encourage healthy growth and flowering, feed your indoor Star Jasmine with a balanced, water-soluble fertilizer every 4-6 weeks during the growing season. A fertilizer with equal parts nitrogen, phosphorus, and potassium (such as a 10-10-10 formula) is suitable. Fertilization should be reduced or stopped throughout the fall and winter months when the plant’s development slows.

Pruning and Training

Pruning is essential for maintaining the shape and size of your indoor Star Jasmine. Regular pruning helps promote bushier growth and can encourage more flowers. Trim back any long, leggy stems to keep the plant compact and tidy. In order to avoid new growth, pruning should be done in the early spring.

If you’re growing Star Jasmine as a vine indoors, you can train it to climb a small trellis or support. Gently tie the stems to the support structure with soft ties, being careful not to damage the plant.

Propagating

To propagate Star Jasmine (Trachelospermum asiaticum), take stem cuttings in spring or early summer. Cut a 4-6 inch healthy stem with a few leaves, remove the lower leaves, and dip the cut end in rooting hormone. Plant the cutting in moist, well-draining soil, and keep it in a warm, bright location with indirect sunlight. Maintain humidity by covering it with a plastic bag or placing it in a mini greenhouse. Water lightly and ensure the soil remains moist but not soggy. Roots usually develop within 4-6 weeks, after which the plant can be gradually acclimated to normal conditions.

Pest Control

While Star Jasmine is relatively resistant to pests, indoor plants can sometimes attract common houseplant pests like spider mites, scale, and mealybugs. Regularly inspect your plant for signs of pests, such as discolored or distorted leaves, webbing, or sticky residue. If you notice an infestation, treat the plant with insecticidal soap or neem oil and isolate it from other plants until the problem is resolved.


Growing Star Jasmine indoors can bring a touch of elegance and fragrance to your home. By providing the right light, water, humidity, and care, you can enjoy the beauty of this plant year-round. With its glossy leaves and fragrant flowers, Star Jasmine is a rewarding indoor plant that adds both visual and aromatic appeal to any indoor space.

How to Grow and Care Tips for Indoor African Violets

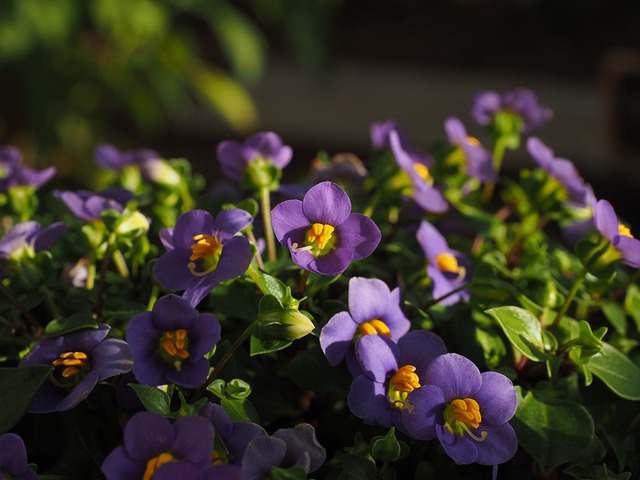
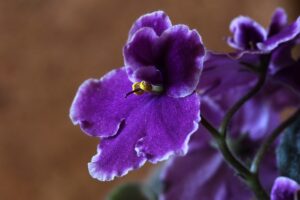
African violet, scientifically known as Saintpaulia spp., is a popular genus of flowering plants in the family Gesneriaceae. Native to the cloud forests of eastern tropical Africa, particularly Tanzania and Kenya, these plants have become one of the most beloved indoor plants around the world due to their beautiful, velvety leaves and vibrant, long-lasting flowers.


Originating from the cloud forests of East Africa, these charming plants have found a special place in homes around the world. Growing and caring for African violets indoors requires attention to specific needs, but the rewards are well worth the effort.

Characteristics 

1. Flower Structure: African violets are admired for their small, symmetrical flowers, which can be single, semi-double, or double in form. The flowers come in a wide range of colors, including shades of purple, blue, pink, red, white, and bi-colored varieties. The flowers are typically 1-2 inches in diameter and are often seen blooming throughout the year under the right conditions.


2. Leaf Appearance: The leaves of African violets are oval to heart-shaped, with a slightly fuzzy texture due to tiny hairs on their surface. They are usually a deep green color, although some varieties may have variegated patterns with white or cream edges. The leaves form a rosette at the base of the plant, creating a dense, lush appearance.


3. Growth Habit: African violets are compact, low-growing plants that typically reach a height of 6 to 9 inches. They have a shallow root system, which makes them well-suited for small pots and indoor environments.


African Violets
African Violets


Common Name African violet
Botanical Name Saintpaulia ionantha
Family Gesneriaceae
Plant Type Perennial
Mature Size 6-9 in. tall, 6-9 in. wide
Sun Exposure Partial
Soil Type Well-drained but moist
Soil pH Acidic, neutral
Bloom Time Spring, summer, fall, and winter
Flower Color White, pink, red, blue, and purple
Hardiness Zones 11-12 (USDA)
Native Areas Africa


Types of African Violets

  • Standard African Violets: Typical size (8–16 inches in diameter), with a variety of flower colors and forms.


  • Miniature and Semi-Miniature: smaller types (under 8 inches), known for their compact size and vibrant blooms.


  • Trailing African Violets grow with multiple crowns, are ideal for hanging baskets, and are known for their spreading growth habit.


  • Chimera African Violets: unique striped or banded flower patterns due to a genetic mutation, requiring specific propagation methods.


  • Fantasy African Violets: Feature flowers with streaks, spots, or splashes of contrasting colors, adding a whimsical look.


  • Variegated African Violets: Distinguished by leaves with patterns of white, cream, pink, or yellow mixed with green.


Care

Pot and Soil

  • Pot Selection: African violets thrive best in small pots. A pot that is too large can retain extra moisture, resulting in root rot. Opt for a pot that is about one-third the size of the plant’s leaf spread. Clay or plastic pots with drainage holes are ideal.


  • Soil Requirements: African violets require a well-draining soil mix. Regular garden dirt is excessively heavy and may choke the roots. Instead, use a specialized African violet potting mix or make your own by mixing equal parts of peat moss, vermiculite, and perlite. This combination guarantees that the soil maintains moisture without getting saturated.

Light Conditions

  • Lighting Needs: African violets prefer bright, indirect light. Too much direct sunlight can scorch the leaves, while too little light can hinder blooming. Use fluorescent grow lights if there is not enough natural light. Keep the lights about 12 inches above the plants for 12–14 hours a day to mimic their natural environment.


  • Rotating the Plant: To ensure even growth, rotate your African violet regularly. This prevents the plant from leaning towards the light source and encourages uniform foliage.

Watering Techniques

  • Water Quality: African violets are sensitive to the type of water used. It’s best to use room-temperature water that has been allowed to sit for 24 hours, which helps dissipate chlorine and other chemicals. Rainwater, or distilled water, is also an excellent choice.


  • Watering Method: Avoid getting water on the leaves, as this can cause spotting or fungal diseases. The best method is to water from the bottom by placing the pot in a saucer of water for about 30 minutes. This allows the roots to absorb moisture without overwatering. Alternatively, use a watering can with a long, narrow spout to water directly at the soil surface.


  • Watering Frequency: African violets prefer to stay slightly moist but never soggy. When the top inch of soil appears dry to the touch, water the plant. Overwatering can lead to root rot, while underwatering can cause the leaves to wilt and the plant to stop blooming.

Humidity and Temperature

  • Humidity: African violets thrive in a humid environment, ideally around 50–60% humidity. If your home is dry, especially during winter, consider placing a humidity tray under the plant or grouping it with other plants to increase moisture in the air. Misting the air around the plant (not the leaves) can also help.


  • Temperature: These plants prefer a consistent temperature between 65°F and 75°F (18°C to 24°C). Avoid placing them near drafts, air conditioners, or heating vents, as sudden temperature changes can stress the plant and affect blooming.

Fertilizing

  • Fertilizer Type: African violets benefit from regular feeding with a balanced, water-soluble fertilizer, preferably one that is specifically formulated for them. Look for a fertilizer with a balanced ratio, such as 14-12-14 or 20-20-20.


  • Fertilizing Frequency: Feed your African violet every 4 to 6 weeks during the growing season (spring and summer). When the plant’s growth slows down in the fall and winter, cut back on feeding. Over-fertilization can cause salt buildup in the soil, which is harmful to the roots.

Pruning and Grooming

  • Removing Dead Leaves and Flowers: Regularly remove dead or yellowing leaves and spent flowers to encourage new growth and prevent disease. Gently pinch or cut the stems close to the base of the plant.


  • Crown Thinning: If your African violet becomes too dense in the center, it can benefit from a little thinning. Remove a few of the inner leaves to improve air circulation and light penetration.

Repotting

  • When to Repot: African violets should be repotted every 6 to 12 months, or when the plant outgrows its current pot. When the plant starts to get top-heavy or roots are emerging from the drainage holes, it’s time to repot it.


  • How to repot: Gently remove the plant from its pot, being careful not to damage the roots. Shake off the old soil and remove any dead or decaying roots. Place the plant in a slightly larger pot with a fresh soil mix, and water lightly to settle the soil.

Common Problems and Solutions

  • Yellowing Leaves: Yellow leaves may suggest overwatering, inadequate drainage, or a lack of nutrients. Check the soil moisture and adjust your watering schedule. Ensure the pot has adequate drainage and consider feeding the plant if it hasn’t been fertilized recently.


  • No Blooms: If your African violet isn’t blooming, it may be due to insufficient light, an incorrect temperature, or a lack of nutrients. Ensure the plant is getting enough indirect light and is kept in a warm environment. Regular feeding can also encourage blooming.


  • Powdery Mildew: This fungal disease appears as a white powder on the leaves and is usually a sign of high humidity and poor air circulation. Improve ventilation around the plant and reduce humidity. As a last option, fungicidal sprays might be applied.


African violets are a perfect choice for indoor gardening enthusiasts, offering year-round beauty with minimal space requirements. With the right care, these charming plants can bring a touch of nature and elegance to any home. Whether you’re a seasoned plant lover or a beginner, African violets are sure to brighten your living space with their stunning flowers and lush folia.