How to Care for Bromeliad Plant: Watering, Pruning, and More

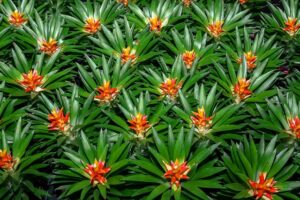
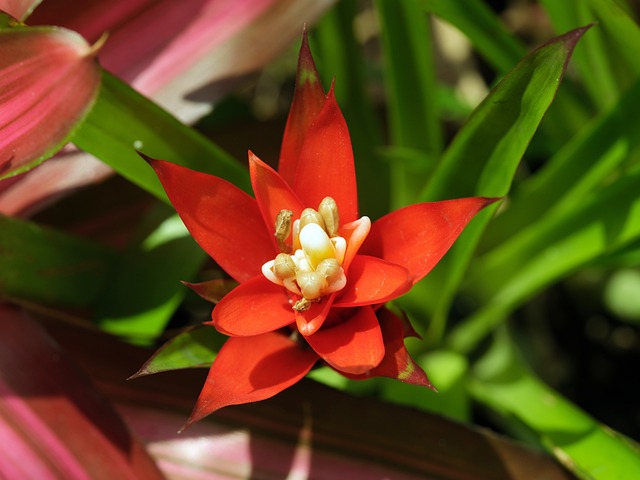
The Neoregalia genus is one of the most popular among bromeliads, distinguished by its rosette of broad, flat leaves. These plants are endemic to South American rainforests and are admired for their brilliant rosettes of leaves and vibrant central “cups” capable of holding water.Neoregalia plants are planted mostly for their foliage, which can be a wide variety of hues, including green, red, purple, and even striped or variegated patterns.


This is in contrast to certain other bromeliads that produce tall flower spikes. The plant is made more attractive by the vibrant color that frequently appears in the center cup of the plant, where the leaves converge, especially during the flowering season.


Common Name Bromeliad
Botanical Name Bromeliaceae genera
Family Bromeliaceae
Plant Type Perennial
Mature Size Varies by genera and species
Sun Exposure Partial
Soil Type Well-draining
Soil pH Acidic
Bloom Time Blooms once; timing varies
Flower Color Red, green, purple, orange, and yellow
Hardiness Zones 10-11 (USDA)
Native Area North America, Central America, and South America


Bromeliad
Bromeliad


Types of Bromeliad

1. Neoregalia ‘Fireball’:
  • Color: Bright red foliage, deepens with more light.
  • Size: small, compact rosette.
  • Light: Thrives in bright, indirect light.
2. Neoregalia ‘Super Fireball’:
  • Color: intense red, slightly larger leaves than ‘Fireball’.
  • Size: Compact, spreads through offsets.
  • Light: requires bright, indirect light.
3. Neoregalia ‘Meyendorffii’:
  • Color: green leaves with red/purple spots.
  • Size: Upright, larger rosette.
  • Light: Prefers medium to bright, indirect light.
4. Neoregalia ‘Pink Star’:
  • Color: pink to deep rose leaves with green edges.
  • Size: small, star-shaped rosette.
  • Light: Best in bright, indirect light.
5. Neoregalia ‘Blushing Tiger’:
  • Color: variegated green/yellow stripes, center blushes red.
  • Size: Broad, moderate-sized rosette.
  • Light: Needs bright, indirect light.
6. Neoregalia ‘Zoe’:
  • Color: green with cream/white stripes, blushes pink/red when blooming.
  • Size: Medium rosette.
  • Light: medium to bright, indirect light.
7. Neoregalia ‘Orange Crush’:
  • Color: Bright orange leaves.
  • Size: small, compact rosette.
  • Light: requires bright, indirect light.
8. Neoregalia ‘Donger’:
  • Color: Dark green to deep purple leaves with spots or stripes.
  • Size: Wide, spreading rosette.
  • Light: It thrives in mild to bright, indirect light.
9. Neoregalia ‘Johannis’:
  • Color: Large green leaves with red/purple spots.
  • Size: Large, robust rosette.
  • Light: Bright, indirect light is preferred.
10. Neoregalia ‘Charm’:
  • Color: Bright pink leaves; center turns vivid red when blooming.
  • Size: small, compact rosette.
  • Light: Needs bright, indirect light.

Each of these Neoregalia varieties brings its unique charm to your home, offering vibrant colors and intriguing patterns that thrive with minimal care.

Bromeliad Care

Light Requirements

Neoregalia bromeliads thrive in bright, indirect light. They can tolerate lower light levels, but this may cause their vibrant colors to fade. Direct sunlight, particularly in the afternoon, should be avoided because it might burn the leaves. An ideal spot would be near an east-facing window where the plant can receive gentle morning sunlight.

Watering

One of the unique aspects of Neoregalia bromeliads is their central cup, which should be kept filled with water. This mimics their natural environment, where they collect rainwater. However, it’s important to change this water regularly to prevent stagnation and the growth of harmful bacteria. It is important to maintain a slightly damp but never waterlogged soil. Overwatering the soil can lead to root rot, so allowing the top layer of soil to dry out between waterings is advisable.

Humidity and Temperature

As tropical plants, Neoregalia bromeliads prefer a humid environment. Aim to maintain humidity levels around 50–60%, which can be achieved by misting the plant regularly or placing it on a humidity tray. They thrive in temperatures between 60 and 80 °F (15 and 27 °C). These bromeliads are not frost-tolerant, so ensure they are kept away from cold drafts and temperatures below 50°F (10°C).

Soil and Fertilization

Neoregalia bromeliads do best in a well-draining potting mix. A blend designed for orchids or a mix of peat, perlite, and bark works well. Fertilization should be light and infrequent. A balanced, water-soluble fertilizer diluted to half strength can be applied to the soil every 1-2 months during the growing season. Avoid adding fertilizer directly to the central cup, as this can cause damage to the plant.

Propagation

Propagation of Neoregalia bromeliads is typically done through offsets, commonly referred to as “pups.” These pups grow at the base of the mother plant and can be separated once they are about one-third the size of the parent. Carefully remove the pup, ensuring it has some roots attached, and pot it in a similar well-draining mix. With proper care, these pups will mature into full-sized plants.

Common Challenges and Solutions

  • Fading Colors: If the vibrant colors of your Neoregalia start to fade, it may be due to insufficient light. Move the plant to a brighter location, ensuring it receives indirect sunlight.
  • Root Rot: This is frequently caused by excessive watering or poor drainage. If you notice the leaves turning brown or mushy, check the roots and adjust your watering routine accordingly.
  • Pest Infestation: While generally resilient, Neoregalia bromeliads can occasionally attract pests like mealybugs or scale. Treat these with a mild insecticidal soap or by wiping the leaves with a mixture of water and dish soap.


Neoregalia bromeliads are more than just a beautiful addition to your home; they are a testament to the wonders of nature, with their ability to thrive in diverse conditions. Their vibrant colors, unique structure, and relatively low maintenance make them an excellent choice for anyone looking to add a tropical flair to their indoor garden.


By understanding their needs and providing the right care, you can enjoy the beauty of these stunning plants for years to come.Whether you’re new to houseplants or a seasoned collector, Neoregalia bromeliads offer a rewarding and visually striking experience. Their resilience and adaptability make them not only beautiful but also a practical choice for anyone looking to bring a piece of the rainforest into their home.

How to Care for Prayer Plant: Watering, Pruning, and More

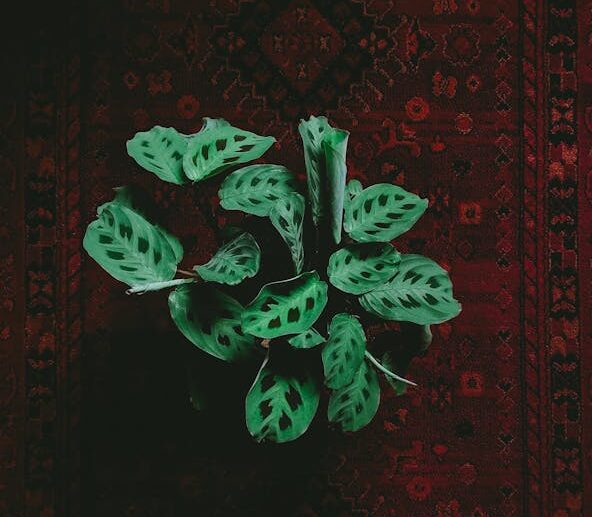
The Maranta leuconeura, commonly known as the prayer plant. The prayer plant is a striking houseplant known for its beautiful foliage. During the day, the leaves lie flat, but in the evening, they fold upward, resembling hands in prayer. This unique behavior is a response to light and helps the plant conserve moisture and energy. Native to the tropical rainforests of Brazil, this plant has become a popular choice for indoor gardening enthusiasts due to its vibrant colors, unique patterns, and relatively easy care requirements.


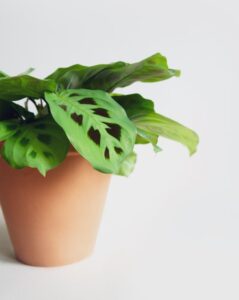
The prayer plant is recognizable by its large, oval leaves, which can grow up to 5 inches long. The leaves are usually dark green with a light green or cream-colored midrib, often displaying a herringbone pattern of red veins or patches of darker green, giving it a mesmerizing appearance. The underside of the leaves is often a rich reddish-purple, adding to the plant’s visual appeal. One of the most fascinating aspects of the prayer plant is its nyctinasty—the daily rhythmic movement of its leaves.


Prayer Plant
Prayer Plant


Common Name Prayer plant
Botanical Name Maranta leuconeura
Family Marantaceae
Plant Type Herbaceous, perennial
Mature Size 6–12 in. tall, 6–12 in. wide
Sun Exposure Partial, shade
Soil Type Moist but well-drained
Soil pH Neutral, acidic
Bloom Time Spring
Flower Color White
Hardiness Zones 11-12 (USDA)
Native Area South America


Types of Prayer Plant

Here’s a brief overview of popular prayer plant (Maranta leuconeura) varieties:


  • ‘Kerchoveana’ (Green Prayer Plant): light green leaves with darker green patches, resembling rabbit tracks.


  • ‘Erythroneura’ (Red-Veined Prayer Plant): dark green leaves with bold red veins in a herringbone pattern, burgundy undersides.


  • ‘Leuconeura’ (Black Prayer Plant): deep green, almost black leaves with silver veins.


  • ‘Massangeana’ (Silver Feather Prayer Plant): dark green leaves with silver or white central veins.


  • ‘Kim’: smaller leaves with lime-colored margins and subtle patterns.


  • ‘Lemon Lime’: Vibrant lime green leaves with darker veins and a bright lemon midrib.


  • ‘Fascinator’ (Tricolor): tricolored leaves with dark green, red veins, light green patches, and purple undersides.


  • ‘Marisela’: Light green leaves with a soft, feather-like, darker green pattern.


  • ‘Silver Band’: leaves with a striking silver band down the center, glossy finish.

Each variety will add unique beauty to your indoor garden!


Prayer Plant Care

Growing Conditions

To keep your prayer plant healthy and vibrant, it’s essential to replicate the conditions it would experience in its natural habitat. Here’s what you need to know:

Light Requirements

The prayer plant thrives in bright, indirect light. Direct sunlight can scorch its leaves, so it’s best to place it in a spot where it will receive filtered light, such as near a north- or east-facing window. If there is not enough natural light, fluorescent lights can be used to complement it.

Temperature

Maranta leuconeura prefers a warm environment with temperatures ranging between 65°F and 75°F (18°C to 24°C). It’s sensitive to cold drafts and should be kept away from windows or doors that might expose it to chilly air.

Humidity

Being a tropical plant, the prayer plant loves high humidity. Aim for a humidity level of around 60% or higher. You can increase humidity by misting the plant regularly, placing a humidifier nearby, or setting the pot on a tray filled with water and pebbles (ensuring the pot isn’t sitting directly in the water).

Soil

Prayer plants demand well-drained soil that keeps moisture without becoming too wet. A peat-based potting mix combined with perlite or sand works well. The soil should be slightly acidic to neutral, with a pH between 5.5 and 6.0.

Watering

Keep the soil consistently moist but not soggy. When the top inch of soil seems completely dry to the touch, water the plant. During the growing season (spring and summer), you may need to water more regularly, whereas the dormant season (autumn and winter) requires less watering. Always use room-temperature water and avoid using water with high mineral content, as this can cause leaf browning.

Care Tips

Fertilizing

Feed your prayer plant with a balanced, water-soluble fertilizer diluted to half strength every 4 to 6 weeks during the growing season. Since the plant’s growth slows down in the winter, fertilizer should be avoided during that time.

Pruning

Regular pruning is not necessary for the prayer plant, but you can trim back any leggy growth to encourage a fuller, bushier appearance. Remove any yellow or broken leaves to keep the plant healthy.

Repotting

Repot the prayer plant every 2 to 3 years or when it becomes root-bound. Choose a pot that is 1-2 inches larger in diameter than the current one and ensure it has drainage holes to prevent waterlogging.

Pest and Disease Management:

Prayer Plants are generally resistant to pests, but they can occasionally be affected by spider mites, aphids, or mealybugs. Inspect the plant regularly, and treat any infestations with insecticidal soap or neem oil. Overwatering or poor drainage can lead to root rot, so be mindful of the plant’s watering needs.

Common Issues and Solutions

1. Leaf curling or browning:

If the leaves start to curl or turn brown at the edges, it could be a sign of low humidity or underwatering. Increase humidity and ensure consistent watering.

2. Yellowing Leaves:

Yellow leaves may indicate overwatering or poor drainage. Allow the soil to dry somewhat between waterings, and make sure the pot has good drainage.

3. Faded Colors:

If the leaves lose their vibrant color, the plant may not be receiving enough light. Shift it somewhere brighter, but out of direct sunlight.

Propagation

Prayer plants can be easily propagated through division or stem cuttings. While the plant is actively growing, in the spring or summer is the ideal time to propagate.

1. Division:

When repotting, gently separate the plant into smaller sections, each with its own root system. Plant the divisions in individual pots filled with brand-new soil.

2. Stem cuttings:

Take a cut just below a node and remove the bottom leaves. The cutting can be submerged in water or moist soil. If rooting in water, transplant it into soil once roots have developed.


The Maranta leuconeura is a captivating and relatively low-maintenance houseplant that can add a touch of the tropics to your home. By providing the right light, temperature, humidity, and care, you can enjoy its stunning foliage and the mesmerizing movement of its leaves for years to come.

How to Cultivate and Care for Indoor Calathea Ornata

Calathea Ornata

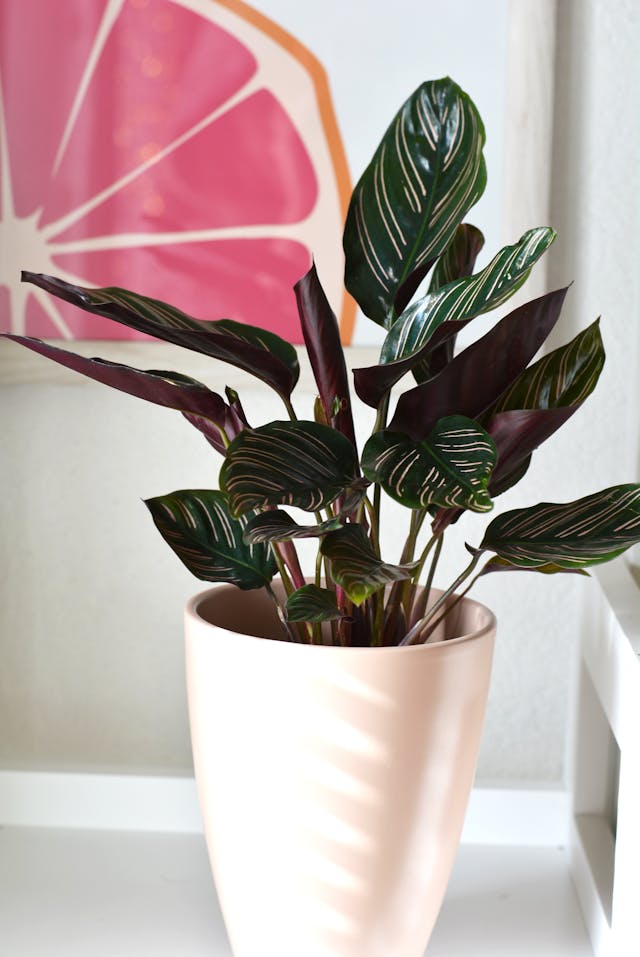
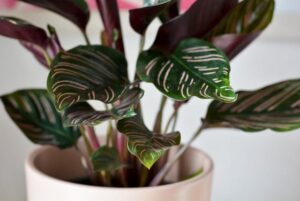
Calathea ornata, commonly known as the pinstripe plant, is a stunning houseplant admired for its beautifully striped leaves. This tropical plant, native to South America, is part of the Marantaceae family. It is recognized for its vibrant foliage and unique patterns. Calathea ornata, with its dark green leaves adorned with delicate pink stripes. Brings a touch of elegance and exotic charm to any indoor space.


The Calathea ornata stands out due to its large, oval-shaped leaves that can grow up to 30 centimeters long. The undersides of the leaves are a rich purple, adding another layer of visual interest. The plant’s leaves move in response to light, folding up at night and opening during the day, a phenomenon known as nyctinasty.


Calathea Ornata
Calathea Ornata


Common Name:  Pinstripe plant, pinstripe calathea
 Botanical Name:  Goeppertia ornata (formerly Calathea ornata)
 Family:  Marantaceae
 Plant Type:  Perennial
 Mature Size: 2–3 feet tall and wide
 Sun Exposure:  Partial
 Soil Type:  Moist, well-drained soil
 Soil pH:  Neutral
 Native Area:  Central America, South America


Types of Calathea Ornata

  • Calathea ornata ‘Sanderiana’: the most common variety, known for its dark green leaves with prominent pinkish-white stripes and purple undersides.
  • Calathea ornata, ‘Beauty Star,” features narrower, elongated leaves with thin, numerous pink stripes that create a starburst pattern.
  • Calathea ornata, ‘Roseolineata’: a variety similar to ‘Sanderiana’ but with slightly different stripe patterns and leaf shapes.


Calathea Ornata Care

Ideal Growing Conditions

Light

The Calathea ornata thrives in bright, indirect light. Direct sunlight can scorch the leaves, causing the colors to fade or the edges to brown. The best location for the plant to receive filtered light is next to a window that faces either north or east. If natural light is insufficient, fluorescent lighting can also support its growth.

Temperature

This tropical plant prefers warm temperatures between 18-24°C (65-75°F). It is sensitive to cold drafts and sudden temperature changes, so avoid placing it near windows or doors that open frequently during the winter. The Calathea ornata does well in a stable environment where the temperature does not drop below 15°C (60°F).

Humidity

High humidity is crucial for the Calathea ornata. It flourishes in environments with humidity levels of 60% or higher. To maintain this, you can place a humidifier nearby, mist the plant regularly, or place the pot on a tray filled with pebbles and water. Low humidity can cause the leaves to curl and the edges to brown.

Soil

The pinstripe plant prefers a well-draining potting mix that retains moisture without becoming waterlogged. A mix of peat, perlite, and orchid bark provides the right balance of drainage and moisture retention. The soil should be kept consistently moist but not soggy, as overwatering can lead to root rot.

Watering

Water the Calathea ornata with filtered or distilled water, as it is sensitive to fluoride and chlorine commonly found in tap water. It’s important to keep the soil uniformly damp but not soggy. When the top inch of soil is completely dry to the touch, water the area well. As the plant’s growth slows down throughout the winter, watering should be done less frequently.

Fertilization

Feed your Calathea ornata every four weeks during the growing season (spring and summer) with a balanced, water-soluble fertilizer diluted to half strength. Avoid fertilizing in the fall and winter, as the plant’s growth naturally slows during these periods.

Common Problems and Solutions

  • Browning leaf edges:

Browning edges can result from low humidity, overfertilization, or water quality. Increase humidity, reduce fertilizer application, and use filtered water to mitigate this issue.

  • Leaf Curling:

Curling leaves often indicate that the plant is too dry, either due to low humidity or underwatering. Increase watering frequency and humidity levels to help the leaves return to their natural state.

  • Pests:

The Calathea ornata can be susceptible to spider mites, aphids, and mealybugs. Regularly check the plant and treat any pests with insecticidal soap or neem oil.

Propagation

The Calathea ornata can be propagated through division. The best time to do this is during the plant’s active growing season in the spring. Carefully separate the plant at the roots, ensuring each division has at least one healthy stem and a few leaves. Plant each division in fresh, moist soil, and keep it in a warm, humid environment to encourage new growth.


The Calathea Ornata, with its exquisite striped foliage and unique movement, is a captivating addition to any indoor plant collection. While it may require a bit more attention compared to other houseplants, the rewards are well worth the effort. By providing the right care, you can enjoy the vibrant beauty of this pinstripe plant and create a lush, tropical atmosphere in your home.

How to Cultivate and Care for Indoor Rubber Plant

Rubber Plant

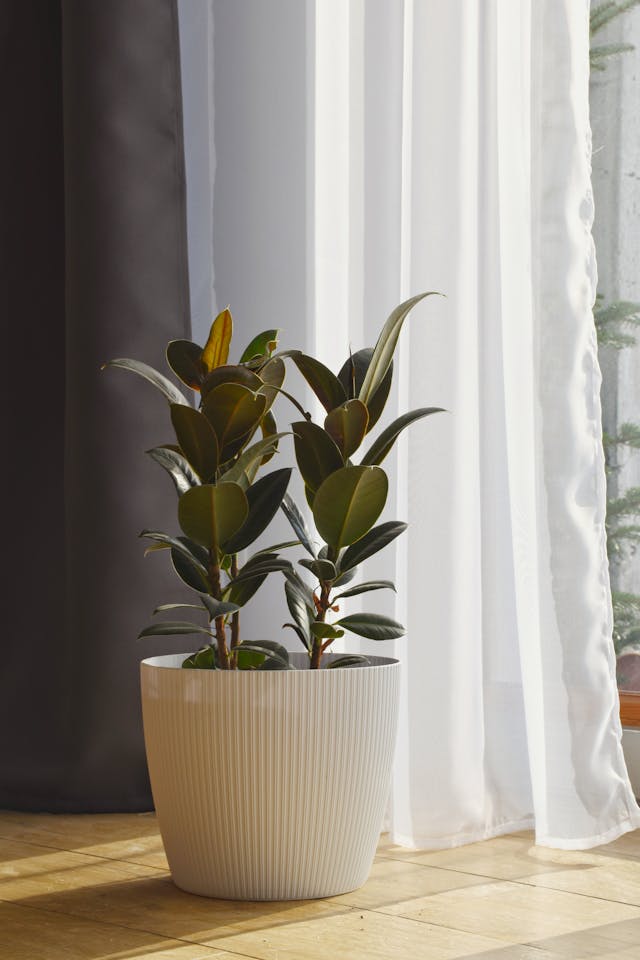
The Rubber Plant (Ficus elastica) is a popular houseplant known for its large, glossy leaves and robust growth. Native to Southeast Asia, this versatile plant has found its way into homes around the world, admired for both its aesthetic appeal and air-purifying qualities. Whether you’re a seasoned plant enthusiast or a beginner looking to green up your space, the rubber plant is an excellent choice.


The Rubber Plant belongs to the Ficus genus, which includes a wide variety of plants. Ficus elastica gets its name from the sticky, milky latex sap it produces, which was once used to make rubber. While this sap is not typically harvested for rubber production anymore, it’s an interesting aspect of the plant’s history.


The plant is characterized by its large, leathery leaves, which can range in color from deep green to burgundy, depending on the variety. The leaves are typically oval-shaped with a pointed tip, and they grow from a central stem that can become quite thick and tree-like over time.


Rubber Plant
Rubber Plant


Common Name Rubber tree, rubber plant
Botanical Name Ficus elastica
Plant Type Broadleaf evergreen
Toxicity Toxic to dogs and cats


Types of Rubber Plants

Here’s a brief overview of the types of rubber plants (Ficus elastica):

Ficus elastica ‘Robusta’: classic variety with large, glossy, deep green leaves. Fast-growing and robust.


Ficus elastica ‘Burgundy’: dark, almost black leaves with a burgundy undertone, offering a dramatic appearance.


Ficus elastica ‘Tineke’: variegated with green and creamy white leaves. Decorative and slower-growing.


Ficus elastica ‘Ruby’: Pinkish-red variegated leaves with green and white, adding vibrant color to any space.


Ficus elastica ‘Decora’: Known for its thick, glossy dark green leaves, similar to ‘Robusta.’


Ficus elastica ‘Doescheri’: Mottled green, cream, and pink leaves with a marbled appearance.


Ficus elastica ‘Melany’: Compact variety with smaller, narrower, deep green glossy leaves.


Ficus elastica ‘Black Prince’: Very dark, almost black leaves with a subtle burgundy hue.


Ficus elastica ‘Abidjan’: Dark green leaves with a reddish tint, similar to ‘Burgundy.’


Ficus elastica ‘Shivereana’: Rare variety with marbled green, cream, and occasional pink or orange hues.

Each variety offers unique leaf patterns and colors, making Rubber Plants versatile and attractive options for indoor spaces.


Rubber Plant Care

The Rubber Plant, scientifically known as Ficus elastica, is a popular houseplant admired for its broad, glossy leaves and striking presence. Native to Southeast Asia, this versatile plant can grow indoors with the right care, making it a favorite among plant enthusiasts. Here’s a comprehensive guide on how to grow and care for your Rubber Plant.

Choosing the Right Location

The Rubber Plant thrives in bright, indirect light. It can withstand some direct sunlight, but too much of it will scorch the leaves. Ideally, place your Rubber Plant near a window that receives filtered light. If the plant is placed in low light, it may become leggy and drop its lower leaves.

Potting and Soil Requirements

Rubber Plants prefer well-draining soil. A standard potting mix with added perlite or sand works well to ensure proper drainage. When potting, choose a container with drainage holes to prevent water from pooling at the bottom, which can lead to root rot.

Watering

The Rubber Plant enjoys regular watering, but it’s essential not to overwater. Give an additional inch of soil to dry out in between waterings. During the growing season (spring and summer), water more frequently. As the plant’s growth slows during the dormant season (autumn and winter), watering should be reduced

Humidity and Temperature

Rubber Plants prefer a humid environment, which mimics their natural tropical habitat. While they can adapt to average indoor humidity levels, they will benefit from occasional misting, especially in dry environments. Keep the plant in temperatures ranging from 60°F to 75°F (16°C to 24°C). Avoid placing the plant near drafts or cold windows, as it is sensitive to sudden temperature changes.

Fertilizing

During the growing season, apply a balanced liquid fertilizer to your rubber plant once every 4–6 weeks. This will promote healthy growth and vibrant leaves. In the dormant season, you can reduce or completely stop fertilizing, as the plant’s nutrient needs are lower.

Pruning and Maintenance

Pruning helps your rubber plant retain its ideal form and size. Use clean, sharp scissors or pruning shears to trim back any leggy growth or remove dead or damaged leaves. If your plant becomes too tall, you can trim the top to encourage bushier growth. The milky sap that oozes out from the cuts can be irritating to the skin, so it’s advisable to wear gloves while pruning.

Repotting

Rubber plants tend to outgrow their pots every 2–3 years. Repotting is best done in the spring, when the plant begins its active growth phase. Choose a pot that is one size larger than the current one and refresh the soil mix to provide fresh nutrients.

Pest Management

Rubber Plants are relatively resistant to pests but can sometimes attract common houseplant pests like spider mites, mealybugs, and scale. Inspect the leaves on a regular basis, paying careful attention to the undersides, for signs of infestation. If you spot any bugs, use insecticidal soap or neem oil to get rid of them.

Propagation

Rubber Plants can be easily propagated through stem cuttings. Take a 4-6-inch cutting from a healthy stem, remove the lower leaves, and allow the cutting to dry for a few hours. Then, place it in water or directly into a potting mix. Place the cutting in an area that is warm and light, and keep the soil moist. It should take a few weeks for roots to appear.

Common Problems and Solutions

  • Leaf Drop: This can occur due to overwatering, underwatering, or sudden changes in light or temperature. Prevent significant alterations to the plant’s surroundings and provide constant maintenance.
  • Yellowing Leaves:  Often a sign of overwatering. Check the soil moisture and adjust your watering schedule.
  • Leggy Growth: This is typically due to insufficient light. It will take a few weeks for roots to emerge.

With its lush, vibrant leaves and easy-care nature, the Rubber Plant is an excellent choice for both novice and experienced plant enthusiasts. By providing the right light, water, and care, your Rubber Plant will thrive and become a stunning focal point in your indoor space.

How to Grow and Care Tips for Indoor Boston Fern

The Boston Fern (Nephrolepis exaltata) is a popular houseplant known for its lush, arching fronds that bring a touch of nature indoors. With its rich green foliage, the Boston Fern is not only a beautiful decorative plant but also an excellent air purifier. The Boston Fern, a variety of sword fern, belongs to the Nephrolepis genus. It is native to tropical and subtropical regions, particularly the Americas, Africa, and Southeast Asia.


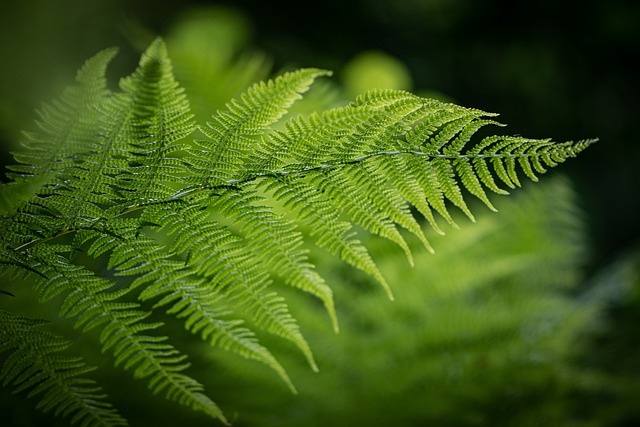
This fern is characterized by its long, feather-like fronds that can grow up to 2–3 feet in length. The fronds are made up of small leaflets, giving the plant a delicate and airy appearance.Here’s everything you need to know about caring for and cultivating this classic fern.


Boston Fern
Boston Fern


Common Names Boston fern, sword fern, ladder fern, boss fern
Botanical Name Nephrolepis exaltata
Family Lomariopsidaceae
Plant Type Herbaceous, perennial
Mature Size 2-3 ft. tall and wide
Sun Exposure Partial sun
Soil Type Moist, well-drained
Soil pH Acidic
Hardiness Zone 9-11 (USDA)
Native Area Americas, Africa, and Polynesia

Types of Boston Fern

While the Boston Fern itself is a variety of the sword fern, there are several cultivars within the Nephrolepis exaltata species, each with unique characteristics. Here are some of the popular types:

Nephrolepis exaltata ‘Bostoniensis’:

This is the classic Boston Fern variety, recognized for its long, arching fronds with small, symmetrical leaflets. It’s the most common type found in homes and gardens.

Nephrolepis exaltata ‘Fluffy Ruffles’:

Known for its shorter, more compact fronds, this cultivar has a dense, ruffled appearance. The fronds are bushier and more upright, making it a great choice for smaller spaces.

Nephrolepis exaltata ‘Teddy Junior’:

This variety is similar to ‘Fluffy Ruffles’ but even more compact and dense. It features soft, finely divided fronds that give it a plush, velvety texture.

Nephrolepis exaltata ‘Dallas Jewel’:

A more tolerant variety, ‘Dallas Jewel’ is known for its ability to thrive in lower light and less humid conditions. Its fronds are slightly shorter and more upright, making it easier to manage indoors.

Nephrolepis exaltata ‘Emerald Queen’:

This cultivar has broader and more elongated fronds that are a deeper green. The ‘Emerald Queen’ is valued for its lush, regal appearance and is often used in decorative displays.

Nephrolepis exaltata ‘Rooseveltii’:

Named after President Franklin D. Roosevelt, this variety is characterized by its wavy, undulating fronds. The fronds have a unique, rippling effect that adds an interesting texture to the plant.

Nephrolepis exaltata ‘Norwoodii’:

A rarer variety, ‘Norwoodii’ has intricately laced, narrow fronds that give the plant a delicate, lace-like appearance. It’s less common in cultivation but highly sought after by fern enthusiasts.

Nephrolepis exaltata ‘Whitmanii’:

Also known as the ‘Feather Fern,’ this cultivar features very finely divided fronds that are almost feathery in texture. The fronds are soft and delicate, creating a light, airy effect.

Nephrolepis exaltata ‘Verona’:

A newer cultivar, ‘Verona’ has a more compact growth habit with slightly twisted fronds, giving it a unique and modern look. It’s ideal for indoor spaces where space is limited.

Each of these Boston Fern varieties has its own charm and can be chosen based on the specific aesthetic or care requirements you’re looking for. Whether you prefer the classic look of ‘Bostoniensis’ or the more intricate fronds of ‘Whitmanii,’ there’s a Boston Fern type to suit every plant lover’s taste.


Boston Fern Care

Ideal Growing Conditions

Light: Boston Ferns thrive in bright, indirect light. While they can tolerate low light conditions, they prefer a spot where they can receive filtered sunlight. Direct sunlight can scorch their fronds, so it’s best to place them near a north- or east-facing window.


Temperature: These ferns prefer a cool to moderate climate, ideally between 60 and 75°F (16 and 24°C). They can tolerate temperatures as low as 50°F (10°C) but should be kept away from drafts and sudden temperature changes, which can cause stress to the plant.


Humidity: Boston Ferns love high humidity. In their natural habitat, they grow in moist, shaded areas, so replicating this environment is key to their success indoors. If the air in your home is dry, consider misting the plant regularly, placing it on a humidity tray, or using a humidifier.


Soil: A well-draining, rich, and slightly acidic soil is ideal for Boston Ferns. A mix of peat moss, potting soil, and perlite or sand works well. While retaining moisture, the soil shouldn’t get soggy.


Watering: Consistent moisture is essential for Boston Ferns. Maintain a uniformly damp but not drenched soil. Water the fern when the top inch of soil feels dry, ensuring that excess water drains away to prevent root rot. During the growing season (spring and summer), increase watering frequency, while in the dormant season (fall and winter), reduce watering slightly.

Care and Maintenance

Fertilizing: During the growing season, feed your Boston Fern with a balanced, water-soluble fertilizer diluted to half strength every 4-6 weeks. Avoid over-fertilizing, as it can lead to frond burn or an accumulation of salts in the soil.


Pruning: Regular pruning helps maintain the fern’s shape and encourages new growth. Remove any yellow, brown, or damaged fronds by cutting them at the base. This also helps to prevent the spread of pests and diseases.


Repotting: Boston Ferns can become root-bound over time, so repotting every 1-2 years is recommended. Choose a pot that is one size larger than the current one, and refresh the soil to provide the plant with new nutrients. Spring is the optimum time for repotting.


Pest Control: Although Boston Ferns are relatively pest-resistant, they can occasionally be affected by pests like spider mites, scale, and mealybugs. Regularly inspect your plant and treat any infestations with insecticidal soap or neem oil.

Propagation

Boston Ferns can be easily propagated through division. When repotting, gently separate the plant into smaller clumps, ensuring that each clump has a healthy root system and fronds. Fill the pots with fresh dirt, plant the divisions, and give them plenty of water. Keep the newly potted ferns in a humid environment until they establish themselves.

Common Problems and Solutions

  • Yellowing Fronds: This can be a sign of overwatering or too much direct sunlight. Adjust your watering schedule and move the plant to a spot with indirect light.
  • Brown Leaf Tips: This is frequently caused by low humidity or underwatering. Increase humidity around the plant and ensure consistent watering.
  • Wilting Fronds: If the fronds are wilting despite regular watering, check for root rot. Remove the damaged roots and repot the plant in fresh, well-drained soil.

Benefits of Boston Ferns

Beyond their aesthetic appeal, Boston Ferns are known for their air-purifying properties. They are particularly effective at removing formaldehyde, xylene, and toluene from the air, making them a great addition to any indoor space. Additionally, the presence of ferns can create a calming and refreshing atmosphere in your home or office.


The Boston Fern (Nephrolepis exaltata) is a timeless houseplant that brings both beauty and health benefits to indoor environments. With the right care, it can thrive and flourish, providing a touch of greenery and a breath of fresh air in your space. Whether you’re a seasoned plant parent or a beginner, the Boston Fern is a rewarding choice for any plant collection.

How to Care for Peace Lily: Watering, Pruning, and More

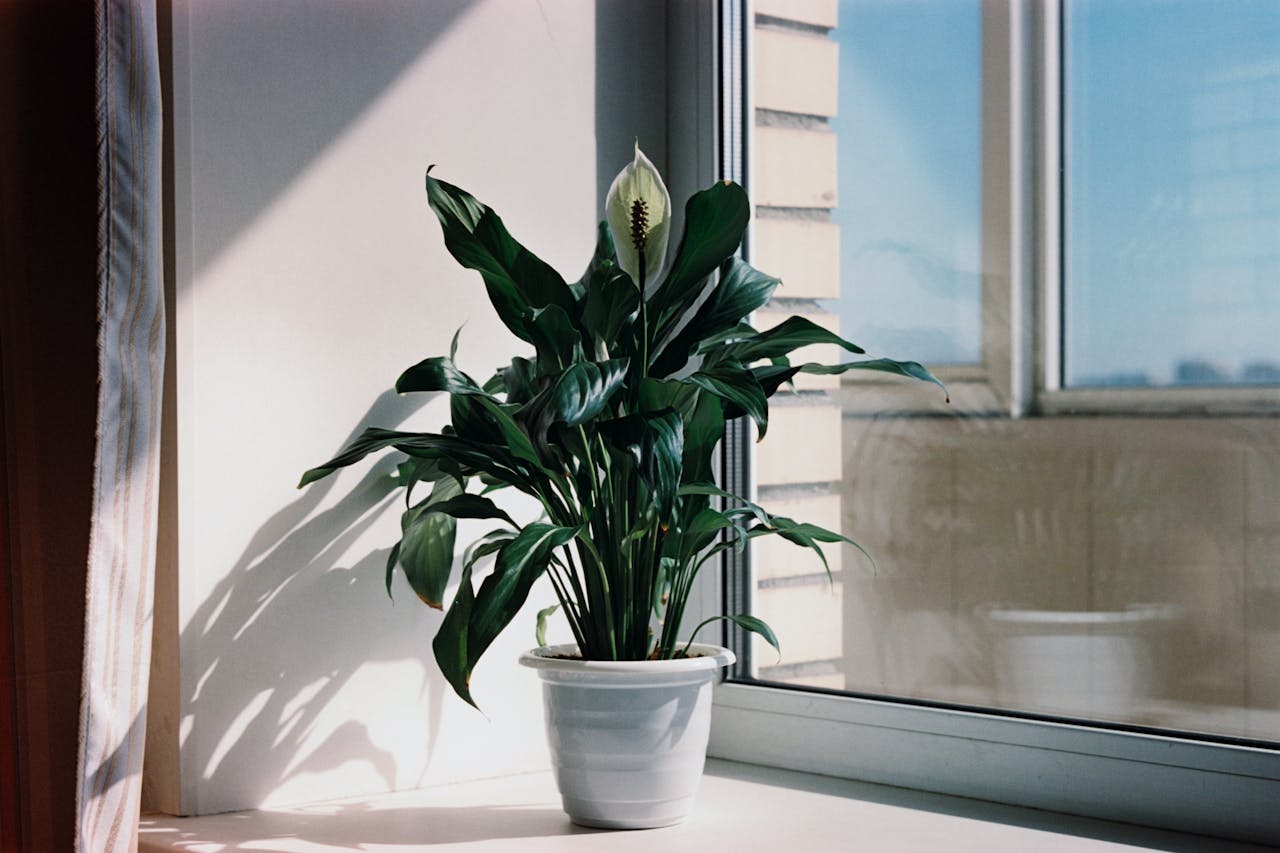
Peace Lily

The Peace Lily (Spathiphyllum spp.) is a popular indoor plant known for its lush, dark green foliage and elegant white blooms. This tropical plant not only adds beauty to your living space but also serves as a natural air purifier. With its ability to thrive in low-light conditions and relatively low maintenance requirements, the Peace Lily is a favorite among both novice and experienced plant enthusiasts.


Native to the tropical rainforests of Central and South America, the Peace Lily belongs to the Araceae family. It is not a true lily but is closely related to other popular houseplants like the Philodendron and Monstera. The plant is characterized by its broad, glossy leaves that grow directly from the soil. The most striking feature of the Peace Lily is its white, hood-like spathes, which resemble a flower but are actually modified leaves. The true flowers are small and located on the spadix, a slender spike that emerges from the spathe.


Peace Lily
Peace Lily


Common Name Peace lily, spath lily
Botanical Name Spathiphyllum spp.
Family Araceae
Plant Type Perennial
Mature Size 1–4 ft. tall, 1–4 ft. wide (indoors), up to 6 ft. tall (outdoors)
Sun Exposure Partial
Soil Type Moist but well-drained
Soil pH Acidic
Bloom Time Spring
Flower Color White, yellow
Hardiness Zones 11–12 (USDA)
Native Area Central America, Asia
Toxicity Toxic to pets and people


Types of Peace Lily

Here’s a brief overview of popular peace lily types:

  1. Spathiphyllum ‘Mauna Loa Supreme’: A large variety, up to 4 feet tall, with broad, glossy leaves and large white spathes. Great for larger spaces.
  2. Spathiphyllum ‘Sensation’: The largest peace lily, growing up to 6 feet tall, with wide, ribbed leaves. Ideal for spacious areas.
  3. Spathiphyllum ‘Domino’: medium-sized with striking variegated leaves featuring white and green patterns. Perfect for adding visual interest.
  4. Spathiphyllum ‘Mojo’: A compact variety, around 1 to 2 feet tall, with vibrant green leaves. Suitable for small spaces.
  5. Spathiphyllum ‘Sweet Pablo’: medium height (3–4 feet) with large, fragrant white spathes. Ideal for living rooms and bedrooms.
  6. Spathiphyllum ‘Petite’: A small variety, 1 to 1.5 feet tall, with narrow leaves. Great for desks or small indoor displays.
  7. Spathiphyllum ‘Cupido’: medium-sized, up to 3 feet tall, with slender dark green leaves and elegant spathes. Perfect for modern decor settings.

These varieties offer different sizes and characteristics, making it easy to find the perfect peace lily for your home or office.

Care

Benefits of Growing a Peace Lily

One of the main reasons the Peace Lily is so beloved is its ability to purify indoor air. According to a study by NASA, the Peace Lily can remove toxins such as benzene, formaldehyde, and trichloroethylene from the air, making it an excellent choice for improving indoor air quality. Additionally, the Peace Lily’s ability to thrive in low-light environments makes it a versatile plant for various indoor settings, from offices to bedrooms.

Growing Conditions

To keep your Peace Lily thriving, it’s essential to understand its preferred growing conditions:

Light: Peace Lilies do well in low to medium indirect light. While they can tolerate low-light conditions, they produce more blooms when exposed to brighter, filtered light. Keep the leaves out of direct sunlight, as it can scorch them.


Water: Peace Lilies prefer consistently moist soil but should not be waterlogged. When the top inch of soil is dry enough to feel good, water the plant. Make sure there is adequate drainage in the pot, because overwatering might cause root rot.


Humidity: As a tropical plant, the Peace Lily enjoys higher humidity levels. If the air in your home is dry, consider misting the leaves regularly or placing the plant on a tray filled with water and pebbles to increase humidity.


Temperature: Peace Lilies thrive in temperatures between 65°F and 80°F (18°C to 27°C). They are sensitive to cold drafts and should be kept away from windows or doors during the winter months.


Soil: A well-draining potting mix is essential for Peace Lilies. A standard indoor potting mix combined with perlite or orchid bark works well to ensure proper aeration and drainage.

Common Issues and Solutions

While Peace Lilies are relatively low-maintenance, they can encounter a few common problems:

  • Yellowing Leaves: This can be a sign of overwatering, underwatering, or exposure to direct sunlight. Change the time you give the plant hydration and relocate it to an area with indirect light.
  • Brown Leaf Tips: Brown tips can result from low humidity or over-fertilization. Increase humidity levels around the plant and reduce the frequency of fertilization.
  • Lack of Blooms: If your Peace Lily isn’t blooming, it may need more light. Try moving it to a brighter spot with indirect light.

Repotting and Propagation

Peace Lilies grow relatively slowly and typically need repotting every two to three years. When repotting, choose a pot that is one size larger than the current one and refresh the soil to provide new nutrients. To propagate, Peace Lilies can be divided during repotting. Gently separate the plant into smaller clumps, ensuring each section has roots attached, and replant them in fresh soil.


The Peace Lily is a resilient and elegant plant that adds a touch of serenity to any indoor space. With its air-purifying qualities and ability to thrive in low-light conditions, it’s an ideal choice for those looking to enhance their environment with minimal effort. By providing the right care, you can enjoy the beauty and benefits of your Peace Lily for years to come. Whether you’re a seasoned plant enthusiast or just starting your indoor garden, the Peace Lily is a rewarding addition to any collection.

Preventive Measures

To minimize the risk of diseases:

  • Watering: Water your Peace Lily appropriately, ensuring the soil is moist but not soggy.
  • Air Circulation: Ensure good air circulation around the plant to reduce humidity and prevent fungal growth.
  • Cleanliness: Regularly clean the leaves to remove dust and check for pests. Use sterilized tools when pruning to prevent the spread of diseases.
  • Isolation: Quarantine new plants before introducing them to your existing collection to prevent the introduction of diseases or pests.

By staying vigilant and providing proper care, you can keep your Peace Lily healthy and free from common diseases, allowing it to thrive and continue beautifying your space.

How to Care for Snake Plant: Watering, Pruning, and More

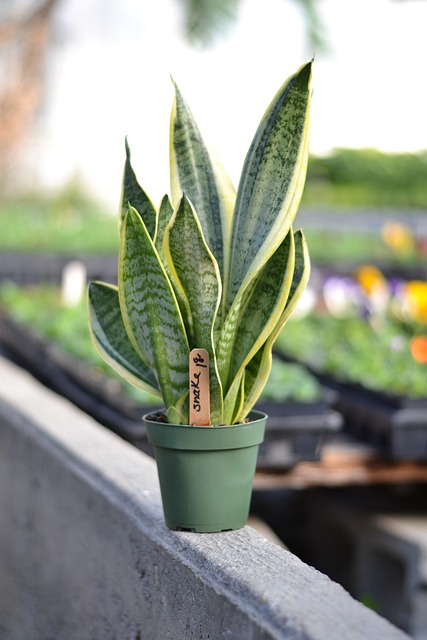
The Snake Plant, scientifically known as Sansevieria trifasciata, is one of the most popular and resilient houseplants you can find. With its striking, upright leaves and low-maintenance nature, this plant is a favorite among both novice and experienced plant enthusiasts.

Sansevieria trifasciata, commonly referred to as the Snake Plant, Mother-in-Law’s Tongue, or Viper’s Bowstring Hemp, originates from West Africa, specifically Nigeria and the Congo. It is easily recognizable by its long, sword-like leaves, which can grow up to 3 feet tall. The leaves are typically dark green with lighter horizontal stripes, giving them a unique, variegated appearance.


Common Name  Snake plant, mother-in-law plant, mother-in-law’s tongue
Botanical Name  Dracaena trifasciata
Family  Asparagaceae
Plant Type  Evergreen perennials are typically grown as houseplants.
Mature Size  2–5 feet . tall as a houseplant
Sun Exposure  Sun to part shade
Soil Type  Sandy, well-drained
Soil pH  Slightly acidic to slightly alkaline
Bloom Time  Spring
Flower Color  White
Hardiness Zones  9–11 (USDA)
Native Area  West Africa
Toxicity  Toxic to cats and dogs


Snake Plant
Snake Plant

Types of Snake Plant

  • Sansevieria trifasciata, ‘Laurentii’
    • Features: Tall, upright leaves with green centers and yellow edges.
    • Height: 2-4 feet.
  • Sansevieria trifasciata, ‘Hahnii’
    • Features: Compact, rosette-shaped leaves, dark green with lighter bands.
    • Height: 6–8 inches.
  • Sansevieria trifasciata, ‘Golden Hahnii’
    • Features: Similar to ‘Hahnii’ but with bright yellow and green variegation.
    • Height: 6–8 inches.
  • Sansevieria trifasciata, ‘Cylindrica’
    • Features: Tube-like, round leaves that grow outward, often braided.
    • Height: Up to 3 feet.
  • Sansevieria trifasciata, ‘Twisted Sister’
    • Features: Leaves curl and twist, with bright green and yellow variegation.
    • Height: 12–15 inches.
  • Sansevieria ‘Moonshine’
    • Features: Silvery-green, broad, upright leaves.
    • Height: Up to 2 feet.
  • Sansevieria, ‘Black Gold’
    • Features: Deep green, almost black leaves with golden edges.
    • Height: Up to 3 feet.
  • Sansevieria, ‘Bantel’s Sensation’
    • Features: Narrow leaves with white vertical stripes and a delicate appearance.
    • Height: Up to 3 feet.
  • Sansevieria trifasciata, ‘Whitney’
    • Features: Compact, dark green leaves with creamy white edges.
    • Height: 12–18 inches.
  • Sansevieria trifasciata,Futura Superba’
    • Features: Shorter, broader leaves with yellow margins, similar to ‘Laurentii’.
    • Height: About 24 inches.

Care

Light Requirements

Snake plants are highly adaptable to a variety of lighting conditions. They can thrive in bright, indirect light but are also capable of surviving in low-light environments. However, for optimal growth and vibrant leaf color, placing them in moderate-to-bright indirect light is ideal.

Watering Needs

One of the most critical aspects of caring for a Snake Plant is avoiding overwatering. This plant is drought-tolerant and prefers its soil to dry out between waterings. Overwatering can trigger root rot, which is a regular problem for this plant. During the growing season (spring and summer), water your Snake Plant every 2-3 weeks, reducing this to once a month during the dormant winter months.

Soil and Potting

Snake Plants are not fussy about soil, but they do best in a well-draining potting mix. It is effective to use a cactus or succulent mix, or you may make your own by adding sand or perlite to ordinary potting soil. Make sure there are drainage holes in the container to avoid water pooling at the bottom, which can lead to root rot.

Temperature and Humidity

This hardy plant can tolerate a wide range of temperatures but prefers to be kept in an environment between 70 and 90 °F (21-32 °C). While it can survive lower temperatures, it should be protected from frost. The Snake Plant is not picky about humidity, making it perfect for most indoor settings.

Fertilization

Fertilizing a Snake Plant is not necessary, but if you want to encourage growth, you can feed it with a balanced, slow-release fertilizer during the growing season. Since the plant is not actively growing throughout the winter, fertilizer should be avoided during that time.

Propagation Methods

Propagating a Snake Plant is straightforward and can be done through leaf cuttings or division.

  • Leaf Cuttings: Cut a healthy leaf into 2-3-inch sections and allow the cut ends to dry for a day or two. Place the cuttings in a pot with a well-draining soil mix, and water lightly. Keep the soil moist but not wet, and roots should start to form in a few weeks.
  • Division: If your Snake Plant has grown large, you can divide it by removing the plant from its pot and gently separating the roots into smaller sections. After that, each part can be potted independently.

Common Problems and Solutions

  • Root Rot: The most common issue with Snake Plants is root rot, caused by overwatering. To avoid this, always let the soil dry out between waterings and ensure your pot has adequate drainage.
  • Pest Infestations: Snake Plants are generally pest-resistant, but they can occasionally attract mealybugs or spider mites. Use a moist cloth to wipe the leaves and, if needed, insecticidal soap.
  • Leaf Discoloration: If the leaves start to turn yellow or brown, it could be due to overwatering, underwatering, or insufficient light. Adjust your care routine accordingly.

The Snake Plant is a resilient and visually striking plant that requires minimal effort to thrive. Whether you’re looking to improve your indoor air quality, add some greenery to your home, or start your journey as a plant parent, Sansevieria trifasciata is an excellent choice. With the proper care, this plant will reward you with years of beauty and health benefits.

Benefits of the Snake Plant

  • Air Purification: The Snake Plant is famous for its air-purifying qualities. NASA’s Clean Air Study highlighted that it can remove toxins like formaldehyde, xylene, toluene, and nitrogen oxides from the air. This makes it a great option to help improve indoor air quality.
  • Oxygen Production: Unlike most plants that release oxygen during the day, the Snake Plant continues to release oxygen at night, making it an ideal plant for bedrooms to enhance air quality while you sleep.
  • Low Maintenance: This plant is incredibly forgiving, making it perfect for those who may not have a green thumb. It can thrive in low-light conditions and requires minimal watering, making it a great choice for busy individuals.

How to Grow and Care for Indoor Spider Plants Easily

Spider Plant

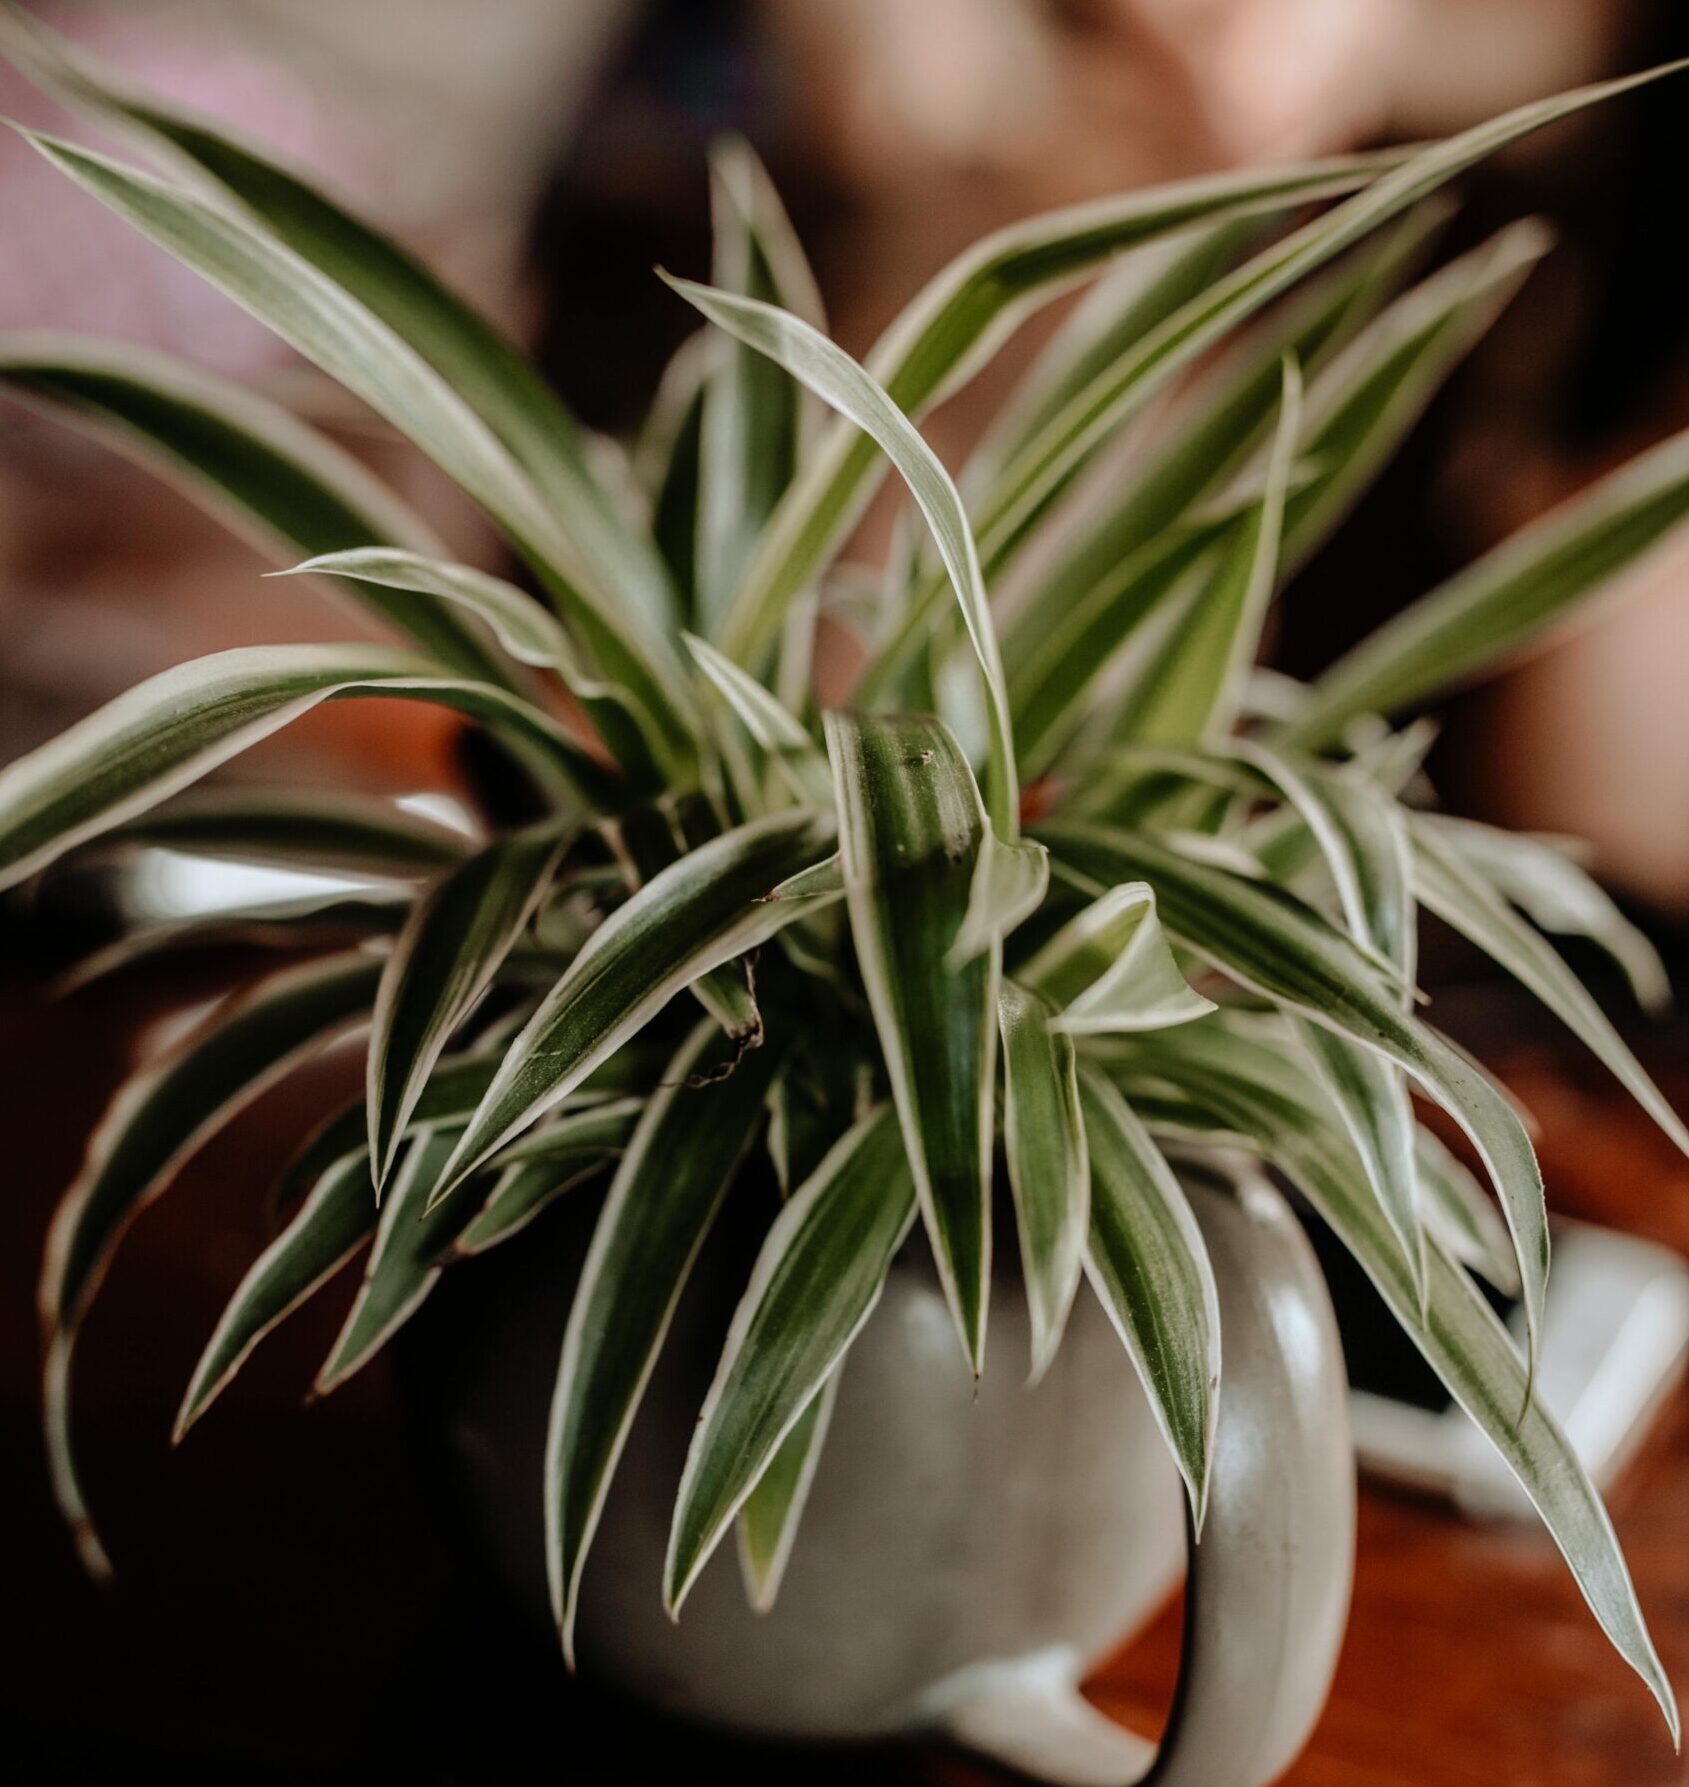
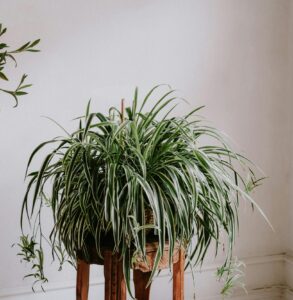
Spider plants, known scientifically as Chlorophytum comosum, are among the most popular and easy-to-care-for houseplants. They are well-loved for their air-purifying qualities, arching leaves, and the way they produce “spiderettes” or baby plants on long stems, which add a charming touch to any indoor space. Here’s a comprehensive guide to help you grow and care for your spider plant indoors.

Common Names Spider plant, spider ivy, ribbon plant
Botanical Name Chlorophytum comosum 
Family Asparagaceae
Plant Type Herbaceous, perennial
Mature Size 1–2 ft. tall and wide
Sun Exposure Partial, shade
Soil Type Loamy, well-drained
Soil pH Neutral
Bloom Time Flowers regularly
Flower Color White
Hardiness Zones 9–11 (USDA)
Native Area Central and Southern Africa


Spider Plant
Spider Plant

Types of Spider Plants

1. Variegated Spider Plant (Chlorophytum comosum ‘Vittatum’)

The most common variety features green leaves with a broad white stripe down the center.

2. Reverse Variegated Spider Plant (Chlorophytum comosum ‘Variegatum’)

Similar to the ‘Vittatum,’ but with white margins and a green center on the leaves.

3. Bonnie Spider Plant (Chlorophytum comosum ‘Bonnie’)

A curly-leaf variety, the ‘Bonnie’ has green leaves with white margins and is often used as a decorative houseplant due to its compact, curly growth habit.

4. Hawaiian Spider Plant (Chlorophytum comosum, ‘Hawaiian’)

Also known as the Golden Glow, this variety has a more compact form with darker green leaves that have a lighter green or gold center stripe.

5. Zebra Spider Plant (Chlorophytum laxum ‘Zebra’)

This variety has narrower leaves with white margins, offering a slightly different look from the traditional Spider Plant.

Each type of Spider Plant offers unique visual appeal, making them versatile options for indoor gardening.

Care

1. Choosing the Right Location

  • Light: Spider plants thrive in bright, indirect light but can tolerate low light conditions. Your plant will benefit from filtered sunlight if you place it close to a window. Keep clear of direct sunlight, as it may scorch the foliage.
  • Temperature: Spider plants prefer temperatures between 55°F and 80°F (13°C to 27°C). They are quite adaptable but should be kept away from cold drafts and heating vents.

2. Potting and Soil

  • Soil: A well-draining, all-purpose potting mix is ideal for spider plants. They prefer slightly acidic to neutral soil with a pH level between 6.0 and 7.2.
  • Pot: Choose a pot with drainage holes to prevent water from accumulating at the bottom, which can lead to root rot. Spider plants don’t mind being slightly root-bound, so they can stay in the same pot for a couple of years before needing repotting.

3. Watering

  • Frequency: Water your spider plant when the top inch of soil feels dry. Typically, this means watering once a week, but this can vary depending on your indoor climate.
  • Water Quality: Spider plants are sensitive to fluoride and chlorine in tap water, which can cause leaf tips to brown. If possible, use distilled water or let tap water sit out overnight before using it.

4. Fertilizing

During the growing season (spring and summer), feed your spider plant every 4–6 weeks with a balanced, water-soluble fertilizer. As the plant’s development slows in the fall and winter, cut back on feeding.

5. Humidity and Air Quality

  • Humidity: Spider plants prefer moderate humidity levels. If the air in your home is dry, especially during winter, you can increase humidity by misting the plant occasionally or placing it near a humidifier.
  • Air Purifying: One of the remarkable qualities of spider plants is their ability to purify the air by absorbing pollutants such as formaldehyde and carbon monoxide, making them an excellent choice for improving indoor air quality.

6. Pruning and Maintenance

  • Trimming: Regularly remove any yellow or brown leaves to keep the plant looking its best. If the tips of the leaves turn brown, trim them with clean scissors, but avoid cutting into the green part of the leaf.
  • Spiderettes: Spider plants produce small white flowers that eventually turn into baby plants or spiderettes. You can leave these on the plant for a fuller look, or cut them off and propagate them in water or soil to create new plants.

7. Propagation

  • Water Propagation: Place the spiderettes in a glass of water, making sure the bottom part of the baby plant is submerged. After a few weeks, roots will develop, and the spiderette can be planted in soil.
  • Soil Propagation: Alternatively, plant the spiderette directly into soil, keeping it moist until it establishes roots.

8. Common Problems and Solutions

  • Browning Tips: Often caused by overwatering, fluoride, or chlorine in tap water. Adjust your watering routine and consider using filtered or distilled water.
  • Yellow Leaves: This can indicate overwatering, poor drainage, or inadequate light. Ensure the plant has good drainage and adjust its light exposure as needed.

9. Repotting

Spider plants typically need repotting every 1–2 years. When the plant starts to get top-heavy or roots are emerging from the drainage holes, it’s time to repot it. Choose a pot one size larger, and refresh the soil to give your spider plant room to grow.

Growing and caring for a spider plant is a rewarding experience, especially for beginners. With minimal effort, these resilient plants can thrive and even multiply, adding a touch of greenery and air-purifying benefits to your home. Remember to keep them in bright, indirect light, water them appropriately, and enjoy the lush, cascading foliage that spider plants offer.

Common Pests and Diseases of Spider Plants

Common Pests:

  • Aphids: cause yellowing leaves; treat with insecticidal soap.
  • Spider Mites: Lead to speckled leaves and webbing; control with neem oil.
  • Mealybugs: appear as white, cotton-like spots; remove with alcohol-dipped cotton swabs.
  • Whiteflies: sap-sucking insects; manage with yellow sticky traps and insecticidal soap.

Common Diseases:

  • Root rot: caused by overwatering; prevent it by ensuring good drainage and proper watering.
  • Leaf Blight: brown spots on leaves; improve air circulation and remove affected leaves.
  • Powdery Mildew: white, powdery spots on leaves; reduce humidity and treat with fungicide.

Prevention Tips:

  • Water properly, maintain moderate humidity, inspect regularly, and keep the plant’s environment clean.

How to Grow and Care for Indoor Coriander Plants Easily

Coriander

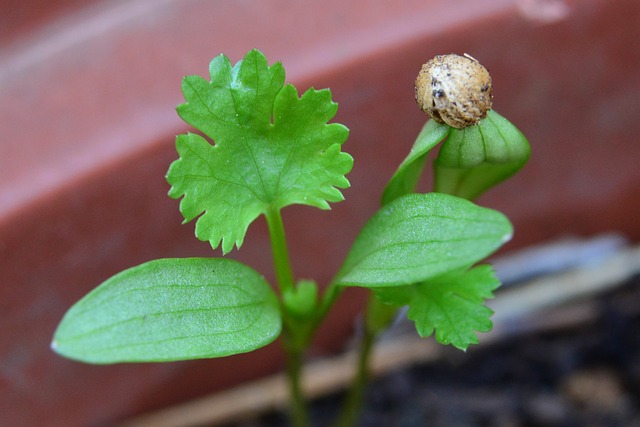
Coriander, also known as cilantro or Chinese parsley, is a versatile herb that is widely used in cooking for its fresh, citrusy flavor. Growing coriander indoors is a great way to have a continuous supply of fresh herbs right at your fingertips. Here’s a guide to help you successfully grow and care for coriander indoors.

Types of Coriander

1. Common Coriander (Coriandrum sativum)
  • Uses: Dual-purpose; fresh leaves (cilantro) for garnishing and seeds for spice.
2. Vietnamese Coriander (Persicaria odorata)
  • Uses: Often used in Southeast Asian cuisine; has a stronger, spicier flavor than common coriander.
3. Slow Bolt Coriander
  • Uses: Resistant to bolting; ideal for longer harvests of leaves.
4. Leisure Coriander
  • Uses: Known for robust flavor; excellent for cooking and frequent use.
5. Cruiser Coriander
  • Uses: Milder flavor; good for beginners due to its ease of growth.

These varieties cater to different culinary preferences and growing conditions, making coriander a versatile herb for various dishes and indoor gardening.

Coriander
Coriander


Care

1. Choosing the Right Container

Coriander has a deep root system, so it’s important to choose a container that is at least 8-10 inches deep. Make sure the container has drainage holes to avoid waterlogging, which can lead to root rot.

2. Soil Requirements

Coriander thrives in well-draining, loamy soil. Use a high-quality potting mix enriched with organic matter. You can mix in some compost or perlite to improve drainage and nutrient content.

3. Planting coriander seeds

  • Sowing: Coriander seeds should be sown directly into the container. Since they have a short lifespan when transplanted, it’s best to avoid transplanting them from another pot. Sow the seeds approximately 1/4 inch deep, then lightly cover them with dirt.
  • Spacing: To allow proper air circulation, space the seeds about 3-4 inches apart. This will also give the plants enough room to grow without competition.

4. Light Requirements

Coriander requires plenty of sunlight to grow well. Place the container in a location that receives at least 4-6 hours of direct sunlight daily, such as a sunny window. Consider adding a grow lamp as a supplement if natural light is inadequate.

5. Watering

Coriander prefers consistently moist soil but not soggy. Water the plants regularly to keep the soil evenly moist, especially during the germination period. However, avoid overwatering, as this might cause root rot. Allow the top inch of soil to dry somewhat in between waterings.

6. Temperature and Humidity

Coriander grows best in temperatures between 50°F and 75°F (10°C and 24°C). It doesn’t tolerate extreme heat well, so keep it in a cool environment. Indoor humidity is generally sufficient, but ensure good air circulation to prevent fungal issues.

7. Fertilizing

Every 2-3 weeks, apply a balanced, water-soluble fertilizer to your coriander plants. Over-fertilizing can lead to excessive leaf growth with less flavor, so it’s important to follow the recommended dosage on the fertilizer packaging.

8. Pruning and Harvesting

  • Pruning: Regularly trim the leaves to encourage bushier growth. This prevents the plant from bolting (flowering and going to seed) too quickly.
  • Harvesting: Start harvesting coriander leaves when the plant is about 6 inches tall. First, trim the outer leaves, leaving the inner leaves untrimmed. For the best flavor, harvest in the morning when the essential oils are at their peak.

9. Managing Pests and Diseases

Indoor coriander is generally less susceptible to pests and diseases, but you should still monitor your plants. Aphids, spider mites, and powdery mildew are among the most common concerns. Use organic insecticidal soap to control pests and ensure proper spacing and air circulation to prevent fungal diseases.

10. Succession Planting

Coriander has a short growing season, so to ensure a continuous supply, practice succession planting. Sow new seeds every 2-3 weeks to have fresh coriander throughout the year.

Final Thoughts

Growing coriander indoors is a rewarding experience that provides fresh herbs for your kitchen. By following these guidelines on container choice, soil, light, and care, you can enjoy a steady supply of flavorful coriander right from your windowsill. Whether you use it to garnish dishes or as a key ingredient in your cooking, homegrown coriander will add a fresh, aromatic touch to your meals.

Uses

Coriander (Coriandrum sativum) is a versatile herb with a wide range of uses, both culinary and medicinal. Below are some of the most common and beneficial uses of coriander:

1. Culinary Uses

Fresh Leaves (Cilantro):
  • Garnishing: Fresh cilantro leaves are commonly used as a garnish in a variety of dishes, including soups, salads, curries, and tacos. They add a bright, citrusy flavor that complements many types of cuisine.
  • Salsas and Chutneys: Cilantro is a key ingredient in many salsas and chutneys, where it adds freshness and enhances the overall flavor profile.
  • Pesto: Cilantro can be used as a substitute for basil in pesto, offering a unique twist on the traditional recipe.
Seeds (Coriander):
  • Spice: Coriander seeds are dried and used as a spice in many global cuisines. They taste toasty and nutty, with a faint citrus undertone. Ground coriander is commonly used in spice blends like garam masala, curry powder, and dukkah.
  • Pickling: Whole coriander seeds are often used in pickling recipes, adding flavor to pickled vegetables, brines, and marinades.
  • Baking: Ground coriander can be used in baking, particularly in bread and dessert recipes, to add a subtle depth of flavor.

2. Medicinal Uses

  • Digestive Aid: Coriander seeds have been traditionally used to aid digestion. They lessen gas, bloating, and other digestive problems. A tea made from coriander seeds is often consumed for its digestive benefits.
  • Anti-inflammatory Properties: Coriander has anti-inflammatory properties, making it useful in treating conditions like arthritis and other inflammatory diseases. Consuming coriander can help reduce inflammation in the body.
  • Blood Sugar Regulation: Some studies suggest that coriander can help in regulating blood sugar levels, making it beneficial for individuals with diabetes or those at risk of developing the condition.
  • Antioxidant Benefits: Coriander is rich in antioxidants, which help in protecting the body against oxidative stress and free radical damage. This can contribute to overall health and may reduce the risk of chronic diseases.
  • Cholesterol Management: Coriander has been shown to help lower LDL (bad) cholesterol levels while increasing HDL (good) cholesterol, promoting better heart health.

3. Cosmetic and Aromatherapy Uses

  • Skincare: Coriander has antimicrobial and anti-inflammatory properties, making it beneficial in skincare. It can be used in face masks, lotions, and creams to help soothe the skin and reduce acne or irritation.
  • Essential Oil: Coriander essential oil is used in aromatherapy for its calming and relaxing effects. It can also be added to massage oils for its warming properties, helping to relieve muscle pain and tension.

4. Cultural and Ritual Uses

  • Traditional Medicine: In many cultures, coriander has been used in traditional medicine for centuries to treat a variety of ailments, from digestive issues to colds and flu.
  • Spiritual Rituals: In some cultures, coriander is used in spiritual and religious rituals due to its believed protective and cleansing properties.

5. Preservation and Storage

  • Drying and Freezing: Fresh coriander leaves can be dried or frozen to preserve their flavor for later use. Dried coriander retains its flavor well and can be crumbled into dishes as needed.
  • Oil and Vinegar Infusion: Coriander seeds can be infused in oils or vinegar to create flavorful condiments that can be used in cooking or as dressings.

Coriander is an incredibly versatile herb that can be used in a multitude of ways, from enhancing the flavor of your favorite dishes to providing medicinal benefits. Whether you’re using the fresh leaves or the seeds, incorporating coriander into your diet and daily routine can offer numerous health advantages and culinary delights.

How to Grow and Care Tips for Indoor Parsley

Parsley, scientifically known as Petroselinum crispum, is more than just a garnish that adds a pop of green to your plate. This humble herb, often underestimated, holds a treasure trove of nutritional benefits, culinary versatility, and even medicinal properties.

Parsley has a fascinating history that dates back over 2,000 years. Native to the Mediterranean region, this herb was revered by the ancient Greeks and Romans not only for its culinary uses but also for its symbolic and medicinal significance. The Greeks considered parsley sacred. It used to crown winners in athletic competitions, while the Romans used it as a breath freshener and digestive aid. Over time, parsley spread across Europe and eventually the world, becoming a staple in a variety of cuisines.

Types of Parsley

There are two main types of parsley commonly used in cooking: curly-leaf parsley (Petroselinum crispum) and flat-leaf parsley (Petroselinum crispum var. neapolitanum), also known as Italian parsley.

  1. Curly-Leaf Parsley: This type is easily recognizable by its tightly curled leaves. It is often used as a garnish due to its attractive appearance, but it also adds a mild flavor to dishes.
  2. Flat-Leaf Parsley: Also known as Italian parsley, this variety has broader, flat leaves and is favored by chefs for its more robust flavor. It’s often used in cooking for its ability to hold up well under heat.

 Parsley
Parsley

Care

Growing parsley (Petroselinum crispum) indoors is an excellent way to enjoy fresh herbs year-round. This versatile herb, often seen as a garnish, is packed with nutrients and can easily thrive in a home environment with the right care. Here’s a comprehensive guide on how to grow and care for parsley indoors, ensuring a healthy, productive plant that will enhance your culinary creations.

1. Choosing the Container

Parsley has deep roots, so it’s important to choose a container that is at least 6-8 inches deep. A pot with good drainage is essential to prevent water from sitting in the soil, which can lead to root rot. If you’re growing multiple parsley plants, consider a larger container or several small pots, giving each plant enough space to grow.

2. Soil Requirements

Parsley thrives in well-draining, fertile soil. A high-quality potting mix with added organic matter, such as compost, works best. The soil should be light and airy, allowing roots to breathe. If you find your soil is too heavy, mix in some perlite or sand to improve drainage.

3. Planting Parsley

You can start parsley indoors from seeds or seedlings.

If starting from seeds:

  • Soak the Seeds: Parsley seeds have a tough outer shell, so soaking them in warm water for 12-24 hours before planting can help speed up germination.
  • Planting Depth: Sow the seeds about 1/4 inch deep in the soil. Lightly cover with soil and water gently to keep the surface moist.
  • Germination Time: Place the pot in a warm area with indirect sunlight. Parsley seeds can take 2-4 weeks to germinate, so patience is key. Throughout this time, make sure the soil is continuously moist.

If using seedlings, transplant them into the pot at the same depth they were growing previously. Water well after planting to help them settle in.

4. Light Requirements

Parsley needs plenty of light to grow well indoors. Place your pot in a location that receives at least 6 hours of direct sunlight daily, such as a south-facing window. If natural light is insufficient, use a grow light to supplement the light exposure, keeping it on for about 12-16 hours a day.

5. Watering Your Parsley

Consistent moisture is crucial for parsley, but overwatering can be detrimental. Water the plant when the top layer of soil feels dry to the touch. Ensure that excess water drains out of the pot to avoid waterlogged soil, which can cause root rot. In dry indoor environments, consider misting the leaves occasionally to increase humidity.

6. Fertilizing Parsley

Parsley doesn’t require heavy fertilization. Feed the plant with a balanced, water-soluble fertilizer once a month during the growing season (spring through early fall). Over-fertilizing can lead to excessive leaf growth with reduced flavor, so stick to a light feeding schedule.

7. Pruning and Harvesting

Regular pruning promotes bushy growth and keeps the plant from becoming lanky. Start harvesting when the parsley is about 6 inches tall. The inner leaves should continue to grow after the outer leaves are chopped off at the base. Avoid cutting more than one-third of the plant at a time to ensure continued growth and productivity.

8. Dealing with Pests and Diseases

Indoor parsley is generally free from pests, but it can occasionally attract aphids, spider mites, or whiteflies. To manage these pests, rinse the leaves with water or use a mild insecticidal soap. Ensure good air circulation around the plant to prevent fungal diseases, which can occur in overly humid or poorly ventilated environments.

9. Winter Care

Parsley can slow down its growth during the winter due to reduced light and cooler indoor temperatures. To maintain healthy growth, continue providing as much light as possible, either through natural sunlight or grow lights. Reduce watering slightly, as the plant’s water needs decrease during this period.

10. Repotting and Long-Term Care

As parsley grows, it may outgrow its pot, requiring repotting into a larger container. Choose a pot that is 2-3 inches wider in diameter than the present one, and use new potting soil. Repotting is best done in early spring when the plant starts its active growth phase.

Parsley is a biennial plant, meaning it typically lives for two years. In its second year, it will produce flowers and seeds. To extend the plant’s life, you can remove the flower stalks as they appear. However, after the second year, the plant may lose its vigor, and it’s best to start new plants from seeds.

Uses

Parsley (Petroselinum crispum) is a highly versatile herb that can be used in a wide range of culinary and non-culinary applications. Here’s a look at the various ways you can incorporate parsley into your daily life:

1. Culinary Uses

  • Garnish: Parsley is often used as a garnish to add a fresh, vibrant touch to dishes. Whether sprinkled over pasta, soups, salads, or roasted vegetables, it enhances the visual appeal and adds a subtle flavor.
  • Flavoring Agent: Flat-leaf parsley (Italian parsley) is particularly valued for its robust flavor, making it a key ingredient in many recipes. It can be chopped and added to sauces, dressings, and marinades to enhance their taste.
  • Herb Blends: Parsley is a common ingredient in herb blends like bouquet garni, fines herbes, and gremolata. These blends are used to flavor stews, soups, and braised dishes.
  • Salads: Parsley is a primary ingredient in some salads, such as the Middle Eastern tabbouleh, where it’s combined with bulgur wheat, tomatoes, onions, and a lemony dressing.
  • Chimichurri Sauce: This vibrant green sauce from Argentina is made with parsley, garlic, vinegar, and olive oil. It’s typically served with grilled meats and adds a fresh, tangy flavor.
  • Smoothies and Juices: Parsley can be added to green smoothies and juices for an extra boost of nutrients and a refreshing taste. It pairs well with fruits and other greens.
  • Herb Butter: Mix chopped parsley with softened butter to create a flavorful herb butter. This can be used to enhance the taste of grilled meats, vegetables, or spread on bread.

2. Medicinal Uses

  • Digestive Aid: Parsley has been traditionally used to support digestion. It can help alleviate bloating and indigestion when consumed as a tea or added to meals.
  • Breath Freshener: Chewing on fresh parsley leaves can help freshen breath, thanks to its natural antibacterial properties. This is particularly useful after consuming garlic or onions.
  • Detoxification: Parsley is a natural diuretic, which means it helps flush out excess fluids and toxins from the body. Drinking parsley tea or adding it to detox smoothies can support kidney function and overall detoxification.
  • Anti-Inflammatory Properties: The antioxidants and volatile oils in parsley, such as myristicin and eugenol, have anti-inflammatory effects. Consuming parsley regularly may help reduce inflammation in the body.

3. Cosmetic Uses

  • Skin Tonic: Parsley is rich in vitamins A and C, which are beneficial for skin health. You can make a parsley-infused toner by steeping parsley leaves in hot water, then using the cooled liquid as a facial rinse to help soothe and refresh the skin.
  • Hair Care: Parsley can also be used in hair care. Boil parsley leaves in water, strain, and use the cooled liquid as a final rinse after shampooing. This is said to promote hair growth and add shine to the hair.

4. Decorative Uses

  • Centerpieces and Bouquets: Fresh parsley sprigs can be used in floral arrangements or as part of a centerpiece to add a touch of greenery. Its curly leaves are particularly decorative.
  • Herb Gardens: Parsley is a great addition to indoor and outdoor herb gardens. It not only provides fresh herbs for cooking but also adds greenery and texture to garden spaces.

5. Environmental Uses

  • Companion Planting: Parsley is often used in companion planting to benefit nearby plants. It attracts beneficial insects like hoverflies and ladybugs, which help control pests in the garden.
  • Pet Care: Parsley can be used to freshen your pet’s breath. A small amount of finely chopped parsley can be added to your dog’s food as a natural breath freshener.

Health Benefits of Parsley

Parsley offers a range of health benefits that make it worth incorporating into your daily diet:

  1. Supports Immune Function: The high vitamin C content in parsley helps boost the immune system, aiding in the fight against infections and illnesses.
  2. Promotes Bone Health: With its rich vitamin K content, parsley plays a crucial role in maintaining strong bones and preventing bone-related diseases like osteoporosis.
  3. Aids Digestion: Parsley has been traditionally used to soothe digestive issues. Its natural enzymes and fiber content can help relieve bloating and support a healthy digestive system.
  4. Detoxifies the Body: Parsley acts as a natural diuretic, helping to flush out excess fluids and toxins from the body, supporting kidney function.