How to Cultivate and Care for Indoor Mint Plants

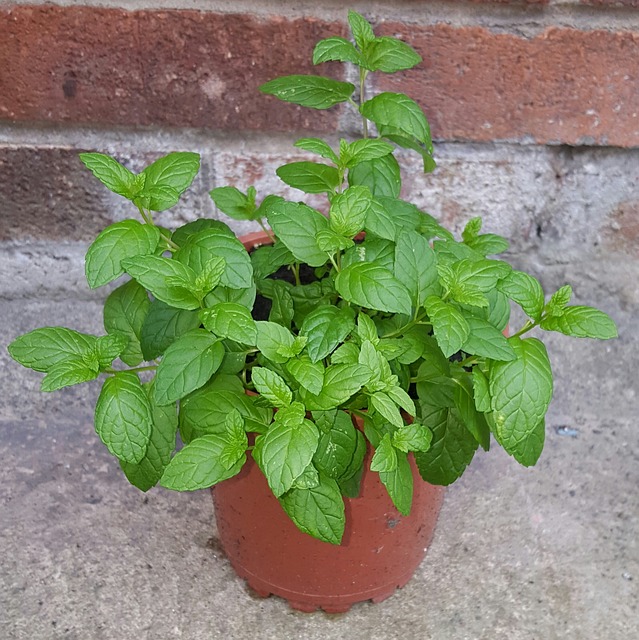
Mint (Mentha spp.)

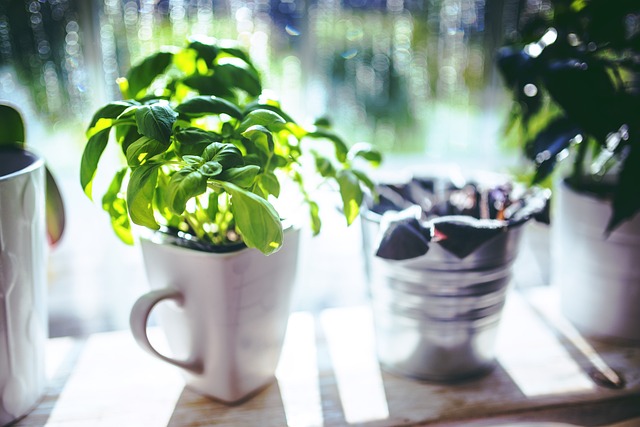
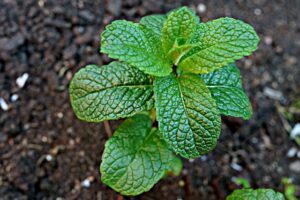
Mint, scientifically known as Mentha spp., is a genus of aromatic herbs that belong to the Lamiaceae family. Renowned for its refreshing fragrance and cooling sensation, mint has been cherished for centuries across various cultures for its culinary, medicinal, and aromatic properties. Mint is a hardy and versatile plant that thrives in a variety of environments, making it an excellent choice for indoor gardening. Let’s explore the multifaceted benefits and uses of this versatile herb.

Common Types of Mint (Mentha spp.)

  1. Peppermint (Mentha × piperita)
    • Strong, cooling flavor due to high menthol content.
    • Used in teas, candies, and medicinal products.
  2. Spearmint (Mentha spicata)
    • Milder, sweeter flavor.
    • Popular in cooking, especially in salads and beverages like mojitos.
  3. Chocolate Mint (Mentha × piperita ‘Chocolate’)
    • Subtle chocolate aroma.
    • Great for desserts and flavored teas.
  4. Apple Mint (Mentha suaveolens)
    • Mild, fruity flavor with hints of apple.
    • Often used in salads and teas.
  5. Pineapple Mint (Mentha suaveolens ‘Variegata’)
    • Variegated leaves with a subtle pineapple scent.
    • Attractive as an ornamental plant and used in culinary dishes.

These varieties offer diverse flavors and aromas, making mint a versatile herb for various uses.
Mint (Mentha spp.)
Mint (Mentha spp.)


Care

Growing mint (Mentha spp.) indoors is a delightful and practical way to keep fresh, aromatic herbs at your fingertips year-round. Mint is a hardy, fast-growing plant that requires minimal care, making it an excellent choice for both beginner and experienced gardeners. Here’s a comprehensive guide to help you successfully grow and care for mint indoors.

1. Choosing the Right Container

Mint spreads rapidly, so it’s important to plant it in a container to prevent it from overtaking other plants. Choose a pot that is at least 8-10 inches wide and deep, with drainage holes at the bottom. Waterlogging can cause root rot, thus it’s imperative to have proper drainage to avoid this problem.

2. Soil Requirements

Mint thrives in well-draining potting mix. A good-quality, organic potting soil with a pH of 6.0 to 7.0 (slightly acidic to neutral) is ideal. You can improve drainage by mixing in some perlite or sand. Mint is not particularly fussy about soil quality, but it benefits from a nutrient-rich mix.

3. Light Conditions

Mint loves bright, indirect sunlight. Place your mint plant near a south-facing window, where it will receive 4-6 hours of sunlight every day. If your home doesn’t get enough natural light, consider using a grow light to provide the necessary illumination. Avoid placing the plant in direct sunlight, since this might scorch the leaves.

4. Watering

Consistent moisture is key to healthy mint plants, but they don’t like to sit in water. Water your mint plant regularly to keep the soil evenly moist, but not soggy. During the growing season (spring and summer), you may need to water more frequently, especially if the indoor air is dry. As the plant’s growth slows down in the winter, watering should be reduced.

5. Temperature and Humidity

Mint prefers a temperature range of 65-70°F (18-21°C) during the day, with slightly cooler temperatures at night. It can tolerate temperatures as low as 55°F (13°C) but should be kept away from frost and cold drafts. Mint enjoys moderate to high humidity, so consider misting the plant occasionally or using a humidifier, especially during dry winter months.

6. Fertilizing

Mint is a relatively low-maintenance plant when it comes to feeding. Fertilize your indoor mint once a month during the growing season with a balanced, water-soluble fertilizer. Be cautious not to over-fertilize, as this can lead to leggy growth and reduced flavor intensity. Organic options like compost tea or diluted fish emulsion are also effective.

7. Pruning and Harvesting

Regular pruning is required to keep your mint plant healthy and bushy. Trim the tips of the stems regularly to encourage new growth and prevent the plant from becoming leggy. When harvesting, cut the stems just above a leaf node to promote branching. You can start harvesting mint once the plant has reached 6-8 inches in height. Regular harvesting also prevents the plant from flowering, which can diminish the potency of the mint’s flavor.

8. Pest Control

Mint is generally resistant to pests, but it can occasionally attract aphids, spider mites, or whiteflies. If you notice any pests, rinse the plant with water or use an insecticidal soap. Ensure good air circulation around the plant to prevent fungal issues like powdery mildew, especially in humid environments.

9. Repotting

Mint grows quickly, and its roots can become crowded in the container. Repot your mint plant every 1-2 years to refresh the soil and give the roots more space. When repotting, you can also divide the plant to propagate new mint plants.

10. Overwintering

If you live in a region with cold winters, you may need to take extra care of your indoor mint during the colder months. Reduce watering, stop fertilizing, and keep the plant in a slightly cooler location. Mint may go dormant during winter, but it will bounce back in the spring with proper care.

Growing mint indoors is a simple and enjoyable way to ensure a fresh supply of this versatile herb year-round. With the right conditions and care, your indoor mint plant will thrive, providing you with fresh leaves for cooking, teas, or just enjoying its delightful aroma. Whether you’re a seasoned gardener or just starting, mint is an excellent choice for indoor gardening.

Uses

Mint is a versatile herb that offers a wide range of uses in culinary, medicinal, and household applications. Here are some of the most common ways to use mint:

1. Culinary Uses
  • Flavoring Beverages: Mint is a popular ingredient in both hot and cold beverages. It’s commonly used to make mint tea, mojitos, and iced tea. Mint leaves can also be muddled or infused in water, lemonade, and cocktails for a refreshing twist.
  • Garnishing Dishes: Fresh mint leaves are often used as a garnish for desserts, salads, soups, and main courses. They add a pop of color and a burst of fresh flavor to various dishes.
  • Cooking: Mint is widely used in cooking, especially in Mediterranean, Middle Eastern, and Indian cuisines. It is a key ingredient in dishes like tabbouleh, tzatziki, and mint chutney. Mint pairs well with lamb, yogurt, fruits, and vegetables, adding a cool, aromatic flavor to meals.
  • Baking: Mint is a popular flavoring in desserts, including cookies, cakes, brownies, and ice creams. Chocolate and mint are a classic combination in many sweet treats.
2. Medicinal Uses
  • Digestive Aid: Mint is well-known for its ability to ease the digestive tract. Mint tea is commonly consumed to alleviate indigestion, bloating, and gas. Peppermint oil capsules are also used to treat irritable bowel syndrome (IBS).
  • Respiratory Relief: The menthol in mint acts as a natural decongestant, helping to relieve symptoms of colds, sinus infections, and allergies. Inhaling steam infused with mint can help clear nasal passages.
  • Headache Relief: Mint has a cooling effect that can help relieve headaches and migraines. Applying diluted peppermint oil to the temples and forehead is a popular natural remedy for tension headaches.
  • Skin Care: Mint has antibacterial and anti-inflammatory properties, making it useful in treating skin conditions like acne. Mint-infused water or oil can be applied to the skin to soothe irritation and reduce redness.
3. Aromatherapy and Stress Relief
  • Relaxation: The calming aroma of mint is used in aromatherapy to reduce stress, anxiety, and mental fatigue. Diffusing mint essential oil or adding it to a bath can create a relaxing atmosphere.
  • Focus and Alertness: Mint’s refreshing scent can also help improve focus and mental clarity. Inhaling the aroma or using mint-scented products can provide an energy boost and enhance concentration.
4. Household Uses
  • Natural Insect Repellent: Mint is an effective natural repellent against pests like ants, mosquitoes, and flies. Placing fresh mint leaves or mint oil around the house, particularly near windows and doors, can help keep insects at bay.
  • Cleaning: Mint has antibacterial properties that make it a great addition to homemade cleaning solutions. Mint-infused vinegar or essential oil can be used to clean and disinfect surfaces while leaving a fresh scent.
  • Air Freshener: Mint can be used to freshen the air in your home. You can create a homemade air freshener by mixing mint essential oil with water in a spray bottle or by simply placing fresh mint leaves in a bowl of water.
5. Gardening
  • Companion Planting: Mint can be planted alongside other garden plants to repel pests like aphids and cabbage moths. However, due to its aggressive growth, it’s best to plant mint in containers to prevent it from overtaking other plants.
  • Ground Cover: Certain mint varieties, like Corsican mint, are used as ground cover in gardens. They create a dense, aromatic carpet that can help suppress weeds and reduce soil erosion.

Mint is an incredibly versatile herb with a multitude of uses, ranging from enhancing the flavor of your favorite dishes to providing natural remedies for common ailments. Whether you’re cooking, caring for your skin, or freshening up your home, mint is a go-to herb that offers both practical and aromatic benefits.

Nurturing Indoor Thymus Vulgaris: Growth and Care Guide

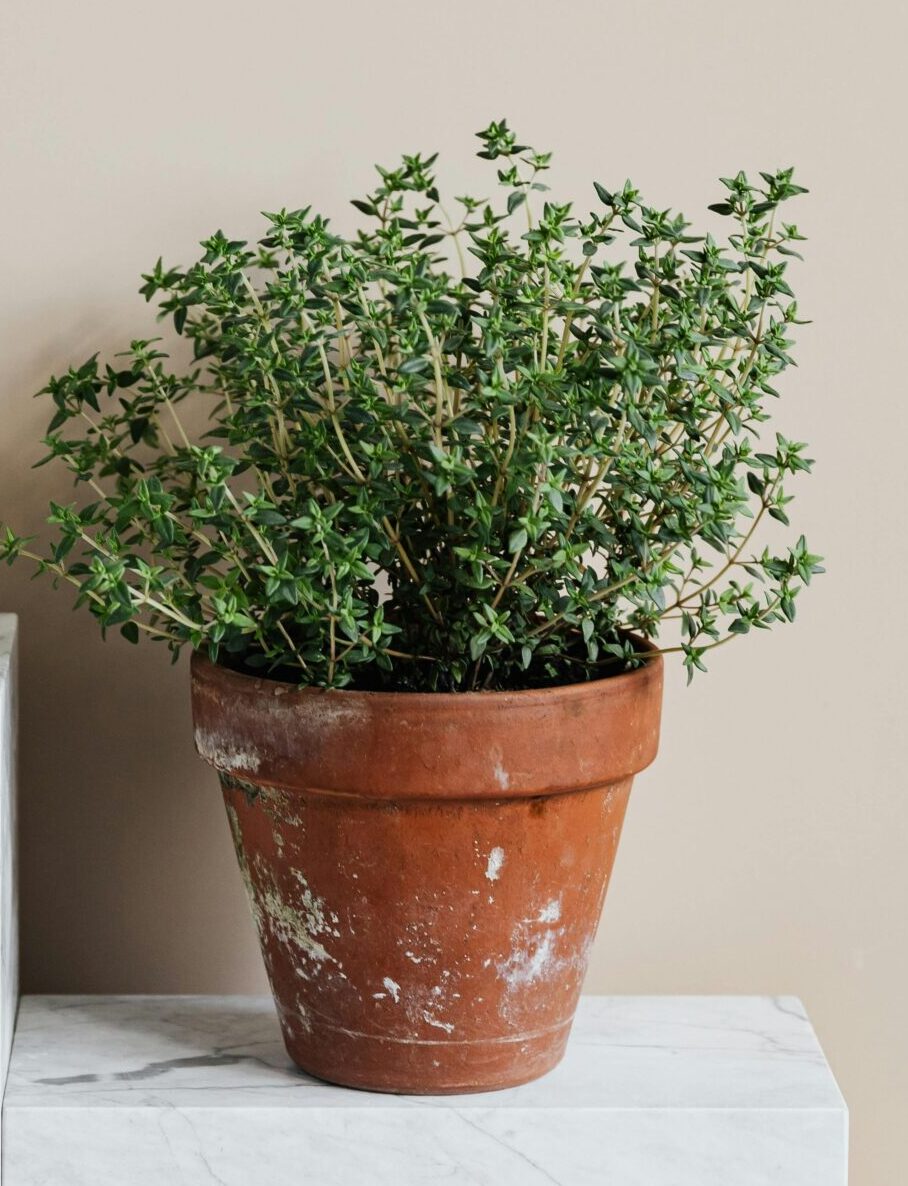
Thyme (Thymus vulgaris)

Thyme (Thymus vulgaris) is a versatile and aromatic herb that has been cherished for centuries in culinary and medicinal practices. Native to the Mediterranean region, thyme is not only known for its distinctive flavor but also for its resilience and adaptability in various climates. This article will explore the cultivation, growth, care, and uses of this remarkable herb.

Types of Thyme (Thymus vulgaris)

1. Common Thyme (Thymus vulgaris)

2. Lemon Thyme (Thymus x citriodorus)

3. Creeping Thyme (Thymus serpyllum)

4. Woolly Thyme (Thymus pseudolanuginosus)

5. Caraway Thyme (Thymus herba-barona)

6. Orange Thyme (Thymus fragrantissimus)

7. Silver Thyme (Thymus vulgaris ‘Argenteus’)

8. Wild Thyme (Thymus polytrichus)

9. French Thyme (Thymus vulgaris ‘Narrow-Leaf French’)

10. German Thyme (Thymus vulgaris ‘German Winter’)


thyme (thymus vulgaris)

Cultivation

Climate and soil requirements

Thyme thrives in a warm, sunny environment and prefers well-drained soil with a pH ranging from 6.0 to 8.0. It’s a drought-tolerant herb, making it an ideal choice for gardens in arid regions. Thyme can be grown both in the ground and in containers, making it versatile for different gardening spaces.

Planting Thyme

Thyme can be grown from seeds, cuttings, or transplants. For those starting from seeds, it’s important to plant them indoors 6–10 weeks before the last frost date. The seeds should be lightly pressed into the soil but not covered, as they require light to germinate. Once the seedlings are strong enough and the danger of frost has passed, they can be transplanted outdoors, spaced about 12 to 24 inches apart to allow room for growth.

Cuttings can also be taken from mature thyme plants. Simply snip a 4-6 inch piece from a healthy plant, remove the lower leaves, and plant it in well-draining soil. Keep the cutting moist until roots develop, usually within a few weeks.

Growth and Care

Watering and Feeding

Thyme is a low-maintenance herb, requiring minimal watering once established. Overwatering can cause root rot, so allow the soil to dry out between watering sessions. A light feeding with a balanced, all-purpose fertilizer once or twice during the growing season will suffice to keep thyme healthy and productive.

Pruning and Harvesting

Regular pruning promotes bushier growth and keeps the plant from becoming woody. After the thyme has bloomed, typically in late spring or early summer, you can prune it back by about one-third to promote fresh growth. Harvesting thyme is simple; snip sprigs as needed, ideally in the morning when the essential oils are most concentrated. Thyme can be used fresh or dried for later use.

Common Pests


  1. Aphids:
    • Symptoms: Leaves curl, wilt, or yellow; sticky honeydew.
    • Control: Spray with water, use insecticidal soap, or introduce ladybugs.
  2. Spider Mites:
    • Symptoms: yellowing or speckling of leaves, possible webbing.
    • Control: Increase humidity, spray with water, or use neem oil.
  3. Root-Knot Nematodes:
    • Symptoms: stunted growth, yellowing leaves, galled roots.
    • Control: Rotate crops, use resistant varieties, and solarize soil.

Common Problems


  1. Root Rot:
    • Cause: Overwatering or poorly drained soil.
    • Symptoms: Wilting, yellowing leaves, mushy roots.
    • Control: Improve drainage, reduce watering.
  2. Powdery Mildew:
    • Cause: high humidity and poor air circulation.
    • Symptoms: white, powdery coating on leaves.
    • Control: Improve air circulation; use fungicidal spray.
  3. Leaf Spot:
    • Cause: Fungal infection.
    • Symptoms: Brown or black spots on leaves.
    • Control: Remove affected leaves; apply fungicide.

By staying vigilant and addressing issues early, you can keep your thyme plants healthy and productive.

Culinary Uses

Flavoring Meats and Poultry:

Thyme is often used to season meats, especially poultry, lamb, and beef. It’s commonly included in marinades, rubs, and stuffing. Thyme pairs well with roasted chicken, grilled lamb chops, and beef stews, enhancing the savory flavors of the dish.

Enhancing Vegetables:

Thyme can be used to add flavor to a variety of vegetables, including roasted potatoes, carrots, and green beans. It’s also great in vegetable soups, sautés, and casseroles.

Soups, Stews, and Sauces:

Thyme is a staple in many soups and stews, where its earthy flavor slowly infuses into the broth. It’s also a key ingredient in sauces like bechamel, tomato sauce, and gravies.

Breads and baked goods:

Thyme can be incorporated into bread dough, biscuits, and savory muffins, adding a subtle herbal note that complements cheese and meats.

Herb Blends:

Thyme is a fundamental component of herb blends like bouquet garni, herbes de Provence, and Italian seasoning. These blends are used to season a wide range of dishes, from roasts to pasta sauces.

Infused oils and vinegars:

Thyme can be infused into oils and vinegars to create flavorful condiments. Thyme-infused olive oil is excellent for drizzling over salads, pasta, or grilled meats, while thyme vinegar can be used in dressings and marinades.

Beverages:

Thyme can be used to infuse simple syrups for cocktails and mocktails. It pairs particularly well with citrus flavors and is a great addition to lemonades and herbal teas.

Medicinal Uses

Respiratory Health:

Thyme has long been used to treat respiratory ailments like coughs, bronchitis, and colds.Thyme tea or steam inhalation can help soothe the throat and clear congestion.

Digestive Aid:

Thyme has carminative properties, meaning it can help relieve gas and bloating. Thyme tea is often consumed after meals to aid digestion.

Antiseptic and Antibacterial:

Thyme contains thymol, a natural antiseptic that can be used to treat minor cuts, wounds, and infections. Thymol is also found in some mouthwashes and toothpastes for its antibacterial properties.

Anti-inflammatory:

Thyme has anti-inflammatory properties that can be beneficial in treating conditions like arthritis and other inflammatory issues. It can be used in compresses or as an ingredient in natural ointments.

Aromatic and Cosmetic Uses

Aromatherapy:

Thyme essential oil is used in aromatherapy for its stimulating and energizing effects. It can help alleviate stress, fatigue, and depression when diffused or inhaled.

Skin Care:

Thyme’s antibacterial and antifungal properties make it useful in skin care. It can be used in homemade face washes, toners, and masks to help treat acne and prevent breakouts.

Hair Care:

Thyme is sometimes included in hair care products to help treat dandruff and promote healthy scalp conditions. A thyme-infused rinse can help cleanse the scalp and stimulate hair growth.

Household Uses

Natural Disinfectant:

Thanks to its antiseptic properties, thyme can be used to create a natural household cleaner. A thyme-based cleaning solution can disinfect surfaces without the need for harsh chemicals.

Insect Repellent:

Thyme can be used as a natural insect repellent. Its strong aroma deters pests such as mosquitoes, fleas, and moths. Thyme essential oil can be diluted and applied to the skin or used in sprays.

Potpourri and Sachets:

Dried thyme can be included in potpourri or sachets to freshen up the air in your home. Its pleasant scent is long-lasting and can be placed in closets, drawers, or bathrooms.

Ornamental Uses

Garden Borders and Ground Cover:
Thyme is often used as an ornamental plant in gardens. It can be planted along borders or used as ground cover due to its low-growing and spreading habit. Thyme also attracts pollinators like bees and butterflies.

Container Gardens:

Thyme grows well in containers, making it a perfect choice for patios, balconies, and small gardens. It can be mixed with other herbs or flowers in containers to create attractive and useful plantings.


Thyme (Thymus vulgaris) is a rewarding herb to grow, requiring minimal care while offering maximum versatility in the kitchen. Whether you’re an experienced gardener or just starting, thyme is an excellent addition to any garden. With its rich history, numerous culinary applications, and easy-growing nature, thyme continues to be a favorite herb for many around the world.

How to Care for Rosemary: Watering, Pruning, and More

Rosemary

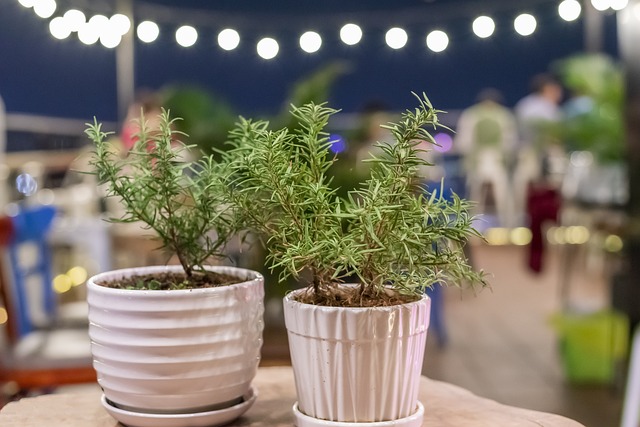
Rosemary, a fragrant evergreen herb native to the Mediterranean, is a member of the mint family Lamiaceae, which includes many other herbs. With its needle-like leaves and white, pink, purple, or blue flowers, rosemary is not only a decorative plant but also a powerhouse of health benefits and culinary uses.

Rosemary has a rich history dating back thousands of years. Ancient civilizations revered the herb for its medicinal and culinary properties. The Egyptians used rosemary in their burial rituals, believing it to have protective qualities. In ancient Greece and Rome, rosemary was a symbol of memory and fidelity. Greek scholars wore garlands of rosemary to enhance their memory during exams, and brides and grooms exchanged rosemary as a token of love and loyalty.

Characteristics

  1. Leaves: The leaves of rosemary are linear, evergreen, and resemble needles. They are dark green on the top and have a white, fuzzy underside due to the presence of trichomes (small hairs).
  2. Flowers: Rosemary flowers are typically blue but can also be white, pink, or purple. The flowers are tiny and come in clusters.
  3. Growth Habit: Rosemary can grow as a shrub, reaching up to 1-2 meters (3-6 feet) in height, depending on the variety and growing conditions. Some varieties have a trailing or creeping growth habit.
  4. Aroma: One of the defining features of rosemary is its strong, fragrant aroma, which is due to the essential oils present in the leaves and stems.

Rosemary
Rosemary


Classification

Kingdom: Plantae

Subkingdom: Tracheobionta

Superdivision: Spermatophyta

Division: Magnoliophyta (Angiosperms)

Class: Magnoliopsida (Dicotyledons)

Subclass: Asteridae

Order: Lamiales

Family: Lamiaceae (Mint Family)

Genus: Salvia

Species: Salvia rosea

Types of Rosemary

    1. Tuscan Blue
      • Description: Tall, upright growth with dark green leaves and blue flowers.
      • Uses: culinary (meats, vegetables), ornamental.
    2. Arp
      • Description: Cold-hardy, light green leaves, pale blue flowers.
      • Uses: Suitable for cooler climates, culinary.
    3. Spice Island
      • Description: Intense flavor, dark green leaves, blue flowers.
      • Uses: Strong seasoning for meats and sauces.
    4. Prostratus (creeping rosemary)
      • Description: Low-growing, spreading habit, pale blue flowers.
      • Uses: ground cover, containers, culinary.
    5. Blue Boy
      • Description: Dwarf variety, tiny dark green leaves, blue flowers.
      • Uses: small gardens, containers, culinary.
    6. Golden Rain
      • Description: Golden-yellow variegated foliage, upright growth, blue flowers.
      • Uses: ornamental, culinary.
    7. Madeline Hill
      • Description: cold-hardy, green leaves, blue flowers.
      • Uses: Suitable for colder regions, culinary.
    8. Gorizia
      • Description: Large leaves, robust growth, blue flowers.
      • Uses: culinary, ornamental.
    9. Irene
      • Description: Trailing variety, dark green leaves, vibrant blue flowers.
      • Uses: ground cover, containers, culinary.

    These varieties offer different growth habits, flavors, and hardiness levels, making it easy to choose the right rosemary type for your specific needs and climate.

Prevention Tips

  1. Regular Inspection: Keep a regular eye out for early indications of pests and illnesses in your rosemary plants.
  2. Sanitation: Keep the area around your plants clean by removing dead leaves and debris, which can harbor pests and diseases.
  3. Quarantine: Isolate new plants for a few weeks to ensure they are not carrying pests or diseases before introducing them to your garden.
  4. Proper Watering: Water rosemary plants at the base and avoid wetting the foliage to reduce the risk of fungal diseases.

Care 

Rosemary is a hardy and resilient herb, but proper care is essential to ensure it thrives and remains healthy. Here are detailed guidelines on how to care for rosemary, from planting to harvesting.

Planting

Soil Requirements

  • Type: Rosemary prefers well-draining soil with a sandy or loamy texture.
  • pH Level: The ideal soil pH for rosemary is between 6.0 and 7.5.
  • Preparation: enrich the soil with compost or organic matter before planting to improve drainage and nutrient content.
    Location
  • Sunlight: Choose a sunny location where the plant will receive at least 6-8 hours of direct sunlight daily.
  • Space: Provide adequate space between plants (about 2-3 feet apart) to allow for air circulation and prevent overcrowding.

Watering

Frequency

  • New Plants: Water regularly until the plant is established.
  • Established Plants: Water deeply but infrequently, allowing the soil to dry out between watering sessions. Overwatering can lead to root rot.

Method

  • Avoid Overhead Watering: Water at the base of the plant to keep the foliage dry and prevent fungal diseases.
  • Check soil moisture: Stick your finger up to the second knuckle in the ground. If the soil seems dry, it is time to water.

Pruning

Timing

  • Frequency: Prune rosemary regularly to encourage bushy growth and prevent legginess.
  • Best Time: Prune in the spring after the last frost and in the summer after the flowering period.

Method

  • Tools: To ensure clean cuts, use sharp, clean pruning shears.
  • Technique: Cut back about one-third of the plant’s height, focusing on removing dead or woody stems. Avoid cutting into old wood since new growth may not appear in these locations.

Fertilizing

Type

  • Organic Fertilizer: Use a balanced, slow-release organic fertilizer to provide essential nutrients.
  • Compost: Incorporate compost into the soil to improve fertility and structure.

Frequency

  • Growing Season: Fertilize in the spring and again in midsummer.
  • Avoid Over-Fertilizing: Excessive fertilization can lead to lush foliage with reduced aromatic qualities.

Harvesting

Timing

  • Best Time: Harvest rosemary in the morning after the dew has dried but before the heat of the day.
  • Frequency: Regularly trim the plant to encourage new growth and prevent it from becoming woody.

Method

  • Tools: Use sharp scissors or pruning shears.
  • Technique: Cut stems back to just above a pair of leaves, ensuring not to remove more than one-third of the plant at a time.

Winter Care

Outdoor Plants

  • Mulching: To protect the plant’s roots from freezing weather, apply a layer of mulch around its base.
  • Covering: Use frost cloths or burlap to cover the plant during extreme cold spells.

Indoor Plants

  • Location: Place rosemary in a sunny window where it will receive at least 6 hours of sunlight daily.
  • Humidity: Increase humidity around the plant by misting or placing a humidifier nearby.
  • Watering: Use minimal water, letting the soil dry up in between applications.

Proper care of rosemary involves understanding its needs for sunlight, water, soil, and regular maintenance. By following these guidelines, you can ensure your rosemary plant remains healthy, productive, and a delightful addition to your garden or home. Whether you are growing it for culinary purposes or as an ornamental plant, rosemary is a versatile herb that rewards careful attention with robust growth and aromatic leaves.

Pest and Disease Management

Common Pests

  • Aphids: Use insecticidal soap or introduce beneficial insects like ladybugs to control aphids.
  • Spider Mites: Increase humidity around the plant and use insecticidal soap if necessary.
  • Whiteflies: Use yellow sticky traps and insecticidal soap to manage whiteflies.

Common Diseases

  • Powdery Mildew: Maintain proper air circulation and avoid overhead watering. Fungicides can be used if necessary.
  • Root Rot: Avoid overwatering and ensure proper drainage. If root rot occurs, remove affected parts and replant in well-draining soil.


Uses

Rosemary is a multifunctional herb with a wide range of uses, from enhancing culinary creations to providing medicinal benefits and contributing to personal care routines. Here’s an in-depth look at the various ways you can use rosemary:

Culinary Uses

Flavoring Dishes

  • Meats: rosemary is a perfect complement to lamb, chicken, pork, and beef. It can be used fresh or dried as a rub, in marinades, or as a seasoning during cooking.
  • Vegetables: Adds depth to roasted vegetables, potatoes, and root vegetables. Sprinkle chopped rosemary leaves over veggies before roasting or grilling.
  • Soups and Stews: Enhances the flavor of soups, stews, and casseroles. Add sprigs of rosemary during cooking and remove before serving.
  • Breads and Pastries: Infusing rosemary into bread dough or focaccia gives a unique, fragrant twist to baked goods. Rosemary butter and rosemary-infused oils are also popular.
  • Herbal Teas: Fresh or dried rosemary can be steeped in hot water to make a refreshing and health-boosting tea. For extra taste, add honey and lemon.

Preservation and Infusion

  • Herb Vinegars and Oils: Infuse rosemary into vinegar or olive oil for a flavorful addition to salads, marinades, and dressings.
  • Salt and Sugar Infusion: Mix dried rosemary with salt or sugar to create flavored seasonings for savory or sweet dishes.

Medicinal Uses

Cognitive Health

  • Memory and Concentration: Rosemary is believed to improve memory and concentration. Inhaling rosemary essential oil or incorporating it into your diet can help enhance cognitive performance.
  • Aromatherapy: Diffusing rosemary essential oil or using it in massage blends can provide mental clarity and reduce stress.

Digestive Aid

  • Carminative Properties: Rosemary helps relieve digestive issues like bloating, gas, and indigestion. Drinking rosemary tea or adding it to your diet can support digestive health.

Anti-inflammatory and antioxidant

  • Anti-inflammatory: Rosemary’s active compounds, such as rosmarinic acid and carnosic acid, have anti-inflammatory properties that help reduce inflammation in the body.
  • Antioxidant: These compounds also act as antioxidants, protecting cells from damage caused by free radicals.
Hair and Skin Health
  • Hair Growth: Rosemary oil is often used in hair care products to stimulate hair growth and improve scalp health.It can be utilized in DIY hair treatments or added to shampoos.
  • Skin Care: Rosemary’s antimicrobial properties make it beneficial for treating acne and other skin conditions. It can be used in facial steams, toners, and cleansers.

Personal Care and Aromatherapy

Essential Oils

  • Diffusers: Add a few drops of rosemary essential oil to a diffuser to purify the air, uplift the mood, and promote mental clarity.
  • Massage Blends: Combine rosemary essential oil with a carrier oil (like jojoba or almond oil) for a refreshing and invigorating massage blend.

Homemade Products

  • Soaps and Lotions: Infuse rosemary into homemade soaps, lotions, and balms for its fragrance and skin benefits.
  • Bath Salts: Mix dried rosemary leaves with Epsom salts for a soothing and aromatic bath soak.
    Ornamental and household uses
Decorative Plant
  • Gardens: Rosemary can be grown as a decorative plant in gardens and landscapes. Its fragrant foliage and eye-catching blossoms make it a popular option.
  • Indoor Plants: Potted rosemary plants can be kept indoors on sunny windowsills for both decoration and easy access to fresh herbs.
    Natural Pest Repellent
  • Insect Repellent: Rosemary can be used to repel insects. Planting rosemary near doorways or using it in sachets can help keep pests at bay.
  • Pet Care: Rosemary can be used in homemade pet shampoos to repel fleas and improve coat health.
    Culinary Recipes Featuring Rosemary

Rosemary Chicken

  • Ingredients: chicken breasts, fresh rosemary, garlic, olive oil, lemon juice, salt, and pepper.
  • Method: Marinate the chicken with chopped rosemary, minced garlic, olive oil, lemon juice, salt, and pepper. Grill or bake until cooked through.

Rosemary-roasted potatoes

  • Ingredients: potatoes, fresh rosemary, olive oil, salt, and pepper.
  • Method: Toss cubed potatoes with olive oil, chopped rosemary, salt, and pepper. Roast in the oven at 400°F (200°C) until golden and crispy.

Rosemary Bread

  • Ingredients: bread flour, yeast, water, olive oil, salt, and fresh rosemary.
  • Method: Mix flour, yeast, salt, chopped rosemary, and water to form a dough. Knead, allow to rise, form, and bake till golden brown.

Rosemary’s versatility makes it a valuable addition to any home, whether used for cooking, health, personal care, or decoration. By incorporating rosemary into your daily routine, you can enjoy its numerous benefits and enhance various aspects of your life.

Complete Guide to Basil Grow and Care for Beginners

Basil 

Basil (Ocimum basilicum), often referred to as the “king of herbs,” is a fragrant and flavorful plant widely used in culinary arts, particularly in Italian and Mediterranean cuisine. Beyond its culinary uses, basil is also valued for its medicinal properties and its role in traditional medicine. Basil has a rich history that spans several millennia. Native to tropical regions of Central Africa and Southeast Asia, basil has been cultivated for over 5,000 years.

It is believed that basil was first domesticated in India and then spread to other parts of Asia and the Mediterranean. The herb was highly prized in ancient Egypt, Greece, and Rome, not only for its culinary uses but also for its medicinal and ritualistic significance. This article explores the history, varieties, cultivation, and benefits of basil, providing a thorough understanding of this versatile herb.


Basil 
Basil


Varieties of Basil

Basil (Ocimum basilicum) is a beloved herb with a rich history and diverse range of varieties. Each type of basil offers unique flavors, aromas, and appearances, making it a versatile addition to various culinary traditions. Here, we explore some of the most popular and distinctive varieties of basil.

1. Sweet Basil (Ocimum basilicum)
  • Flavor Profile: Sweet and slightly peppery
  • Uses: Predominantly used in Italian cuisine, sweet basil is the star ingredient in pesto, Caprese salad, and various pasta dishes. Its large, bright green leaves are aromatic and flavorful, making it a versatile choice for many recipes.
2. Thai Basil (Ocimum basilicum var. thyrsiflora)
  • Flavor Profile: Anise-like with a hint of spice
  • Uses: Essential in Southeast Asian cuisines, particularly Thai and Vietnamese dishes. It holds up well under high heat, making it perfect for stirfries, curries, and soups. Thai basil’s narrow, dark green leaves and purple stems add visual appeal to dishes.
3. Holy Basil (Ocimum tenuiflorum or Ocimum sanctum)
  • Flavor Profile: Peppery and slightly bitter
  • Uses: Also known as Tulsi, holy basil is revered in Indian culture for its medicinal properties. It’s commonly used in herbal teas and traditional Ayurvedic medicine. The leaves are smaller and more delicate compared to sweet basil, with a distinctive aroma.
4. Lemon Basil (Ocimum × citriodorum)
  • Flavor Profile: Citrusy with a hint of spice
  • Uses: The fresh, lemony flavor of lemon basil is perfect for salads, seafood dishes, and desserts. Its light green leaves are often smaller and narrower than sweet basil leaves, adding a bright, citrusy note to culinary creations.
5. Purple Basil (Ocimum basilicum ‘Purpurascens’)
  • Flavor Profile: Slightly spicy and clove-like
  • Uses: With its striking dark purple leaves, purple basil is not only a flavorful addition to dishes but also a decorative one. It’s used in salads, as a garnish, and in infused oils and vinegars. Its color makes it a visually appealing addition to any dish.
6. Genovese Basil (Ocimum basilicum ‘Genovese’)
  • Flavor Profile: Sweet and aromatic
  • Uses: This variety is closely related to sweet basil and is the preferred choice for making traditional Italian pesto. The leaves are larger and darker green, with a slightly stronger flavor.
7. Greek Basil (Ocimum basilicum var. minimum)
  • Flavor Profile: Sweet and mild
  • Uses: Greek basil is known for its small, densely packed leaves and compact growth habit. It’s often used in Mediterranean dishes and as an ornamental plant. Its mild flavor makes it suitable for a variety of culinary applications.
8. Cinnamon Basil (Ocimum basilicum ‘Cinnamon’)
  • Flavor Profile: Spicy with cinnamon undertones
  • Uses: Cinnamon basil adds a unique twist to both sweet and savory dishes. It’s used in fruit salads, baked goods, and spicy dishes. The plant is characterized by its dark purple stems and veined leaves.
9. Globe Basil (Ocimum basilicum ‘Spicy Globe’)
  • Flavor Profile: Sweet and spicy
  • Uses: This dwarf variety forms a compact, bushy plant with small, aromatic leaves. It’s ideal for container gardening and can be used in salads, soups, and as a garnish.
10. African Blue Basil (Ocimum kilimandscharicum × basilicum, ‘Dark Opal’)
  • Flavor Profile: Camphor-like with a hint of spice
  • Uses: Known for its ornamental beauty and aromatic leaves, African blue basil is used more for its decorative qualities and aromatic properties than for culinary purposes. The leaves have a pungent, spicy aroma.

The diverse varieties of basil offer a wide range of flavors and uses, from the sweet and peppery notes of sweet basil to the citrusy zest of lemon basil and the spicy warmth of cinnamon basil. Whether you’re cooking up a classic Italian dish, adding flavor to a Southeast Asian recipe, or simply looking to add a decorative touch to your garden, there’s a basil variety to suit every need. By exploring the different types of basil, you can enhance your culinary creations and enjoy the rich heritage and versatility of this remarkable herb.

Caring for Basil 


Basil is a relatively easy herb to grow and care for, making it a popular choice for both novice and experienced gardeners. Proper care ensures that basil plants remain healthy, productive, and flavorful. Here are essential tips for caring for your basil plants:

1. Planting
  • Location: Choose a sunny spot with at least 6-8 hours of direct sunlight each day. Basil thrives in warm temperatures and doesn’t tolerate frost.
  • Soil: Basil prefers well-draining, nutrient-rich soil with a pH between 6.0 and 7.5. Amend the soil with compost to enhance fertility.
  • Spacing: Space plants about 12-18 inches apart to ensure good air circulation and prevent overcrowding, which can lead to diseases.
2. Watering
  • Consistency: Basil needs consistent moisture but does not like to sit in waterlogged soil. Water the plants on a regular basis so that the soil remains moist but not saturated.
  • Technique: Water the plants at their base to avoid wetting the foliage, which can lead to fungal illnesses. In the morning is best, allowing the plants to dry out during the day.
3. Fertilizing
  • Type: Use a balanced, all-purpose fertilizer or organic compost to feed your basil plants.
  • Frequency: Throughout the growing season, use a little fertilizer every 4-6 weeks. Overfertilization might result in lush foliage with less flavor.
4. Pruning and Harvesting
  • Pruning: Regularly pinch off the tops of the plants, especially before they flower, to encourage bushier growth and prevent the leaves from becoming bitter.
  • Harvesting: Begin harvesting leaves once the plant has several sets of true leaves. Harvesting regularly promotes new growth. Pick leaves from the top down, and avoid removing more than one-third of the plant at a time.
5. Growing Indoors
  • Light: Basil needs enough light to thrive indoors. Place it in a sunny window or under grow lights for 12-14 hours a day.
  • Container: Use a pot with good drainage. Ensure the container is large enough to support the plant’s root system.
  • Humidity: Basil prefers higher humidity levels. Mist the plant occasionally or place a humidifier nearby if the indoor air is dry.
6. Overwintering
  • Climate: In colder climates, basil is typically grown as an annual. To keep it alive during winter, bring it indoors before the first frost.
  • Cuttings: Take cuttings from your basil plant and root them in water or potting soil indoors to ensure you have fresh basil year-round.
7. Companion Planting
  • Good Companions: Basil grows well with tomatoes, peppers, and oregano. These plants can benefit from each other’s presence, often enhancing flavor and deterring pests.
  • Avoid: Keep basil away from plants like sage and rue, which may inhibit its growth.

By following these care tips, you can enjoy a bountiful harvest of fresh, flavorful basil throughout the growing season. Whether you’re growing basil in your garden or indoors, providing the right conditions and care will ensure your plants thrive and remain healthy. With its myriad of uses in the kitchen and its aromatic presence in the garden, basil is a valuable herb that rewards attentive care with abundant growth and vibrant flavor.

Pests and Diseases of Basil 

Basil, while relatively easy to grow, can be susceptible to various pests and diseases. Proper identification and management of these issues are crucial to maintaining healthy plants. Here is a detailed guide to the common pests and diseases that affect basil and how to manage them.

Common Pests

Aphids

  • Description: Small, soft-bodied insects that can be green, black, or gray. They form clusters on the undersides of leaves and stems.
  • Damage: Aphids suck sap from the plant, causing leaves to yellow, curl, and deform. They also exude honeydew, which can cause sooty mold.

Management:

  • To get rid of aphids, spray the plants with a forceful stream of water.
  • Use insecticidal soap or neem oil.
  • Introduce natural predators like ladybugs.

Spider Mites

  • Description: Tiny, red or yellowish mites that form webs on the undersides of leaves.
  • Damage: Spider mites suck plant juices, causing leaves to become speckled and discolored. Severe infestations lead to leaf drop.

Management:

  • Increase humidity around plants (spider mites thrive in dry conditions).
  • Use insecticidal soap or neem oil.
  • Introduce predatory mites.

Whiteflies

  • Description: Small, white, flying insects that congregate on the undersides of leaves.
  • Damage: Whiteflies suck sap from plants, causing leaves to yellow and weaken. They also create honeydew, which results in sooty mold.

Management:

  • Use yellow sticky traps to capture adults.
  • Spray with insecticidal soap or neem oil.
  • Introduce beneficial insects like parasitic wasps.

Japanese Beetles

  • Description: Metallic green beetles with coppery wings.
  • Damage: Adults feed on basil leaves, creating skeletal patterns.

Management:

  • Handpick beetles and place them in soapy water.
  • Use row covers to protect plants.
  • Apply neem oil to deter feeding.
Common Diseases

Downy Mildew

  • Description: Fungal disease causing yellowing leaves and a grayish, fuzzy growth on the undersides.
  • Conditions: Thrives in cool, moist conditions with poor air circulation.

Management:

  • Proper plant spacing ensures optimum air circulation.
  • Water the base of your plants to keep the foliage dry.
  • Remove and destroy infected leaves.
  • Apply fungicides labeled for downy mildew.

Fusarium Wilt

  • Description: Fungal disease that causes yellowing, wilting, and eventual death of plants.
  • Conditions: Often soil-borne and can persist in the soil for years.

Management:

  • Rotate crops and avoid planting basil in the same spot each year.
  • Remove and destroy infected plants.
  • Use disease-resistant varieties if available.

Root Rot

  • Description: Caused by various soil-borne fungi, leading to brown, mushy roots and stunted growth.
  • Conditions: Poorly drained, waterlogged soils.

Management:

  • Ensure good drainage and avoid overwatering.
  • Plant in well-draining soil.
  • Remove and dispose of affected plants and improve soil conditions.

Leaf Spot

  • Description: Caused by various fungi and bacteria, resulting in dark spots on leaves.
  • Conditions: Often exacerbated by high humidity and wet conditions.

Management:

  • Remove and destroy affected leaves.
  • Avoid overhead watering to keep foliage dry.
  • Apply appropriate fungicides or bactericides.

Integrated Pest Management (IPM)

Implementing an Integrated Pest Management (IPM) approach can help maintain basil health by combining cultural, mechanical, biological, and chemical controls:

  • Cultural controls: Proper spacing, good air circulation, crop rotation, and soil management.
  • Mechanical Controls: Handpicking pests, using traps, and physical barriers like row covers.
  • Biological Controls: Introducing natural predators and beneficial insects.
  • Chemical Controls: Using organic or synthetic pesticides judiciously and following label instructions to minimize impact on beneficial organisms.

Uses

Culinary 

Basil is a staple in many culinary traditions, particularly in Mediterranean and Southeast Asian cuisines. Here are some popular uses:

  • Pesto: A classic Italian sauce made from fresh basil leaves, garlic, pine nuts, Parmesan cheese, and olive oil.
  • Salads: Fresh basil adds a burst of flavor to salads, particularly Caprese salad, which combines basil with tomatoes and mozzarella.
  • Soups and Stews: Basil is often added to soups and stews for its aromatic qualities.
  • Marinades and Dressings: Chopped basil can enhance the flavor of marinades and salad dressings.
  • Herbal Teas: Holy basil, in particular, is used to make herbal teas known for their health benefits.
Medicinal Properties

Basil is not only a culinary delight but also offers several health benefits:

  • Anti-inflammatory: Basil contains essential oils like eugenol, citronellol, and linalool, which have anti-inflammatory properties.
  • Antioxidant: Rich in antioxidants, basil helps combat oxidative stress and supports overall health.
  • Antibacterial: The essential oils in basil have been shown to have antibacterial properties.
  • Digestive Health: Basil can aid digestion and reduce bloating.
  • Stress Relief: Holy basil, in particular, is known for its adaptogenic properties, helping the body cope with stress.

Basil (Ocimum basilicum) is a versatile herb that has been cherished for centuries for its culinary, medicinal, and aromatic qualities. Whether you’re growing it in your garden, using it to flavor your favorite dishes, or exploring its health benefits, basil remains a timeless and valuable herb in households around the world. By understanding its varieties, cultivation needs, culinary applications, and health benefits, you can fully appreciate all that this remarkable plant has to offer.

How to grow and care for Dieffenbachia

Dieffenbachia

Dieffenbachia, commonly known as Dumb Cane, is a popular houseplant appreciated for its striking foliage and easy-care nature. Native to the tropical regions of the Americas, Dieffenbachia spp. is a diverse genus with several species and cultivars that make attractive additions to indoor spaces. This article provides a detailed overview of Dieffenbachia varieties, care requirements, and propagation methods.

Dieffenbachia
Dieffenbachia


Common Names Dieffenbachia, dumb cane
Botanical Name Dieffenbachia spp.
Family Araceae
Plant Type Herbaceous, perennial
Mature Size 3–10 ft. tall, 2–3 ft. wide
Sun Exposure Partial
Soil Type Well-drained
Soil pH Acidic
Bloom Time Spring, summer
Flower Color White
Hardiness Zones 10–12 (USDA)
Native Area Caribbean, South America
Toxicity Toxic to people, pets2


Types of Dieffenbachia


1. Dieffenbachia seguine

  • Description: Features large, oblong leaves with a blend of green, white, and yellow patterns.
  • Size: Typically grows 3 to 6 feet tall.
  • Features: One of the most common species, known for its striking leaf patterns.

2. Dieffenbachia amoena

  • Description: Robust species with dark green leaves marked by white or cream variegation.
  • Size: Can grow taller than 6 feet indoors.
  • Features: Popular for its large size and dramatic foliage.

3. Dieffenbachia ‘Camille’

  • Description: Compact cultivar with creamy-centered leaves edged in dark green.
  • Size: Ideal for smaller spaces due to its compact growth.
  • Features: Known for its distinctive and attractive variation.

4. Dieffenbachia ‘Tropic Snow’

  • Description: Features large, glossy leaves with creamy white variegation and green margins.
  • Size: Grows up to 5 feet tall.
  • Features: Prized for its lush and full appearance.

5. Dieffenbachia ‘Sterling’

  • Description: Silver-gray leaves with dark green edges provide a unique look.
  • Size: Moderate growth, making it suitable for indoor settings.
  • Features: Eye-catching foliage due to its contrasting colors.

6. Dieffenbachia ‘Reflector’

  • Description: Dark green leaves adorned with bright lime-green spots.
  • Size: Reaches up to 3 feet tall.
  • Features: Stunning contrast in leaf pattern makes it a standout plant.

Dieffenbachia varieties offer a range of sizes, colors, and patterns, making them versatile and appealing choices for indoor gardening. Each type has its won unique charm, ensuring there’s a Dieffenbachia suitable for every plant enthusiast’s taste and space.

Dieffenbachia Care


Dieffenbachia, commonly known as “dumb cane,” is a beloved houseplant celebrated for its lush, variegated leaves. Native to the tropical regions of Central and South America, this plant adds a touch of exotic beauty to any indoor space. While Dieffenbachia is relatively easy to care for, understanding its specific needs will help it thrive and enhance your home with its striking foliage.

Light Requirements

Dieffenbachia thrives in bright, indirect light. Placing it near an east or north-facing window is ideal, as too much direct sunlight can scorch its leaves. If natural light is limited, Dieffenbachia can adapt to low light conditions, but its growth may slow, and its leaves may lose some vibrancy. To prevent legginess and maintain its lush appearance, rotate the plant periodically to ensure even light exposure.

Watering 

One of the key aspects of Dieffenbachia care is proper watering. The soil should be regularly moist but not soggy. Water your plant when the top inch of soil is dry to the touch. During the growing season (spring and summer), this may mean watering once a week, while in the dormant period (fall and winter), watering can be reduced. Always use room-temperature water to avoid startling the roots.

Humidity and Temperature

Dieffenbachia prefers high humidity, mirroring its tropical origins. To maintain adequate humidity levels, mist the leaves regularly or place the plant on a humidity tray. Alternatively, using a humidifier in the room can create a more stable environment. As for temperature, keep your Dieffenbachia in a room where the temperature stays between 65-75°F (18-24°C). Protect it from drafts, air conditioning vents, and sudden temperature changes, which can stress the plant.

Soil and Fertilization

A well-draining potting mix is crucial for Dieffenbachia. A blend designed for houseplants or a mix of peat, perlite, and vermiculite works well. During the growing season, feed your Dieffenbachia monthly with a balanced, water-soluble fertilizer. This regular feeding schedule will support its growth and maintain vibrant leaf coloration. Reduce fertilizing during the fall and winter months when the plant’s growth naturally slows.

Pruning and Repotting

Regular pruning helps maintain Dieffenbachia’s shape and removes any yellow or damaged leaves. To cut precisely, use clean, sharp scissors or pruning shears. If your plant becomes too tall or leggy, you can trim the stems to encourage bushier growth. Repotting should occur every 2-3 years, or when the plant outgrows its existing container. Choose a pot that is one size larger and refresh the potting mix to provide new nutrients.

With its stunning foliage and manageable care requirements, Dieffenbachia is a wonderful addition to any indoor garden. By providing the right light, water, humidity, and care, you can enjoy a healthy, vibrant Dieffenbachia that enhances the beauty of your home for years to come.

Propagating Dieffenbachia

Propagating Dieffenbachia, commonly known as dumb cane, can be done using stem cuttings. Here’s a step-by-step guide to help you propagate your Dieffenbachia:

Materials Needed:

  • Sharp, sterile knife or scissors
  • Rooting hormone (optional)
  • Potting mix or water
  • Pots or containers
  • Plastic bag or humidity dome (optional)

Steps:

  1. Choose a healthy stem:

Select a healthy stem from the mother plant. It should be free from any diseases or pests and have at least one leaf.

2. Cut the stem:

Using a sharp, sterile knife or scissors, cut a section of the stem about 4-6 inches long. Make sure the cutting has at least one node (a small bump where leaves or roots can grow).

Optional:

  • Apply rooting hormone
  • Dip the cut end of the stem in rooting hormone to promote rapid root growth.
3. Choose Your Medium:
  • You can root Dieffenbachia in either water or soil.
  • Water Method: Place the cutting in a jar of water, making sure the node is submerged but the leaves are not. To maintain freshness, refresh the water every few days.
  • Soil Method: Plant the cutting in a pot filled with well-drained potting soil. Bury the node about an inch deep.

4. Provide humidity:

  • If rooting in soil, cover the pot with a plastic bag or use a humidity dome to maintain high humidity. Make sure the plastic does not contact the leaves.
5. Place in indirect light:
  • The cutting should be placed in a well-lit, indirect region. Place the cutting in a place with good, indirect lighting.
    Monitor and Wait:
  • Keep the soil moist but not soggy if using the soil method. For the water method, ensure the water level stays constant. Roots should start to grow in a few weeks.

6. Transplanting:

Once the roots are a few inches long, you can transplant the cutting from water to soil. If propagating in soil, you may notice new growth, indicating successful rooting.

Tips:

Be patient; roots can take many weeks to form. Keep an eye out for any signs of rot, especially if using the water method. If the cutting starts to rot, remove the affected part and re-submerge the healthy section.

Overwintering

Overwintering is the process of protecting plants from cold winter weather to ensure they survive until spring. Here are the key steps:

  1. Bring Indoors: Move potted plants indoors to a cool, frost-free area with light.
  2. Mulch: Apply a thick layer of mulch around outdoor plants to insulate roots.
  3. Prune: Trim dead or damaged parts to prevent disease.
  4. Watering: Water plants sparingly; overwatering can cause rot.
  5. Cover: Use fabric or plastic covers for outdoor plants to shield them from frost.

Common Pests 

Spider Mites

  • Identification: Tiny red or brown insects, fine webbing on leaves.
  • Symptoms: yellow speckles on leaves, leaf drop.
  • Treatment: Increase humidity, wash leaves, use insecticidal soap or neem oil.

Aphids

  • Identification: small green, black, red, or white insects.
  • Symptoms: curled or yellow leaves, sticky honeydew, stunted growth.
  • Treatment: Wipe off, spray with water, use insecticidal soap or neem oil, and introduce ladybugs.

Mealybugs

  • Identification: White, cotton-like masses on stems and leaves.
  • Symptoms: stunted growth, yellow leaves.
  • Treatment: Dab with rubbing alcohol; use insecticidal soap or neem oil.

Scale Insects

  • Identification: Small brown or tan bumps on stems and leaves.
  • Symptoms: yellowing leaves, sticky honeydew, reduced vigor.
  • Treatment: Scrape off; use horticultural oil or insecticidal soap.

Thrips

  • Identification: Tiny slender black, brown, or yellow insects.
  • Symptoms: silver streaks or spots on leaves, leaf deformities.
  • Treatment: Remove affected leaves, use insecticidal soap or neem oil, and set sticky traps.

Common Problems

Yellow Leaves

  • Causes: overwatering, underwatering, poor lighting, nutrient deficiencies.
  • Solutions: Adjust the watering schedule, ensure proper lighting, and fertilize as needed.

Brown Leaf Tips

  • Causes: low humidity, fluoride in water, overfertilization.
  • Solutions: Increase humidity, use distilled or rainwater, and reduce fertilizer use.

Drooping Leaves

  • Causes: underwatering, root rot, temperature stress.
  • Solutions: Water thoroughly, check for root rot, and maintain stable temperatures.

Leggy Growth

  • Causes: Insufficient light.
  • Solutions: Provide more indirect light; rotate the plant regularly.

Preventive Measures

  • Regular Inspection: Frequently check for pests and early signs of problems.
  • Cleanliness: Keep the plant and the surrounding surroundings clean.
  • Isolation: Prior to introducing new plants to your collection, quarantine them.

How to Grow and Care for Indoor Chinese Money Plant

Chinese Money Plant

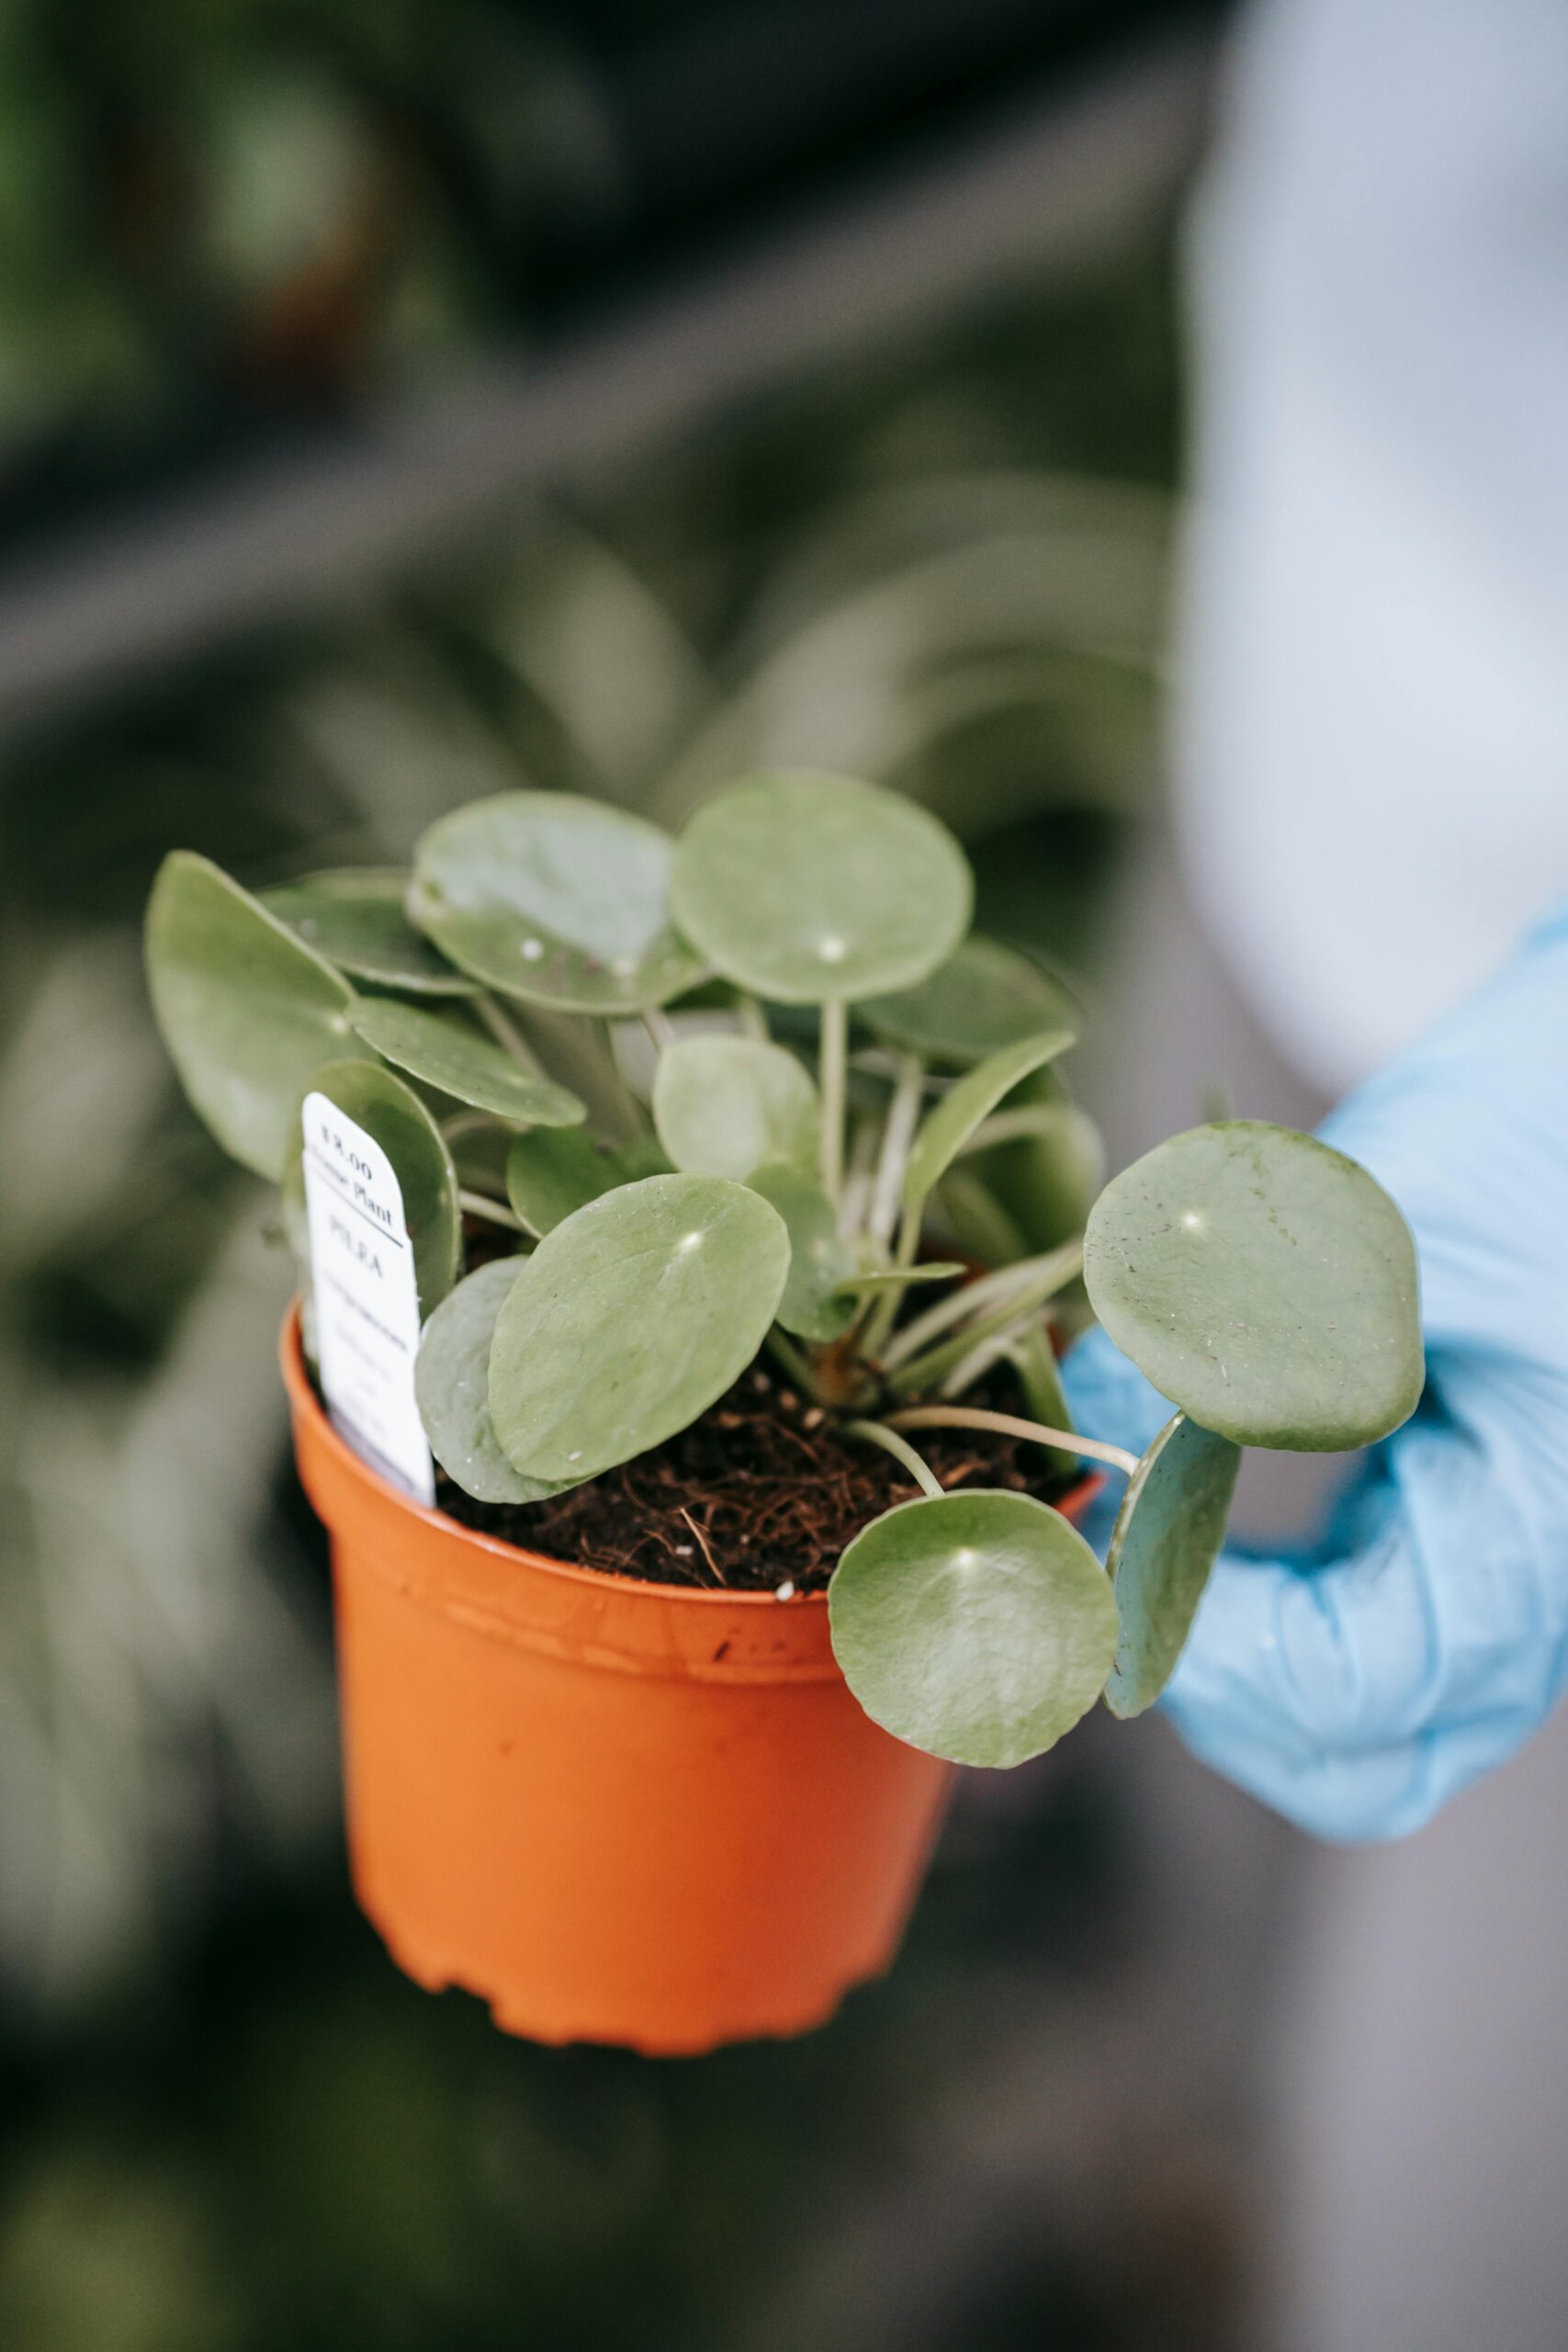
The Chinese Money Plant, also known as Pilea peperomioides, is a popular houseplant known for its distinctive round leaves and easy care requirements. Originating from the Yunnan province in southern China, this plant has become a favorite among indoor gardeners worldwide due to its unique appearance and minimal maintenance needs.

European botanists first collected the Chinese Money Plant in the early 20th century. It gained popularity in the West thanks to Scandinavian missionaries who brought cuttings back from China in the 1940s. Over the decades, its ease of propagation and charming aesthetics have made it a staple in homes and offices.

Appearance
Pilea peperomioides is characterized by its glossy, coin-shaped leaves that grow on long, slender petioles. The leaves are typically a vibrant green, and the plant’s overall structure is compact and bushy, making it ideal for small spaces. Mature plants can reach up to 12 inches in height and spread.

Common Name Pancake plant, Chinese money plant, coin plant, UFO plant, friendship plant 
Botanical Name Pilea peperomioides
Family Urticaceae
Plant Type Perennial
Mature Size 12 in tall, 8 to 12 in. wide
Sun Exposure Partial
Soil Type Well-draining
Soil pH Acidic, neutral
Bloom Time Spring
Flower Color White
Native Area China
Chinese Money Plant
Chinese Money Plant

Type of Chinese Money Plant

While Pilea peperomioides is the most well-known species, there are several other varieties within the Pilea genus that offer different shapes and sizes, catering to various aesthetic preferences:

  1. Pilea ‘Dark Mystery’: This variety boasts dark, almost black leaves with a striking metallic sheen, offering a dramatic contrast to the typical green foliage of most Pileas.
  2. Pilea ‘Silver Tree’: Known for its silver-green leaves, this type has a more elongated leaf shape with a distinctive silver pattern that adds a touch of elegance to any collection.
  3. Pilea ‘Mojito’: Featuring variegated leaves with splashes of white and cream, the ‘Mojito’ is perfect for those who enjoy a bit of variety and uniqueness in their plant selection.
  4. Pilea ‘Aquamarine’: This variety has bluish-green leaves with a slight shimmer, reminiscent of a tranquil underwater scene, making it a soothing addition to indoor spaces.

Chinese Money Plant Care 

The Chinese Money Plant, or Pilea peperomioides, is a beloved houseplant known for its unique, coin-shaped leaves and easy maintenance. Native to the Yunnan province of China, this plant has become a favorite among plant enthusiasts for its aesthetic appeal and minimal care requirements. Here’s a comprehensive guide to keeping your Chinese money plant healthy and thriving.

Light Requirements

Pilea peperomioides thrives in bright, indirect light. To make sure it receives the proper quantity of light, follow these suggestions:

  • Location: Place the plant near a north or east-facing window where it can receive plenty of diffused sunlight.
  • Avoid Direct Sunlight: Direct sunlight can scorch the leaves, so it’s best to avoid placing the plant in the direct path of the sun’s rays.
  • Signs of Insufficient Light: If the plant starts to stretch and the leaves become sparse, it’s a sign that it needs more light.
Watering

For your Chinese money plant to be healthy, proper hydration is essential.

  • Frequency: When the top inch of soil is completely dry to the touch, water the area well.
  • Avoid Overwatering: Overwatering can lead to root rot, so ensure the pot has good drainage.
  • Winter Care: In winter, reduce watering as the plant’s growth slows down.
  • Drainage: Always let the soil dry out between waterings to prevent waterlogged roots.
Soil

A well-draining potting mix is essential.

  • Mix: A standard houseplant soil with added perlite or sand works well.
  • Purpose: This mix promotes proper drainage and prevents the risk of overwatering.
Temperature and Humidity

Maintain an environment that mimics the plant’s natural habitat.

  • Temperature: The plant does well in average household temperatures ranging from 60-75°F (16-24°C).
  • Humidity: It prefers moderate humidity but can adapt to lower levels.
  • Avoid Drafts: Keep the plant away from drafts, heating vents, or air conditioners to avoid sudden temperature changes.
Fertilizing

Provide nutrients to support growth:

  • Schedule: Feed the plant with a balanced liquid fertilizer once a month during the growing season (spring and summer).
  • Dormancy: No fertilizer is needed in the winter months when the plant is dormant.
  • Caution: Over-fertilizing can harm the plant, so stick to a monthly schedule and follow the fertilizer’s instructions.
Pruning and Maintenance

Regular maintenance keeps the plant looking its best.

  • Pruning: Regular pruning encourages bushier growth and keeps the plant in the desired form. To maintain the health of the plant, remove any yellowed or damaged leaves.
  • Leggy Growth: If the plant becomes leggy, trim back some of the longer stems to promote fuller growth.
Propagation

The Chinese Money Plant is easy to propagate, making it a favorite for sharing with friends.

1. Offsets (Pups):

  • Look for small plants growing from the base of the main plant.
  • Gently separate the offset from the parent plant, ensuring it has some roots attached.
  • Plant the offset in a small pot with well-draining soil and water lightly.

2. Stem Cuttings:

  • Take a healthy stem cutting with at least one leaf attached.
  • Place the cutting in water until roots develop, which usually takes a few weeks.
  • Once roots have formed, plant the cutting in the soil and care for it as you would a mature plant.
Reporting 
  • When to Repot:
    • Repot in spring or early summer when roots outgrow the pot or the soil dries quickly.
  • Materials Needed:
    • New pot (1-2 inches larger with drainage holes)
    • Well-draining potting mix
    • Trowel or small shovel
    • Watering can
  • Steps to Repot:
    1. Prepare the new pot:
      • Fill the bottom with fresh potting mix.
    2. Remove the plant:
      • Gently slide the plant out of the old pot, loosening the root ball.
    3. Inspect Roots:
      • Trim any dark, mushy, or damaged roots.
    4. Place in the new Pot:
      • Center the plant, fill it with soil, and press gently.
    5. Water Thoroughly:
      • Water the plant to settle the soil.
  • Aftercare:
    • Adjust the watering as needed and place it in bright, indirect light.


Common Problem, Pests, and Disease

Common Problems

1. Yellow Leaves:

  • Cause: Often a sign of overwatering.
  • Solution: Allow the soil to dry out more between waterings and ensure proper drainage. Adjust your watering schedule to prevent waterlogging.

2. Leggy Growth:

  • Cause: insufficient light.
  • Solution: Move the plant to a brighter location where it can receive bright, indirect light. To guarantee a uniform distribution of light, rotate the plant from time to time.

3. Leaf Drop:

  • Cause: sudden changes in the environment or watering habits.
  • Solution: Maintain consistent care, avoid drastic changes in light, temperature, or humidity, and ensure the plant is watered appropriately.

4. Curling Leaves:

  • Cause: underwatering or low humidity.
  • Solution: Increase the frequency of watering, and if the air is dry, consider using a humidifier or placing the plant on a pebble tray with water.

5. Brown Leaf Edges:

  • Cause: over-fertilization or fluoride in tap water.
  • Solution: Flush the soil with distilled water and reduce the frequency of fertilization. During watering, use purified or filtered water.
Pests

1. Aphids:

  • Identification: small, green insects that cluster on new growth.
  • Solution: Treat with insecticidal soap or neem oil. Regularly inspect the plant and wash off aphids with a strong stream of water.

2. Spider Mites:

  • Identification: Tiny, spider-like pests that create webbing on the undersides of leaves.
  • Solution: Increase humidity around the plant and treat with miticide or neem oil. Regularly wipe the leaves to remove dust and mites.

3. Mealybugs:

  • Identification: white, cotton-like pests found in leaf axils and on stems.
  • Solution: Remove with a cotton swab dipped in rubbing alcohol or treat with insecticidal soap. Inspect and clean the plant regularly to prevent infestations.

4. Scale Insects:

  • Identification: brown or tan shell-like bumps on stems and leaves.
  • Solution: Remove scales manually with a cotton swab dipped in rubbing alcohol, or use insecticidal soap. Regularly check the plant for early signs of infestation.
Diseases

1. Root rot:

  • Cause: overwatering and poor drainage.
  • Symptoms: wilting, yellowing leaves, and mushy roots.
  • Solution: Prevent by allowing the soil to dry between waterings and using well-draining soil. If root rot occurs, remove the affected roots and repot the plant in fresh, dry soil.

2. Powdery Mildew:

  • Cause: high humidity and poor air circulation.
  • Symptoms: white, powdery fungus on leaves.
  • Solution: Improve air circulation, reduce humidity, and treat with a fungicide if necessary. Remove affected leaves to prevent the spread of mildew.

3. Leaf spot:

  • Cause: A fungal or bacterial infection.
  • Symptoms: brown or black spots on leaves.
  • Solution: Remove affected leaves and treat with an appropriate fungicide or bactericide. Ensure proper spacing and air circulation to prevent future infections.

4. Botrytis (Gray Mold):

  • Cause: high humidity and poor ventilation.
  • Symptoms: gray, fuzzy mold on leaves and stems.
  • Solution: Improve air circulation, remove affected parts, and treat with a fungicide if necessary. Reduce watering and humidity around the plant.
Prevention Tips
  • Regular Inspection: Check your plant regularly for early signs of pests and diseases.
  • Proper Watering: Water the plant correctly, allowing the soil to dry out between waterings.
  • Adequate Light: Ensure the plant receives bright, indirect light to promote healthy growth.
  • Clean Environment: Keep the plant and its surroundings clean to reduce the risk of pest infestations and diseases.
  • Quarantine New Plants: Isolate new plants for a few weeks to ensure they are pest and disease-free before introducing them to your existing plants.

By following these care guidelines and addressing problems promptly, you can keep your Chinese money plant healthy and thriving.


Uses

The Chinese Money Plant is primarily grown for decorative purposes, symbolizing wealth and prosperity in Feng Shui. It’s also valued for its air-purifying qualities and is often given as a gift. Additionally, it can serve as a teaching tool for plant care and propagation.

FAQ

Where to buy chinese money plant?
  • Local Nurseries and Garden Centers: Check nearby plant shops for a variety of houseplants.
  • Online Retailers: Browse websites like Amazon, Etsy, The Sill, and Bloomscape.
  • Home Improvement Stores: Visit the garden sections of Home Depot and Lowe’s.
  • Specialty Plant Shops: Look for stores focusing on rare and unique plants, both locally and online.
  • Plant Swaps and Community Groups: Join local or online gardening groups to trade or buy plants.

How to grow and Care for Indoor Rex Begonias

Rex Begonias

Rex Begonia, scientifically known as Begonia rex, is a popular houseplant renowned for its vibrant and diverse foliage. This plant is prized not for its flowers but for its beautiful, intricate leaves that come in a wide range of colors, shapes, and patterns. Native to the tropical and subtropical regions of Asia, Rex Begonia has become a favorite among indoor gardeners for its striking appearance and relatively easy care.

Characteristics

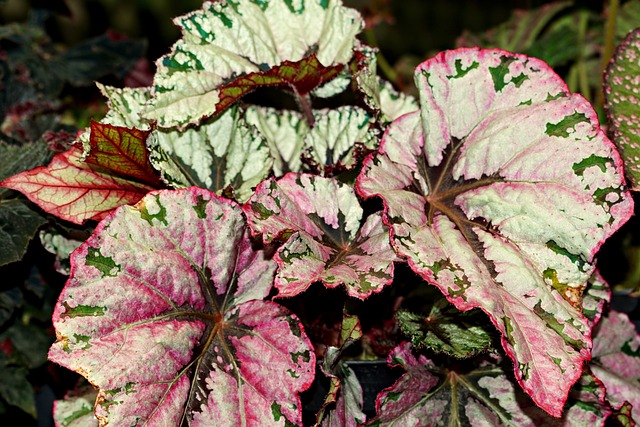
Rex begonias are rhizomatous perennials, meaning they grow from thickened stems that run horizontally along or just below the soil surface. The leaves of Rex Begonia are the main attraction; they can be large, often heart-shaped or asymmetrical, with stunning variegation. Colors range from deep greens and purples to reds, silvers, and even pinks. The leaves may have intricate patterns with splashes, streaks, or veins of contrasting colors, making each plant uniquely beautiful.

Common Name Rex begonia
Botanical Name Begonia rex-cultorum
Family Begoniaceae
Plant Type Herbaceous, perennial
Mature Size 12-18 in. tall, similar spread
Sun Exposure Partial, shade
Soil Type Well drained
Soil pH Acidic
Hardiness Zones 10-12 (USDA)
Native Area Asia
Toxicity Toxic to pets2


Rex Begonias
Rex Begonias

Types of Rex Begonias


Rex Begonias (Begonia rex-cultorum) are renowned for their stunning and diverse foliage, making them popular houseplants. There are numerous cultivars of Rex Begonia, each with unique leaf patterns, colors, and shapes.

1. Begonia rex, ‘Escargot’
  • Description: Named for its striking snail-shell pattern, ‘Escargot’ has large, spiraled leaves with shades of green and silver.
  • Highlights: The spiral design is highly distinctive and makes it a standout variety.
2. Begonia rex, ‘Fireworks’
  • Description: ‘Fireworks’ features dark leaves with bright pink and purple streaks radiating from the center.
  • Highlights: The contrasting colors and bold patterns resemble bursts of fireworks, hence the name.
3. Begonia rex, ‘Merry Christmas’
  • Description: This cultivar has dark green leaves with bright red edges and silver splashes.
  • Highlights: The festive colors of ‘Merry Christmas’ make it a favorite during the holiday season.
4. Begonia rex, ‘Red Tango’
  • Description: ‘Red Tango’ boasts deep red leaves with dark green margins and a metallic sheen.
  • Highlights: The rich, vibrant red foliage is eye-catching and adds a touch of elegance to any space.
5. Begonia rex, ‘Iron Cross’
  • Description: Known for its unique pattern, ‘Iron Cross’ has green leaves with a dark brown cross-shaped marking in the center.
  • Highlights: The distinct cross pattern is both unusual and attractive, making it a conversation starter.
6. Begonia rex, ‘Silver Queen’
  • Description: ‘Silver Queen’ features silvery leaves with green veins and edges.
  • Highlights: The silvery foliage has a regal appearance, fitting for its royal name.
7. Begonia rex, ‘Plum Paisley’
  • Description: This cultivar has deep purple leaves with pink and silver markings.
  • Highlights: The rich plum color combined with intricate patterns gives it a luxurious look.
8. Begonia rex, ‘Black Mamba’
  • Description: ‘Black Mamba’ has almost black leaves with metallic silver veins.
  • Highlights: The dark, dramatic foliage adds a touch of mystery and sophistication.
9. Begonia rex, ‘Silver Lace’
  • Description: ‘Silver Lace’ features delicate silver leaves with green edges and veins.
  • Highlights: The lacy pattern and soft colors give it a delicate and elegant appearance.
10. Begonia rex, ‘Jive’
  • Description: ‘Jive’ has bright green leaves with silver and pink accents.
  • Highlights: The vibrant mix of colors creates a lively and energetic display.

Rex Begonias Care


Rex Begonias (Begonia rex) are stunning houseplants known for their vibrant and varied foliage. With the right care, these plants can thrive indoors, adding a splash of color and intrigue to your home. Here are some essential tips for taking care of your Rex Begonia:

Light Requirements

Rex begonias prefer bright, indirect light. Direct sunlight can scorch their delicate leaves, leading to brown spots and discoloration. Place your Rex Begonia in a spot where it can receive plenty of filtered light, such as near a north- or east-facing window. If natural light is insufficient, especially in the winter months, consider supplementing with a grow light.

Temperature and Humidity

Native to tropical and subtropical regions, Rex begonias thrive in warm, humid environments. The ideal temperature range for these plants is between 60°F and 75°F (15°C to 24°C). Avoid exposing them to temperatures below 50°F (10°C), as cold drafts can damage the leaves. Maintaining high humidity is crucial. Here are a few tips to achieve this:

  • Use a Humidifier: This is the most effective way to increase humidity around your plant.
  • Humidity Trays: Place a shallow tray filled with water and pebbles under the plant pot. The humidity level surrounding the plant will rise as water evaporation occurs.
  • Grouping Plants: Placing several plants together can create a microenvironment with higher humidity.
Soil and Potting

Rex begonias need a well-draining soil mix to prevent root rot. A recommended mix includes:

One part peat moss
1 part perlite or vermiculite
One part potting soil

Make sure the openings in your pot can drain excess water. Repot your Rex Begonia every couple of years or when it becomes root-bound, ideally in the spring.

Watering

Proper watering is crucial for Rex Begonias. Here’s how to do it right:

  • Consistency: Maintain a constant moisture content in the soil without becoming soggy. Allow the top inch of soil to dry out before rewetting.
  • Watering Method: Water the plant at the base, avoiding the leaves, as wet leaves can lead to mildew and fungal issues.
  • Seasonal Adjustments: Reduce watering during the winter months when the plant’s growth slows down.
Fertilization

Feed your Rex Begonia with a balanced, water-soluble fertilizer every 2-4 weeks during the growing season (spring and summer). Use a fertilizer with equal parts nitrogen, phosphorus, and potassium (e.g., 10-10-10). Cut back on fertilization in the fall and winter when the plant is not actively growing.

Pruning and Maintenance

Regular pruning helps maintain the shape and health of your Rex Begonia. To promote new growth and stave off disease, remove any dead or yellowing leaves. Pinch back the stems to promote a bushier growth habit. Be gentle when handling the leaves, as they can be quite fragile.

Common Problems and Solutions


Rex Begonias are prized for their stunning foliage, but they can be somewhat finicky and prone to various issues. Understanding these common problems and their solutions will help keep your Rex Begonia healthy and vibrant.

1. Leaf Spotting and Mildew
  • Problem: Leaf spotting, mildew, and other fungal issues often occur due to high humidity and poor air circulation.

Solution:

  • Avoid Wetting Leaves: When watering, avoid getting water on the leaves. Water near the plant’s base.
  • Improve Air Circulation: Ensure good air flow around your plant by not overcrowding it with other plants.
  • Use Fungicides: If mildew or fungal spots appear, treat the plant with an appropriate fungicide.
2. Root Rot
  • Problem: Overwatering and poor drainage can lead to root rot, a serious condition that can kill your plant.

Solution:

  • Proper Watering: Before rewetting, let the top inch of soil dry off. Water less frequently in the winter.
  • Well-Draining Soil: Use a soil mix that drains well, such as a combination of peat moss, perlite, and potting soil.
  • Drainage Holes: Ensure your pot has adequate drainage holes to prevent water from sitting at the bottom.
3. Leaf Browning and Edges Crisping
  • Problem: Browning of leaf edges can be due to low humidity, inconsistent watering, or exposure to direct sunlight.

Solution:

  • Increase Humidity: Use a humidifier, place the plant on a humidity tray, or mist the plant regularly.
  • Consistent Watering: Keep the soil consistently moist but not soggy.
  • Indirect Light: Ensure the plant receives bright, indirect light. Avoid placing it in direct sunlight.
4. Pest Infestations
  • Problem: Common pests include aphids, spider mites, and mealybugs, which can damage leaves and stunt growth.

Solution:

  • Regular Inspection: Check your plant regularly for signs of pests.
  • Natural Predators: Introduce natural predators like ladybugs or use biological controls.
  • Insecticidal Soap: Treat infestations with insecticidal soap or neem oil, following the instructions on the label.
  • Isolation: If you find pests, isolate the affected plant to prevent spreading to other plants.
5. Leggy Growth
  • Problem: Leggy growth, characterized by long, weak stems with sparse foliage, usually results from insufficient light.

Solution:

  • Increase Light: Move the plant to a brighter location where it can receive more indirect light.
  • Supplemental Lighting: Use grow lights if natural light is inadequate, especially in winter.
6. Wilting
  • Problem: Wilting can be caused by both underwatering and overwatering.

Solution:

  • Check Soil Moisture: Test the soil moisture level. If the soil is dry, increase watering. If it is soggy, allow the soil to dry out and adjust your watering routine.
  • Proper Drainage: Make sure there is adequate drainage in the pot to avoid waterlogging.
7. Yellowing Leaves
  • Problem: Yellowing leaves can indicate several issues, including overwatering, underwatering, nutrient deficiencies, or pest problems.

Solution:

  • Watering Balance: Adjust watering practices to ensure the soil remains evenly moist.
  • Fertilization: Throughout the growing season, fertilize the plant using a balanced, water-soluble fertilizer. Avoid over-fertilizing.
  • Pest Control: Inspect for pests and treat accordingly.

Common Pests and Diseases


Rex Begonias (Begonia rex-cultorum) are admired for their beautiful foliage but can be susceptible to various pests and diseases. Recognizing and addressing these issues promptly is key to maintaining a healthy plant. Here are some of the most common pests and diseases that affect Rex Begonias and tips on how to manage them:

Common Pests
Aphids
  • Description: Insects are soft-bodied and available in green, black, brown, or red hues. They cluster on new growth and the undersides of leaves, sucking sap from the plant.
  • Symptoms: Distorted leaves, sticky honeydew on the plant, and sooty mold growth.

Control:

  • Natural Predators: Introduce ladybugs or lacewings, which feed on aphids.
  • Insecticidal Soap: Spray affected areas with insecticidal soap or neem oil.
  • Water Spray: Aphids can be removed from plants by using a powerful water jet.
Spider Mites
  • Description: tiny, reddish-yellow pests that resemble tiny spiders. They thrive in dry conditions and create fine webbing on the plant.
  • Symptoms: Yellowing leaves, tiny spots on leaves, and webbing on the underside of leaves.

Control:

  • Humidity: Increase humidity around the plant, as spider mites prefer dry conditions.
  • Insecticidal Soap: Infested regions can be treated with neem oil or insecticidal soap.
  • Isolation: To stop the infestation from spreading to other plants, isolate the affected ones.
Mealybugs
  • Description: White, cottony insects that feed on plant sap and can often be found in leaf axils and along stems.
  • Symptoms: White, cottony masses on the plant, yellowing leaves, and sticky honeydew.

Control:

  • Manual Removal: Remove mealybugs with a cotton swab dipped in rubbing alcohol.
  • Insecticidal Soap: Use insecticidal soap or neem oil to treat infestations.
  • Regular Inspection: Regularly inspect plants to catch infestations early.
Thrips
  • Description: Tiny, slender insects that can be yellow, brown, or black. They feed on plant tissues by puncturing and sucking out the contents.
  • Symptoms: Silvery or bronze streaks on leaves, deformed growth, and black specks (frass).

Control:

  • Blue or Yellow Sticky Traps: Use sticky traps to catch adult thrips.
  • Insecticidal Soap: Spray with insecticidal soap or neem oil.
  • Isolation: Isolate infested plants to prevent their spread.
Common Diseases
Powdery Mildew
  • Description: A fungal disease that appears as white, powdery spots on leaves and stems.
  • Symptoms: White, powdery growth on leaves, distorted growth, and leaf drop.

Control:

  • Air Circulation: Improve air circulation around the plant.
  • Fungicide: Apply a fungicide specifically labeled for powdery mildew.
  • Avoid Wetting Leaves: Water the plant at the base to keep the leaves dry.
Botrytis Blight (Gray Mold)
  • Description: A fungal disease that causes gray, fuzzy mold on flowers, leaves, and stems.
  • Symptoms: Gray mold on affected areas, wilting, and browning of plant tissues.

Control:

  • Remove Affected Parts: Cut away and dispose of affected parts of the plant.
  • Improve Air Circulation: Ensure good airflow and reduce humidity around the plant.
  • Fungicide: Apply a fungicide to affected areas.
Root Rot
  • Description: A condition caused by various soil-borne fungi, often due to overwatering and poor drainage.
  • Symptoms: Yellowing leaves, wilting, and mushy, discolored roots.

Control:

  • Well-Draining Soil: Use a well-draining soil mix and ensure pots have drainage holes.
  • Proper Watering: Avoid overwatering; let the soil dry slightly between waterings.
  • Remove Affected Parts: If root rot is detected, remove affected roots and repot the plant in fresh soil.
Leaf Spot
  • Description: Caused by bacteria or fungi, leading to spots on leaves.
  • Symptoms: Brown, black, or yellow spots on leaves, which may become larger and merge over time.

Control:

  • Remove Affected Leaves: Cut away and dispose of affected leaves.
  • Fungicide/Bactericide: Use appropriate fungicides or bactericides.
  • Watering Method: Water at the base and avoid wetting leaves.

Uses

Rex Begonias are commonly used for indoor decoration, in office spaces, as gifts, for educational purposes, in therapeutic gardening, in botanical gardens and conservatories, at events and exhibitions, and in landscaping for shaded areas.

How to grow and care for Aglaonema Siam Aurora

Aglaonema Siam Aurora

Aglaonema ‘Siam Aurora’, commonly known as the Red Aglaonema, is a striking cultivar of the Aglaonema genus. Renowned for its vibrant foliage and low-maintenance care requirements, this plant is a favorite among indoor gardening enthusiasts. Native to tropical and subtropical regions of Asia, Aglaonemas have been cultivated for centuries, valued for their decorative appeal and adaptability to indoor environments.

Description

The ‘Siam Aurora’ stands out with its vivid red-edged leaves that transition to shades of green towards the center, creating a stunning contrast. The leaves are broad, glossy, and have a leathery texture, adding a lush, exotic feel to any space. Typically, the plant reaches a height of 12 to 24 inches, making it an ideal choice for tabletops, shelves, or as a floor plant in smaller containers.

Aglaonema Siam Aurora

Types of  Aglaonema Siam Aurora            

Aglaonema ‘Siam Aurora’ is a specific cultivar known for its striking red and green foliage, but within the broader Aglaonema genus, there are numerous varieties that exhibit a wide range of colors and patterns. While ‘Siam Aurora’ itself is a distinct type, enthusiasts and growers often refer to similar cultivars and related varieties when discussing its types and variations. Here are some notable types and related cultivars within the Aglaonema family:

1. Aglaonema, ‘Siam Aurora’
  • Appearance: characterized by its vibrant red edges on green leaves. The center of the leaf is typically a rich green, providing a striking contrast.
  • Growth: compact growth habit, usually reaching about 12 to 24 inches in height. The plant has a bushy, lush appearance, making it a popular choice for indoor decoration.
2. Aglaonema, ‘Red Gold’
  • Appearance: Features red-tinted leaves with gold or yellow variegation. The colors are less intense than ‘Siam Aurora’ but still provide a beautiful, colorful display.
  • Growth: Similar in size and care requirements to ‘Siam Aurora’, it thrives in low to moderate light conditions and requires minimal maintenance.
3. Aglaonema, ‘Super Red’
  • Appearance: Known for its deep red leaves with minimal green, this variety stands out due to its intense color. The leaves are usually broader and have a more uniform red hue.
  • Growth: This variety tends to be slightly more robust, with a denser foliage structure.
4. Aglaonema, ‘Sparkling Sarah’
  • Appearance: Displays a unique mix of green, pink, and red hues, creating a “sparkling” effect on the leaves. The variegation is more scattered compared to ‘Siam Aurora’.
  • Growth: Slightly larger and more spreading in growth habit, it requires similar care but may need more light to maintain its vibrant colors.
5. Aglaonema, ‘Anyamanee’
  • Appearance: A highly variegated cultivar with shades of pink, red, and green. The leaves often have a marbled appearance, making each plant look unique.
  • Growth: Generally compact but may spread more horizontally, suitable for table tops or wide planters.
6. Aglaonema, ‘Red Peacock’
  • Appearance: As the name suggests, this variety boasts peacock-like patterns with a mix of red, pink, and green. The variegation pattern is more intricate and feathered.
  • Growth: Requires similar conditions to ‘Siam Aurora’, thriving in low to moderate light with infrequent watering.
7. Aglaonema ‘Creta’
  • Appearance: Features a mix of red, pink, and green foliage, similar to ‘Siam Aurora’ but with more pronounced pink hues.
  • Growth: Compact and bushy, it fits well in small spaces and is easy to care for, making it a great choice for beginners.


Aglaonema Siam Aurora Care

Aglaonema ‘Siam Aurora’ is a popular choice for indoor plant enthusiasts due to its striking appearance and relatively low maintenance requirements. Here is a comprehensive care guide to help you keep your Aglaonema ‘Siam Aurora’ thriving.

Light Requirements
  • Indirect Light: ‘Siam Aurora’ prefers bright, indirect light. Direct sunlight can scorch its leaves, so it’s best to place it near a window with filtered light or in a spot that receives diffused sunlight.
  • Low Light Tolerance: This plant can tolerate lower light conditions, making it suitable for offices and rooms with less natural light. However, less light might reduce the intensity of its red coloration.
Watering
  • Consistent Moisture: Water the plant when the top 1-2 inches of soil feel dry. Overwatering can cause root rot, so ensure the pot has adequate drainage.
  • Humidity: Aglaonema ‘Siam Aurora’ appreciates higher humidity levels but can adapt to average household humidity. You can increase humidity by misting the plant regularly or placing it on a pebble tray filled with water.
Temperature

Optimal Range: This plant thrives in temperatures between 65°F and 75°F (18°C – 24°C). Avoid exposing it to temperatures below 60°F (15°C) and protect it from cold drafts and sudden temperature changes.

Soil
  • Well-Draining Mix: Use a well-draining potting mix rich in organic matter. A houseplant-specific mix or a combination of peat, perlite, and pine bark works great.
  • Pot Selection: Ensure the pot has drainage holes to prevent water from accumulating at the bottom, which can cause root rot.
Fertilization
  • Balanced Fertilizer: Feed your ‘Siam Aurora’ with a balanced, water-soluble fertilizer diluted to half strength every 4-6 weeks during the growing season (spring and summer). As the plant’s development slows in the fall and winter, cut back on feeding.
Pruning and maintenance
  • Regular Pruning: Remove yellow or damaged leaves to maintain the plant’s appearance and health. Pruning also encourages new growth.
  • Cleaning Leaves: Wipe the leaves with a damp cloth to remove dust and keep the foliage looking vibrant.
Repotting
  • Repotting Frequency: Repot the plant every 2-3 years or when it outgrows its current pot. Spring is the best time for repotting.
  • Pot Size: Choose a pot that is one size larger than the current one to provide enough space for root growth.
Propagation
  • Stem Cuttings: The most common method of propagating Aglaonema ‘Siam Aurora’ is through stem cuttings. Cut a healthy stem with at least a few leaves and place it in water or moist soil until roots develop.
  • Division: You can also propagate by dividing the root ball during repotting. Gently separate the plant into smaller sections, each with its own roots, and pot them individually.


Common Problem, Pests, and Diseases

Aglaonema ‘Siam Aurora’ is a relatively hardy houseplant, but it can still encounter some issues. Knowing how to identify and address these problems will help keep your plant healthy and vibrant.

Common Problems

 1. Yellowing Leaves

  • Causes: Overwatering is the most common cause of yellowing leaves. It can lead to root rot, which prevents the plant from absorbing nutrients properly.
  • Solution: Check the soil moisture and ensure proper drainage. Between waterings, let the soil become slightly dry.

 2. Brown Tips

  • Causes: Brown tips on leaves can result from low humidity, underwatering, or fluoride or chlorine in tap water.
  • Solution: Increase humidity by misting the plant or using a pebble tray. When watering, use distilled or filtered water.

 3. Leggy Growth

  • Causes: Insufficient light can cause the plant to grow tall and spindly as it reaches for more light.
  • Solution: Transfer the plant to a more sunny spot that receives indirect sunlight.

 4. Wilting

  • Causes: Wilting can be a sign of both overwatering and underwatering.
  • Solution: Check the soil moisture. Provide the plant with water if the soil is dry. If it’s wet, let it dry out before giving it another drink.
Pests

 1.Spider Mites

  • Identification: Tiny, spider-like pests that cause fine webbing and speckled leaves.
  • Treatment: Increase humidity, rinse the plant with water, and treat with insecticidal soap or neem oil.

 2.Mealybugs

  • Identification: white, cottony masses on the leaves and stems.
  • Treatment: Using a cotton swab coated in rubbing alcohol, remove mealybugs. To treat, use insecticidal soap or neem oil.

 3.Aphids

  • Identification: small, green, black, or brown insects on new growth.
  • Treatment: Rinse the plant with water and use insecticidal soap or neem oil to eliminate aphids.

 4.Scale Insects

  • Identification: brown, shell-like bumps on stems and leaves.
  • Treatment: Remove scales manually with a cotton swab dipped in rubbing alcohol. Apply insecticidal soap or neem oil.
Diseases

 1.Root Rot

  • Causes: Overwatering and poor drainage lead to root rot, causing yellowing leaves and a foul smell from the soil.
  • Solution: Remove the plant from the pot, trim away the affected roots, and repot in fresh, well-draining soil.

  2.Leaf Spot

  • Causes: Fungal or bacterial infections can cause brown or black spots on leaves.
  • Solution: Remove affected leaves, avoid overhead watering, and ensure good air circulation. Treat with a fungicide if necessary.

 3. Powdery Mildew

  • Causes: High humidity and poor air circulation can lead to a white, powdery substance on the leaves.
  • Solution: Improve air circulation, reduce humidity, and treat with a fungicide.

 4. Botrytis Blight

  • Causes: This fungal disease causes gray mold on leaves, especially in cool, damp conditions.
  • Solution: Remove affected parts, improve air circulation, and treat with a fungicide.
Prevention Tips
  • Proper Watering: Ensure the soil dries out slightly between waterings and that the pot has good drainage to prevent root rot.
  • Humidity: Maintain moderate to high humidity levels to keep the plant healthy and reduce the risk of pests.
  • Light: Provide bright, indirect light to promote healthy growth and prevent leggy growth.
  • Cleaning: Regularly clean the leaves to remove dust and check for early signs of pests or diseases.
  • Quarantine: Isolate new plants for a few weeks to ensure they are pest-free before introducing them to your collection.

By staying vigilant and addressing problems promptly, you can ensure that your Aglaonema ‘Siam Aurora’ remains a beautiful and thriving part of your indoor garden.

Uses

Aglaonema ‘Siam Aurora’ enhances indoor spaces with its vibrant red and green foliage, serving as an ornamental decor piece. It improves air quality by filtering pollutants, adds a calming ambiance to offices, and is an excellent low-maintenance plant for novice gardeners. Additionally, it makes a thoughtful and attractive gift.


How to Grow and Care Indoor Alocasia Polly

Alocasia Polly
Alocasia polly, scientifically known as Alocasia amazonica ‘Polly,’ is a striking houseplant renowned for its unique, eye-catching foliage. With its dark green, shield-shaped leaves adorned with prominent white veins, Alocasia polly adds a touch of the exotic to any indoor space.
Origins and Characteristics

Alocasia polly is a hybrid plant derived from the Alocasia genus, which is native to the tropical rainforests of Southeast Asia. The plant is characterized by its glossy, deep green leaves with wavy edges and contrasting white or light green veins. The leaves are arrow-shaped and can grow up to 16 inches long, creating a bold visual statement in any room.


Common Name: Alocasia Polly, African mask plant
Botanical Name: Alocasia × amazonica ‘Polly’
Family: Araceae
Plant Type: Bulb
Mature Size: 1-2 ft. tall and wide
Sun Exposure:  Part shade
Soil Type:  Moist, rich, well-drained
Soil pH:  Acidic
Bloom Time:  Summer
Flower Color:  Pale green, cream
Native Area:  Southern Asia
Toxicity:  Toxic to people and pets1


Alocasia Polly
Alocasia Polly

Types of Alocasia Polly

While Alocasia Polly itself is a unique cultivar of Alocasia amazonica, it belongs to the larger Alocasia genus, which includes various captivating species and cultivars. Here are some notable types:

1. Alocasia amazonica ‘Polly’: Dark green, arrow-shaped leaves with white veins.

2. Alocasia amazonica ‘Bambino’: Compact version of Polly with smaller, similar leaves.

3. Alocasia micholitziana ‘Frydek’: Velvety dark green leaves with white veins, narrower than Polly.

4. Alocasia zebrina: Known for zebra-striped stems and large, solid green leaves.

5. Alocasia ‘Black Velvet’: Nearly black, velvety leaves with silvery veins.

6. Alocasia macrorrhiza ‘Giant Taro’: Very large, glossy green leaves, among the largest Alocasia species.

7. Alocasia cuprea: Metallic, coppery leaves with an iridescent texture.

8. Alocasia reginula ‘Black Velvet’: Small, dark green to nearly black leaves with striking white veins.

 Indoor Care for Alocasia Polly


Alocasia polly, with its striking foliage and tropical allure, is a delightful addition to any indoor space. Providing the right care is crucial to ensuring this beautiful plant thrives indoors. Here’s a comprehensive guide to caring for your Alocasia polly indoors:

Light:
  • Preference: Alocasia polly thrives in bright, indirect light.
  • Indoor Placement: Place your plant near a window where it can receive filtered sunlight. East or west-facing windows are ideal.
  • Artificial Light: If natural light is insufficient, supplement with grow lights to provide adequate brightness.
Watering:
  • Moisture Needs: Keep the soil consistently moist, but not soggy.
  • Watering Frequency: Water your Alocasia polly when the top inch of soil feels dry to the touch.
  • Avoid overwatering: Ensure proper drainage to prevent water from accumulating at the bottom of the pot, which can lead to root rot.
Humidity:
  • High Humidity: Alocasia polly thrives in humid environments.
  • Increasing Humidity: Use a humidifier or place a tray filled with water and pebbles beneath the plant’s pot to create a humid microclimate.
  • Misting: Regularly mist the plant’s leaves to increase humidity levels.
Temperature:
  • Warm Temperatures: Maintain indoor temperatures between 65 and 80 °F (18 and 27 °C).
  • Avoid Cold Drafts: Protect your Alocasia Polly from cold drafts, which can cause stress and leaf damage.

Soil:

  • Well-Draining Soil: Use a well-draining potting mix that retains moisture but allows excess water to drain freely.
  • Aroid Mix: Consider using a specialized aroid mix or creating a blend of potting soil, perlite, and orchid bark.
Fertilization:
  • Regular Feeding: Feed your Alocasia polly with a balanced liquid fertilizer every 4-6 weeks during the growing season (spring and summer).
  • Reduce Feeding: Decrease fertilization frequency in the fall and winter when the plant’s growth slows down.
Pruning and Maintenance:
  • Remove Yellow Leaves: Prune yellow or damaged leaves to maintain the plant’s appearance and health.
  • Cleaning: Wipe the leaves gently with a damp cloth to remove dust and keep them looking glossy.
  • Repotting: Repot your Alocasia polly every 1-2 years or when it outgrows its current container.

Common Pests and Plant Diseases 


Alocasia polly, like many houseplants, can be susceptible to certain pests and diseases. Being aware of these common issues and knowing how to prevent and treat them is essential for maintaining the health and vitality of your plant. Here are some of the most common pests and diseases that may affect your Alocasia polly:

Pests:

Spider Mites:
  • Symptoms: fine webbing on the undersides of leaves, stippling or discoloration of leaves, and an overall decline in plant health.
  • Treatment: Use a gentle insecticidal soap or neem oil spray to control spider mite infestations. Ensure thorough coverage of the affected areas.

Aphids:

  • Symptoms: clusters of small, soft-bodied insects on new growth, distorted leaves, and sticky honeydew residue.
  • Treatment: Rinse aphids off with a strong stream of water, or use insecticidal soap or neem oil to eliminate them. Repeat treatments as necessary.
Mealybugs:
  • Symptoms: white, cottony masses on stems and leaves; yellowing or distorted growth; and sticky honeydew residue.
  • Treatment: Remove mealybugs manually with a cotton swab dipped in rubbing alcohol. Alternatively, use insecticidal soap or neem oil to control infestations.

Scale Insects:

  • Symptoms: raised, waxy bumps on stems and leaves, yellowing or wilting of foliage, and sticky honeydew residue.
  • Treatment: To get rid of scale insects, use a cotton swab or soft brush bathed in rubbing alcohol. Repeat treatments as necessary to ensure thorough control.
Diseases:

Root Rot:

  • Symptoms: wilting, yellowing, and drooping leaves; mushy or blackened roots; and a foul odor emanating from the soil.
  • Treatment: Remove the affected plant parts and repot the Alocasia polly in fresh, well-draining soil. Adjust watering practices to prevent overwatering.
Leaf Spot:
  • Symptoms: circular, water-soaked lesions on leaves, which may turn brown or black over time. Leaf yellowing and defoliation can occur in severe cases.
  • Treatment: Eliminate any damaged leaves and increase airflow around the plant. Avoid overhead watering and treat with a fungicidal spray if necessary.
Powdery Mildew:
  • Symptoms: white, powdery patches on leaves, stems, and flowers. Leaves may become distorted or covered with fungal growth.
  • Treatment: Improve air circulation and reduce humidity levels around the plant. Treat with a fungicidal spray containing sulfur or potassium bicarbonate.

Bacterial Leaf Blight:

  • Symptoms: water-soaked lesions on leaves, which may spread and turn dark brown or black. Leaf tips may become necrotic, and overall plant health can decline.
  • Treatment: Remove affected leaves and avoid overhead watering. Treat with a copper-based fungicide to control bacterial infections.
Prevention Tips:
  • Inspect Regularly: Check your Alocasia polly regularly for signs of pests or diseases, especially on the undersides of leaves and in the soil.
  • Quarantine New Plants: Quarantine new plants before introducing them to your collection to prevent the spread of pests and diseases.
  • Maintain optimal conditions. Provide proper care, including adequate light, water, and humidity, to keep your plant healthy and resilient against pests and diseases.
  • Prune Prudently: Remove dead or damaged plant parts promptly to prevent the spread of pathogens and reduce the risk of pest infestations.

By being proactive and attentive to the health of your Alocasia polly, you can effectively prevent and manage common pests and diseases, ensuring your plant thrives and flourishes in your care.

Common Problem


One common problem that Alocasia polly owners may encounter is leaf yellowing. Here’s a detailed explanation of this issue, along with possible causes and solutions:

Common Problem: Leaf Yellowing

Symptoms:

The leaves of your Alocasia polly may develop a yellow hue, starting from the tips or edges and spreading towards the center.
Yellowing leaves may eventually wilt, become dry, or drop prematurely from the plant.

Possible Causes and Solutions:

Overwatering:

  • Cause: Excess water in the soil can lead to root suffocation and root rot, causing the leaves to yellow and eventually die.
  • Solution: When watering, allow the soil to dry completely between applications. Modify your watering schedule to avoid standing water. Ensure proper drainage in the pot, and consider repotting if the soil remains consistently soggy.
Underwatering:
  • Cause: Insufficient moisture in the soil can also cause leaf yellowing as the plant becomes dehydrated.
  • Solution: Water your Aloe vera thoroughly when the top inch of soil feels dry. Ensure consistent moisture levels, especially during the growing season, but avoid waterlogging the soil.

Poor Drainage:

  • Cause: If the potting mix does not drain well, excess water may accumulate around the roots, leading to root rot and leaf yellowing.
  • Solution: Use a well-draining potting mix specifically formulated for aroids. To let extra water out, make sure the pot has drainage holes in the bottom.
Low Humidity:
  • Cause: Alocasia Polly prefers high humidity levels, and low humidity can stress the plant, leading to leaf yellowing.
  • Solution: Increase humidity around the plant by using a humidifier, placing the pot on a pebble tray filled with water, or misting the leaves regularly.

Nutrient Deficiency:

  • Cause: Lack of essential nutrients, particularly nitrogen, can cause yellowing of the leaves.
  • Solution: Feed your Alocasia polly with a balanced liquid fertilizer every 4–6 weeks during the growing season. Choose a fertilizer specifically formulated for houseplants and follow the recommended dosage.
Pest Infestation:
  • Cause: Pests such as spider mites, aphids, or mealybugs can damage the leaves, leading to yellowing and other symptoms.
  • Solution: Check your plant often for indications of pest infestation. Neem oil, insecticidal soap, or other suitable treatments should be applied as soon as possible to infestations.

Environmental Stress:

  • Cause: Environmental factors such as sudden temperature changes, drafts, or direct sunlight can stress the plant, causing leaf yellowing.
  • Solution: Ensure your Alocasia polly is placed in a stable environment with consistent temperatures, protected from drafts and direct sunlight.

By identifying the underlying cause of leaf yellowing and implementing the appropriate solutions, you can help your Alocasia polly recover and thrive, restoring its vibrant green foliage and overall health.

How to Grow and Maintain Indoor Monstera Deliciosa

Monstera Deliciosa

Monstera deliciosa, commonly known as the Swiss cheese plant, is a popular houseplant admired for its strikingly large, glossy, and fenestrated leaves. Native to the tropical rainforests of Central America, this plant has become a staple in homes and offices around the world due to its unique appearance and relatively easy care requirements.

Monstera deliciosa is known for its distinctive leaves, which can grow up to three feet long and are characterized by deep splits and perforations. These holes and splits are believed to help the plant withstand heavy rainfall and strong winds in its native habitat. The plant can grow quite large, often reaching heights of 10 to 15 feet indoors with proper care.

Botanical Overview
Common Names Split-leaf philodendron, Swiss cheese plant, windowleaf, ceriman
Botanical Name Monstera deliciosa
Family Araceae
Plant Type Vine
Mature Size 3 -15 ft. tall, 3-8 ft. wide
Sun Exposure Partial
Soil Type Well-drained
Soil pH Acidic, neutral
Bloom Time Summer
Flower Color White
Hardiness Zones 10-12 (USDA)
Native Area Central America
Toxicity Toxic to humans,1 cats, and dogs2


Monstera Deliciosa
Monstera Deliciosa

Types of Monstera Plants


Monstera plants are a diverse and fascinating genus within the Araceae family. While Monstera deliciosa is the most well-known, there are several other species and varieties that plant enthusiasts may find equally captivating. Here’s a closer look at some popular types of Monstera plants:

1. Monstera deliciosa

Common Names: Mexican breadfruit, split-leaf philodendron, and Swiss cheese plant

  • Description: This is the most iconic Monstera species, known for its large, glossy, heart-shaped leaves with deep splits and holes. It’s a robust climber that can grow very large indoors and outdoors in suitable climates.
2. Monstera adansonii

Common Names: Adanson’s monstera, Swiss cheese vine

  • Description: Monstera adansonii has smaller, more delicate leaves than M. deliciosa, with more frequent and elongated holes. It’s a vining plant that can be trained to climb or trail, making it ideal for hanging baskets and trellises.
3. Monstera obliqua

Common Names: Obliqua monstera

  • Description: This species is rare and often confused with M. adansonii. M. obliqua has extremely thin, delicate leaves with large perforations that can sometimes comprise more than 90% of the leaf surface. It’s a collector’s item due to its rarity and distinct appearance.
4. Monstera siltepecana

Common Names: Silver Monstera

  • Description: Known for its silvery sheen and dark green veins, M. siltepecana starts with lance-shaped leaves that are unfenestrated but develop splits as the plant matures. It’s a climbing species that thrives with support.
5. Monstera pinnatipartita

Common Names: Pinnatipartita monstera

  • Description: This species features deeply pinnatifid leaves that resemble those of a palm. It starts with smaller, simpler leaves that become more segmented and fenestrated as the plant matures and climbs.
6. Monstera dubia

Common Names: Shingle Plant

  • Description: M. dubia has small, heart-shaped leaves that lie flat against the surface they climb, resembling shingles on a roof. In its juvenile form, it looks quite different from the mature form, which develops fenestrations and becomes more typical of Monstera species.
7. Monstera Standleyana

Common Names: Standley’s Monstera

  • Description: This species has elongated, lance-shaped leaves that are often variegated with white or cream streaks. It’s a compact, non-climbing Monstera that adds a unique aesthetic to any plant collection.
8. Monstera epipremnoides

Common Names: Epipremnoides monstera

  • Description: Similar to M. adansonii, but with larger, thicker leaves and more pronounced fenestrations. This plant can grow quite large and is prized for its bold, dramatic foliage.

Monstera Deliciosa Care Guide


Monstera deliciosa, also known as the Swiss cheese plant, is a popular and relatively easy-to-care-for houseplant. Its dramatic, fenestrated leaves and robust growth make it a favorite among plant enthusiasts. Here is a comprehensive care guide to help you keep your Monstera deliciosa healthy and thriving.

Light Requirements

Monstera deliciosa thrives in bright, indirect light. It can tolerate some direct sunlight, especially in the morning, but prolonged exposure to intense direct sunlight can scorch its leaves. In low light conditions, the plant will grow more slowly and may develop smaller leaves with fewer fenestrations.

  • Optimal Light: Bright, indirect light.
  • Avoid prolonged direct sunlight and deep shade.
Watering

For your Monstera deliciosa to stay healthy, proper watering is essential. Overwatering can lead to root rot, while underwatering can cause the leaves to wilt and become dry.

  • Watering Schedule: Water when the top inch of soil feels dry to the touch.
  • Method: Water thoroughly until it drains out of the bottom of the pot. To keep the plant out of the water, empty the saucer.

Humidity

Monstera deliciosa prefers a humid environment, similar to its native tropical habitat. While it can adapt to average household humidity levels, increasing humidity will promote healthier growth and prevent leaf edges from browning.

  • Ideal Humidity: 60-80%.
  • Tips to Increase Humidity: Use a humidifier, place a tray of water near the plant, or mist the leaves regularly.

Temperature

Monstera deliciosa prefers warm temperatures and can suffer from cold drafts or sudden temperature drops.

  • Ideal Temperature Range: 65-85°F (18-29°C).
  • Avoid temperatures below 50°F (10°C) and sudden temperature changes.

Soil

A well-draining potting mix is essential to prevent root rot and ensure proper nutrient uptake.

  • Recommended Soil: A mix of peat-based potting soil with perlite or orchid bark for added aeration and drainage.
  • Soil pH: slightly acidic to neutral (5.5-7.0).

Fertilization

Regular feeding will support the vigorous growth of your Monstera deliciosa.

  • Fertilizer Type: Balanced, water-soluble fertilizer.
  • Frequency: Once a month during the growing season (spring and summer). As development slows in the fall and winter, cut back on feeding.
Pruning and training

Pruning helps manage the size of your monstera and encourages bushier growth. It can also be trained to climb, mimicking its natural growth habit.

  • Pruning: Remove yellow or damaged leaves and trim back overgrown stems as needed. Just above a leaf node, prune to promote new growth.
  • Training: Use a moss pole or trellis to support climbing. As the stems grow, gently connect them to the support framework.

Repotting

Repotting your Monstera deliciosa every 1-2 years will provide fresh soil and more room for growth.

  • When to Repot: When the plant becomes root-bound or outgrows its pot.
  • Pot Size: Choose a pot 2-3 inches larger in diameter than the current one.

Propagation

Monstera deliciosa can be easily propagated through stem cuttings.

  • Method: Cut a stem just below a node with a few leaves attached. Immerse the cutting in either water or potting mix that drains properly.
  • Rooting: Roots will develop in a few weeks. Once the roots are a few inches long, transplant the cutting into a pot with soil.

With proper care, Monstera deliciosa can become a stunning centerpiece in your home. By providing the right light, water, humidity, and nutrients, you can ensure that your Swiss cheese plant thrives and continues to produce its iconic, beautiful leaves. Whether you’re a novice plant parent or an experienced gardener, Monstera deliciosa is a rewarding plant to grow and enjoy.

Common Pests, Diseases and Problem


Despite being a relatively hardy and low-maintenance plant, Monstera deliciosa can still encounter various pests, diseases, and other problems. Identifying and addressing these issues promptly can help ensure the health and vitality of your plant.

Common Pests

Spider Mites

  • Symptoms: Tiny, web-like structures on the undersides of leaves; speckled or yellowing leaves.
  • Treatment: Increase humidity around the plant, rinse leaves with water, and use insecticidal soap or neem oil.

Mealybugs

  • Symptoms: white, cottony masses on leaves and stems; sticky residue (honeydew) on the plant.
  • Treatment: Wipe off bugs with a cotton swab dipped in rubbing alcohol, and use insecticidal soap or neem oil. Regularly inspect and treat as needed.

Scale Insects

  • Symptoms: brown or black bumps on stems and leaves; sticky residue (honeydew) on the plant.
  • Treatment: Manually remove scales with a cloth or sponge soaked in soapy water, and use horticultural oil or insecticidal soap.

Thrips

  • Symptoms: silver or bronze streaks on leaves; tiny black droppings.
  • Treatment: Rinse the plant with water, use sticky traps, and apply insecticidal soap or neem oil.

Common Diseases

Root Rot

  • Causes: overwatering or poor drainage.
  • Symptoms: yellowing leaves, mushy or blackened roots, wilting despite moist soil.
  • Treatment: Remove affected parts of the root system, repot in fresh, well-draining soil, and adjust watering habits.

Leaf Spot

  • Causes: fungal or bacterial infections.
  • Symptoms: Spots on leaves, sometimes with a yellow halo, that are brown or black.
  • Treatment: Remove affected leaves, improve air circulation, avoid overhead watering, and apply a suitable fungicide.
Powdery Mildew
  • Causes: fungal infection.
  • Symptoms: Spots of white powder on stems and leaves.
  • Treatment: Increase air circulation, reduce humidity, avoid overhead watering, and use a fungicidal spray.
Common Problems

Yellowing Leaves

  • Causes: overwatering, underwatering, nutrient deficiency, or inadequate light.
  • Treatment: Check the watering schedule, ensure proper drainage, provide balanced fertilizer, and adjust light conditions.

Browning Leaf Edges

  • Causes: low humidity, underwatering, or excessive fertilizer.
  • Treatment: Increase humidity, ensure consistent watering, and avoid overfertilizing.

Leggy Growth

  • Causes: insufficient light.
  • Treatment: Move the plant to a brighter location with indirect light, or supplement with grow lights if necessary.

Leaf Curling

  • Causes: underwatering, low humidity, or temperature stress.
  • Treatment: Ensure consistent watering, increase humidity, and avoid exposing the plant to drafts or temperature extremes.

No Fenestrations (Holes) in Leaves

  • Causes: immaturity of the plant, insufficient light, or lack of nutrients.
  • Treatment: Provide bright, indirect light, ensure proper feeding with a balanced fertilizer, and allow time for the plant to mature.


FAQ

Where to buy monstera deliciosa?

Monstera deliciosa plants can be bought at local nurseries, specialty plant shops, home improvement stores like Home Depot and Lowe’s, and online retailers such as Amazon, Etsy, and dedicated plant websites like The Sill and Bloomscape. You can also check local plant sales and swaps for unique options.