Anthurium Clarinervium Care Guide: Tips for Thriving Plants

Anthurium Clarinervium

Anthurium clarinervium, commonly known as the Velvet Cardboard Anthurium, is a captivating houseplant that has gained immense popularity among plant enthusiasts. Known for its striking foliage and unique texture, this tropical plant is a perfect addition to any indoor garden.

Anthurium clarinervium hails from the lush tropical rainforests of southern Mexico. It belongs to the Araceae family, which is known for its wide variety of decorative plants. In its natural habitat, this plant thrives under the canopy of trees, enjoying the high humidity and dappled sunlight of the forest floor.

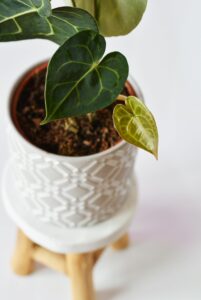
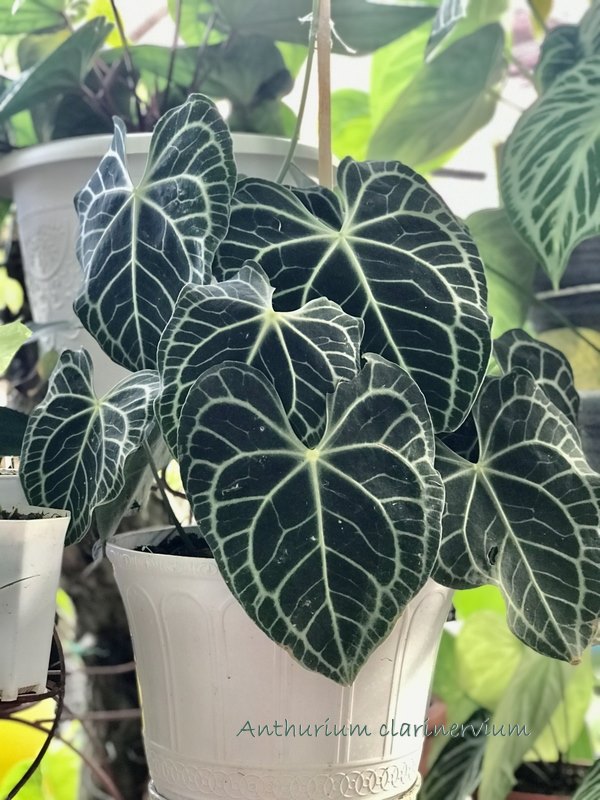
The most striking feature of Anthurium clarinervium is its heart-shaped leaves. These leaves are velvety to the touch, with a deep green hue contrasted by prominent white veins that create a striking pattern. Each leaf can grow up to 8-10 inches long, making it a focal point in any plant collection. The plant also produces small, inconspicuous flowers on a spadix, typical of the Araceae family, but these are often overshadowed by its dramatic foliage.

Scientific Classification

Kingdom: Plantae
Clade: Tracheophytes
Clade: Angiosperms
Clade: Monocots
Order: Alismatales
Family: Araceae
Genus: Anthurium
Species:
A. clarinervium
Binomial name
Anthurium clarinervium


Anthurium Clarinervium

Care

Anthurium clarinervium, also known as the Velvet Cardboard Anthurium, is a stunning houseplant admired for its unique foliage. To ensure this plant thrives indoors, it’s important to understand and meet its specific care requirements. Here’s a detailed guide on how to care for your Anthurium clarinervium indoors.

Light Requirements

Anthurium clarinervium prefers bright, indirect light. Direct sunlight can be too harsh and may cause the leaves to scorch, leading to brown, crispy edges. Ideally, place the plant near an east or north-facing window where it can receive filtered sunlight. If natural light is insufficient, consider using a grow light to provide the necessary illumination.

Watering 

Maintaining proper moisture levels is crucial for the health of your Anthurium clarinervium. The plant prefers consistently moist soil but is sensitive to overwatering, which can cause root rot. Follow these watering guidelines:

  • Frequency: When the top inch of soil appears dry to the touch, add water. This usually translates to watering every 1-2 weeks, depending on your indoor environment.
  • Method: Water the pot thoroughly until the water drains from the bottom. Ensure that the pot includes drainage holes to keep water from gathering at the bottom.
  • Humidity: Anthurium clarinervium thrives in high humidity. Aim for humidity levels around 60–80%. To increase humidity, either use a humidifier or place a tray of water with pebbles near the plant.
Soil and potting

The right soil mix is essential for good drainage and aeration. Use a well-draining potting mix, such as an orchid mix, or create your own mix using equal parts peat moss, perlite, and orchid bark. Repot the plant every 1-2 years to refresh the soil and provide more space for root growth.

Temperature

Anthurium clarinervium prefers a warm environment. Maintain indoor temperatures between 65 and 80 °F (18 and 27 °C). Avoid exposing the plant to temperatures below 60°F (15°C) and protect it from drafts or sudden temperature changes.

Fertilizing

Feed your Anthurium clarinervium with a balanced, water-soluble fertilizer diluted to half strength. Fertilize every 6–8 weeks during the growing season (spring and summer). Reduce feeding during the fall and winter, when the plant’s development slows.

Pruning and maintenance

Regular pruning helps maintain the plant’s shape and health. Remove any yellowing or dead leaves to encourage new growth and prevent disease. Wipe the leaves with a damp cloth occasionally to remove dust and keep the plant looking vibrant.

Propagation

Propagating Anthurium clarinervium is typically done through division.

  1. Carefully take the plant out of its pot and carefully separate the roots.
  2. Divide the plant into smaller sections, ensuring each section has a healthy root system and at least one leaf.
    Plant each portion in a separate pot filled with fresh potting mix and thoroughly water it.

Anthurium clarinervium is a beautiful and unique houseplant that can thrive indoors with the right care. By providing the appropriate light, water, humidity, and maintenance, you can enjoy its striking foliage and add a touch of tropical elegance to your home. With attention to its specific needs, this plant can become a cherished centerpiece in your indoor garden.

Common Pests & Problem


Despite its hardiness, Anthurium clarinervium can occasionally face pest infestations and other problems. Identifying and addressing these issues early can help keep your plant healthy and thriving. Here are some common pests and problems you might encounter with Anthurium clarinervium, along with solutions for each.

Common Pests

Spider Mites

Symptoms: fine webbing on the undersides of leaves; tiny specks moving on the leaves; yellowing or stippling of leaves.

Solution: Increase humidity around the plant since spider mites thrive in dry conditions. Spray the plant with a mixture of water and mild soap, or use neem oil. Ensure thorough coverage, especially on the undersides of the leaves. Repeat the treatment every 7–10 days until the infestation is under control.

Mealybugs

  • Symptoms: white, cotton-like masses on leaves, stems, and in leaf axils; honeydew (a sticky substance) on leaves.
  • Solution: Wipe affected areas with a cotton swab dipped in rubbing alcohol to remove mealybugs. For larger infestations, apply insecticidal soap or neem oil. Regularly inspect the plant and treat it as necessary.

Aphids

  • Symptoms: clusters of small, soft-bodied insects on new growth; sticky honeydew on leaves; distorted or curling leaves.
  • Solution: Spray the plant with a strong stream of water to dislodge aphids. Apply insecticide soap or neem oil to the afflicted areas. Introduce beneficial insects, such as ladybugs, to decrease aphid populations.

Scale Insects

  • Symptoms: brown or tan; shell-like bumps on stems and leaves; yellowing leaves; sticky honeydew.
  • Solution: Remove scale insects manually with a cotton swab dipped in rubbing alcohol. Apply horticultural oil or insecticidal soap. Regularly monitor the plant and treat any new infestations promptly.
Common Problems

Yellowing Leaves

  • Cause: overwatering, underwatering, nutrient deficiency, or low light conditions.
  • Solution: Check soil moisture levels and adjust watering practices accordingly. Ensure the plant is receiving adequate, but not excessive, light. Feed with a balanced fertilizer if a nutrient deficiency is suspected.
Brown leaf tips or edges
  • Cause: low humidity, underwatering, excessive fertilization, or salt buildup in the soil.
  • Solution: Increase humidity around the plant using a humidifier or a pebble tray. Water consistently, and avoid letting the soil dry out completely. Flush the soil periodically to remove excess salts and avoid over-fertilizing.

Root Rot

  • Cause: overwatering or poor drainage.
  • Solution: Let the soil dry completely in between applications of water. Ensure the pot has drainage holes, and use a well-draining potting mix. If root rot is severe, trim away the affected roots and repot the plant in fresh soil.

Leaf spot diseases

  • Cause: Fungal or bacterial infections, often due to high humidity and poor air circulation.
  • Solution: Remove the afflicted leaves and promote air circulation around the plant. Avoid overhead irrigation, and keep the leaves dry. Apply a fungicide if necessary to control the spread of the disease.

Wilting

  • Cause: underwatering, overwatering, root rot, or extreme temperatures.
  • Solution: Check soil moisture levels and adjust watering practices. Inspect the roots for signs of rot and repot if necessary. Protect the plant against severe temperatures and unexpected fluctuations.

Preventive Measures

  • Regular Inspection: Regularly check your plant for early signs of pests and problems. Effective therapy depends on early discovery.
  • Proper Watering: Water appropriately, ensuring the soil remains moist but not soggy. In between waterings, allow the top inch of soil to become dry.
  • Humidity and Air Circulation: Maintain high humidity levels and ensure good air circulation around the plant to prevent fungal and bacterial diseases.
  • Clean Environment: Keep the plant’s environment clean. Get rid of any dead or decaying plant matter right away.

By understanding the common pests and problems that can affect Anthurium clarinervium and implementing these preventive measures, you can ensure your plant remains healthy and continues to thrive indoors.

Color and Meaning

Colors
  1. Deep Green Leaves: Signifies health, vitality, and growth.
  2. Prominent White Veins: Symbolizes clarity, purity, and intricate beauty.
  3. Velvety Texture: Adds a luxurious, tactile quality to the plant.
Meaning and Symbolism
  1. Hospitality: Represents warm and welcoming energy.
  2. Luxury and Elegance: Symbolizes refined taste and high aesthetic value.
  3. Endurance and Strength: Reflects resilience and the idea that beauty can be both delicate and strong.
  4. Nature’s Artistry: Represents the intricate wonders and creativity of the natural world.
  5. Love and Relationships: Heart-shaped leaves symbolize love and deep relationships.

How to grow and care Philodendron Pink Princess

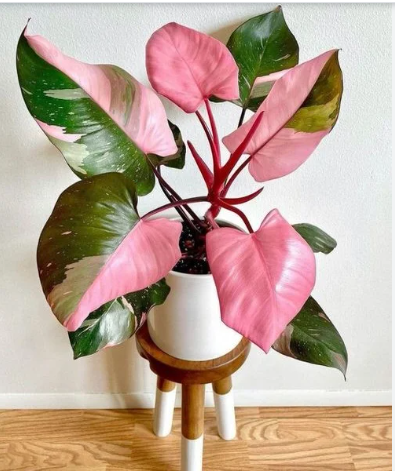
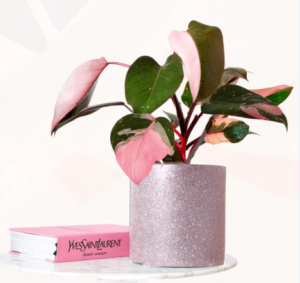
The Philodendron Pink Princess (PPP) is a popular and striking plant known for its dark green leaves adorned with vibrant pink variegation. This tropical plant is a cultivar of Philodendron erubescens and is cherished by plant enthusiasts for its unique and colorful foliage. Here are some key points about the Philodendron Pink Princess:

Appearance

  • Leaves: The leaves are heart-shaped with a mix of deep green and bright pink patches. The variegation can vary greatly from leaf to leaf.
  • Stems: The stems are often a reddish or pinkish color, adding to the plant’s overall aesthetic appeal.


Botanical Name Philodendron erubescens ‘pink princess’
Common Name Philodendron pink princess, blushing philodendron
Family Araceae
Plant Type Perennial
Mature Size 4-5 ft. tall, 2-4 ft. wide
Sun Exposure Partial
Soil Type Loamy, moist but well-draining
Soil pH Acidic
Bloom Time Spring, summer
Flower Color Green, white
Hardiness Zones 9a, 9b, 10a, 10b, 11a, 11b
Native Area South America


Types of Philodendron Pink Princess

The Philodendron Pink Princess (PPP) is a specific cultivar of Philodendron erubescens known for its pink variegation. There are no distinct “types” of Pink Princess, but variations exist in the degree of pink variegation:

  1. High Variegation: Features more pink areas on the leaves.
  2. Low Variegation: Displays fewer pink sections, with more green.
  3. Reverted Green: Produces mostly green leaves, sometimes reverting from variegated ones.

Similar plants often confused with the Pink Princess include the Philodendron Pink Congo, White Princess, and White Knight, each with different variegation characteristics.

Pink princess philodendron

Growing Conditions and Care

Caring for an indoor Philodendron Pink Princess (PPP) involves creating an environment that mimics its natural tropical habitat. Here’s a detailed guide on the growing conditions and care needed for this beautiful plant:

Light
  • Bright, Indirect Light: Place your PPP in a spot where it gets plenty of bright, indirect light. Direct sunlight can burn the leaves, while insufficient light can reduce the pink variegation. It is best to place the window facing north or east, or a few feet distant from a window facing south or west.
  • Supplemental Light: If natural light is limited, especially during winter months, you can use a grow light to provide the necessary brightness.
Watering
  • Moderate Watering: Water the plant when the top inch of the soil is dry to the touch. Overwatering can lead to root rot, while underwatering can cause the leaves to wilt and turn brown at the edges.
  • Good Drainage: Ensure your pot has drainage holes to allow excess water to escape, preventing waterlogging.
Humidity
  • High Humidity: The PPP thrives in high humidity environments, ideally above 60%. If your home has dry air, consider the following:
  • Humidifier: Use a humidifier near the plant.
  • Misting: Regularly mist the leaves with water.
  • Pebble Tray: Place the pot on a tray containing water and pebbles to promote humidity around the plant.
    Temperature
  • Optimal Range: Maintain a consistent temperature between 65-80°F (18-27°C). Avoid exposing the plant to temperatures below 55°F (13°C), cold drafts, or sudden temperature changes.
    Soil
  • Well-Draining Mix: Use a potting mix that ensures good drainage and aeration. A mix for aroids or houseplants, combined with perlite, orchid bark, or coco coir, works well.
Fertilizing
  • Balanced Fertilizer: During the growing season (spring and summer), feed your PPP with a balanced, water-soluble fertilizer every 4-6 weeks. Reduce fertilizing during the fall and winter when the plant’s growth slows down.

Pruning

  • Maintaining Shape: Prune the plant to remove any completely green or damaged leaves and to maintain a desirable shape. Pruning can also encourage new variegated growth.
  • Encouraging Variegation: Remove stems that produce all-green leaves to promote the growth of variegated leaves.
    Support
  • Climbing Support: Provide a moss pole or support stake for the PPP to climb, which can help it grow more robustly and produce larger leaves.
Repotting

Repotting your Philodendron Pink Princess involves selecting a slightly larger pot with good drainage, gently removing the plant from its current pot, inspecting and trimming the roots if necessary, placing it in the new pot with fresh potting mix, and watering thoroughly. Repotting in spring or early summer when the plant is actively growing helps minimize stress. Keep the plant in bright, indirect light post-repotting and monitor for signs of stress while adjusting care as needed for optimal growth.

Propagation

  • Stem Cuttings: Propagate the PPP by taking stem cuttings with at least one node and a healthy leaf. You can root the cuttings in water or directly in a moist potting mix.

By providing the Philodendron Pink Princess with these optimal growing conditions and attentive care, you can enjoy its stunning pink variegated foliage and ensure it thrives indoors.

Common Problem 

One common problem that Philodendron Pink Princess owners encounter is yellowing leaves. This can often be attributed to overwatering, which leads to waterlogged soil and root suffocation. When roots can’t access oxygen, they begin to decay, causing the leaves to turn yellow. To address this issue, allow the soil to dry out between waterings and ensure that your plant’s pot has proper drainage. Additionally, check the roots for any signs of rot and trim away any damaged sections. Adjusting your watering routine and providing optimal drainage can help prevent yellowing leaves and promote the health of your Philodendron Pink Princess.

Common Pests

Common pests that can affect Philodendron Pink Princess plants include:

  • Spider Mites: These tiny arachnids are a common nuisance for indoor plants, including Philodendrons. They feed on the sap of the leaves, causing stippling and webbing. Spider mites thrive in dry conditions, so increasing humidity around your plant can help deter them.
  • Aphids: Aphids are small insects that cluster on the undersides of leaves and feed on plant sap. They can cause distortion of new growth and the leaves to become sticky with honeydew. Regularly inspect your Pink Princess for aphids, and if found, remove them with a strong spray of water or treat with insecticidal soap.
  • Mealybugs: Mealybugs are little, soft-bodied insects coated in a white, waxy material. They often congregate in leaf axils and along stems, sucking sap from the plant. Mealybug infestations can lead to stunted growth and yellowing leaves. To eliminate mealybugs from your plant, immerse a cotton swab in rubbing alcohol.
  • Scale Insects: Scale insects are small, oval-shaped pests that attach themselves to the stems and leaves of plants. They feed on plant sap and can cause yellowing leaves and stunted growth.Use a soft brush or cotton swab soaked in rubbing alcohol to manually remove scale insects.

Regular inspection and early detection are key to preventing pest infestations on your Philodendron Pink Princess. If you notice any signs of pest activity, take prompt action to control the infestation and protect the health of your plant.

Plant Diseases

Plant diseases that commonly affect Philodendron Pink Princess include:

  • Root Rot: Caused by overwatering, leading to rotting roots and wilting foliage. Ensure proper drainage and avoid waterlogging the soil.
  • Leaf Spot: Fungal disease resulting in brown or black spots on leaves, often due to high humidity. Remove the afflicted leaves to increase air circulation.
  • Powdery Mildew: White, powdery substance on leaves and stems caused by fungal infection. Increase air circulation and avoid overhead watering to prevent its spread.
  • Bacterial Blight: Leads to dark, water-soaked lesions on leaves and stems. Remove infected plant parts and maintain proper watering practices.

Prevent plant diseases by practicing good plant hygiene, providing optimal growing conditions, and promptly addressing any signs of disease.

Uses 

The Philodendron Pink Princess is an ornamental plant whose beautiful foliage brightens up indoor spaces. It also improves air quality, decreases stress, and appeals to plant lovers. It is also frequently given as a gift on many occasions due to its beauty and meaning.

FAQ

Pink princess philodendron where to buy?

You can purchase a Pink Princess Philodendron from:

  1. Online Plant Retailers: Etsy, Amazon, The Sill, Costa Farms.
  2. Local Nurseries: Independent plant shops, Home Depot, Lowe’s.
  3. Plant Groups: Facebook plant groups, Reddit’s r/houseplants.
  4. Plant Shows: Local plant fairs and expos.
  5. Online Marketplaces: eBay.

Guide to Growing and Caring for Hibiscus Plants

Hibiscus flower

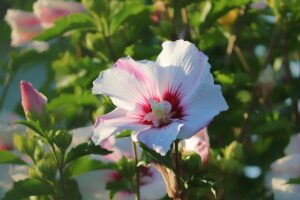
Hibiscus is a large genus of flowering plants belonging to the Malvaceae family. These plants are cherished for their striking, colorful blooms and are popular in both garden landscapes and as indoor plants. Here’s a comprehensive look at hibiscus flowers:

Characteristics
  1. Appearance:
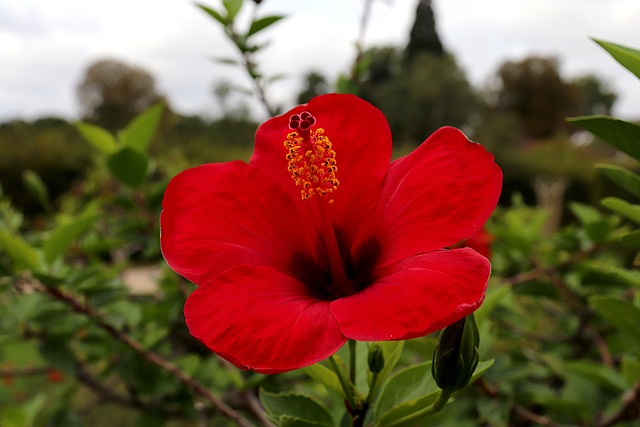
    • Flowers: Hibiscus flowers are typically large and showy, with a distinctive trumpet shape and five or more petals. They can range from 2 to 10 inches (5 to 25 cm) in diameter.
    • Colors: They come in various colors, including red, pink, white, yellow, orange, and purple. Some varieties even have multi-colored or patterned petals.
    • Leaves: The leaves are usually glossy, dark green, and can be either smooth-edged or serrated.
  2. Plant Types:
    • Shrubs and Trees: Some hibiscus species grow as small trees or large shrubs, while others are more compact and suitable for container gardening.
    • Annuals and Perennials: While many hibiscus plants are perennials in tropical climates, some are grown as annuals in temperate regions.

Hibiscus flower
Hibiscus flower

Varieties and Classification 


When it comes to growing hibiscus indoors, the focus is primarily on varieties that can thrive in container environments and adapt well to indoor conditions. Here’s an overview of the most suitable hibiscus varieties for indoor cultivation, along with their classifications:

Popular Indoor Hibiscus Varieties
  1. Hibiscus rosa-sinensis (Tropical Hibiscus)
    • Description: Known for its large, vibrant flowers, this is the most common type of hibiscus grown indoors. It comes in a variety of colors, including red, pink, yellow, orange, and white.
    • Characteristics: Evergreen shrub with glossy, dark green leaves. Flowers can be single or double-petaled.
    • Care: Requires bright light, warm temperatures, and high humidity. Needs regular watering and feeding during the growing season.
  2. Hibiscus syriacus (Rose of Sharon)
    • Description: This deciduous hibiscus can be grown indoors, though it is more commonly found outdoors. It produces smaller, less showy flowers compared to the tropical hibiscus.
    • Characteristics: a hardy shrub that can tolerate cooler temperatures. Flowers are typically white, pink, lavender, or blue.
    • Care: It needs bright, indirect light and moderate watering. Can handle cooler indoor temperatures better than tropical varieties.
  3. Hibiscus sabdariffa (Roselle)
    • Description: Known for its edible calyces, which are used to make hibiscus tea. It has striking red stems and leaves with smaller, less ornamental flowers.
    • Characteristics: annual or perennial herb with a bushy growth habit.
    • Care: Requires plenty of light and regular watering. It can be grown indoors for its unique foliage and edible parts.
Classification
  1. By Flower Type:
    • Single-Petal Varieties: Feature a single layer of petals. Examples include ‘Brilliant’ and ‘President’.
    • Double-Petal Varieties: Have multiple layers of petals, giving a fuller appearance. Examples include ‘The Path’ and ‘Bon Temps’.
  2. By Growth Habit:
    • Compact/Dwarf Varieties: Ideal for indoor containers due to their smaller size and manageable growth. Examples include ‘Petite Orange’ and ‘Petite Pink’.
    • Standard Varieties: Can be pruned and trained to maintain a suitable size for indoor growing. Examples include ‘Sunny Wind’ and ‘Cajun Blue’.
  3. By Color:
    • Red Varieties: Such as ‘Red Dragon’ and ‘Fireball’.
    • Pink Varieties: Such as ‘Pink Versicolor’ and ‘Rose Queen’.
    • Yellow Varieties: Such as ‘Sunny Wind’ and ‘Yellow Submarine’.
    • Multi-Colored Varieties: Such as ‘Cherry Cheesecake’ and ‘Magic Moment’.

Growing Conditions and Care 


Growing hibiscus indoors requires careful attention to their specific needs to ensure they thrive and bloom beautifully. Here are the detailed growing conditions and care tips for indoor hibiscus flowers:

Growing Conditions

Light

  • Requirements: Hibiscus plants need plenty of bright, indirect sunlight. They should receive at least 6–8 hours of light per day.
    Placement: Place them near a south- or west-facing window. If natural light is insufficient, consider adding grow lights as a supplement.

Temperature

  • Optimal Range: Maintain indoor temperatures between 60 and 75°F (15 and 24°C). Hibiscus plants prefer warm conditions and can suffer if temperatures drop below 50 °F (10 °C).
  • Avoid: drafty areas, sudden temperature changes, and proximity to cold windows in winter.

Humidity

  • Requirement: High humidity is crucial for hibiscus. Aim for a humidity level of 50–60 percent.
  • Methods: Use a humidity tray, mist the leaves regularly, or use a humidifier to maintain adequate humidity levels.

Soil

  • Type: Use a well-draining potting mix. A mix of potting soil, perlite, and peat moss works well.
  • pH Level: Slightly acidic to neutral soil (pH 6.0–7.0) is ideal.
Care Tips

Watering

  • Frequency: Keep the soil wet but not saturated. When the top inch of soil appears dry to the touch, add water.
  • Winter Care: Reduce watering frequency during the winter months when the plant’s growth slows down.

Fertilizing

  • During the growing season: Feed your hibiscus every 2-4 weeks with a balanced, water-soluble fertilizer (such as 10-10-10 NPK).
  • Dormant Period: Reduce feeding in the fall and winter when the plant’s growth naturally slows.

Pruning

  • Purpose: Prune to maintain shape, encourage bushier growth, and remove dead or diseased branches.
  • Timing: The best time to prune is in early spring, before new growth starts. Light pruning can also be done throughout the growing season to maintain shape.

Repotting

  • Frequency: Whenever the plant outgrows its pot, or every 1-2 years, repot. To give yourself room to expand, use a pot that is slightly larger.
  • Method: Carefully remove the plant from its current pot, trim any overgrown or damaged roots, and replant in fresh potting mix.
Pest Control
  • Common Pests: Look out for aphids, spider mites, and whiteflies. Check the plant often for indications of pest infestation.
  • Treatment: Treat infestations with insecticidal soap or neem oil. To avoid insect infestations, make sure there is excellent air circulation and don’t overwater.

Propagation

  • Method: Hibiscus can be propagated through stem cuttings. Take 4-6 inch cuttings from new growth, remove the lower leaves, dip the cut end in rooting hormone, and plant in a pot with moist potting mix.
  • Care: Keep the cuttings in a warm, humid environment with indirect light until roots develop.
Troubleshooting Common Issues

Yellowing Leaves

  • Cause: overwatering or underwatering. Check the soil moisture and adjust the watering accordingly.
    Bud Drop
  • Cause: sudden changes in temperature, inadequate light, or overfeeding. Ensure stable growing conditions and avoid over-fertilizing.

Poor Flowering

  • Cause: insufficient light, inadequate nutrients, or improper pruning. Ensure the plant gets enough light and is fed regularly during the growing season.

By providing the right conditions and attentive care, indoor hibiscus plants can flourish, bringing vibrant, tropical beauty to your home.

Colors and Meanings


The color of a hibiscus flower can convey different meanings, much like other flowers. Here are some common interpretations associated with different colors of hibiscus flowers:

  1. Red Hibiscus:
    • Passion: Red hibiscus flowers often symbolize love, passion, and desire.
    • Energy: They can also represent vitality, action, and enthusiasm.
  2. Pink Hibiscus:
    • Affection: Pink hibiscus flowers symbolize affection, tenderness, and friendship.
    • Femininity: They can also represent femininity, grace, and charm.
  3. Yellow Hibiscus:
    • Happiness: Yellow hibiscus flowers symbolize happiness, joy, and optimism.
    • Friendship: They can also represent friendship, warmth, and positive energy.
  4. Orange Hibiscus:
    • Excitement: Orange hibiscus flowers symbolize excitement, enthusiasm, and energy.
    • Creativity: They can also represent creativity, inspiration, and innovation.
  5. White Hibiscus:
    • Purity: White hibiscus flowers symbolize purity, innocence, and cleanliness.
    • Peace: They can also represent peace, tranquility, and spiritual growth.
  6. Purple Hibiscus:
    • Royalty: Purple hibiscus flowers symbolize royalty, luxury, and nobility.
    • Spirituality: They can also represent spirituality, wisdom, and inner peace.
  7. Blue Hibiscus:
    • Rare: Blue hibiscus flowers are quite rare in nature but symbolize serenity, tranquility, and harmony when found.
    • Imagination: They can also represent imagination, inspiration, and creativity.

These interpretations may vary depending on cultural and personal contexts, but they provide a general understanding of the symbolic meanings associated with different colors of hibiscus flowers.

Uses 

Sure, here’s a concise summary of the uses of hibiscus flowers:

  • Ornamental: Decorative flowers for gardens and indoor settings.
  • Culinary: Used to make hibiscus tea and as edible decorations.
  • Medicinal: Potential health benefits, including lowering blood pressure.
  • Cosmetic: Ingredients in skincare products for moisturizing and exfoliating.
  • Haircare: Used in shampoos and conditioners for strengthening hair.
  • Natural Dyes: Pigments used for coloring fabrics and materials.
  • Landscape: Providing shade, attracting pollinators, and erosion control.


Indoor Peonies: A Complete Guide to Growing and Care

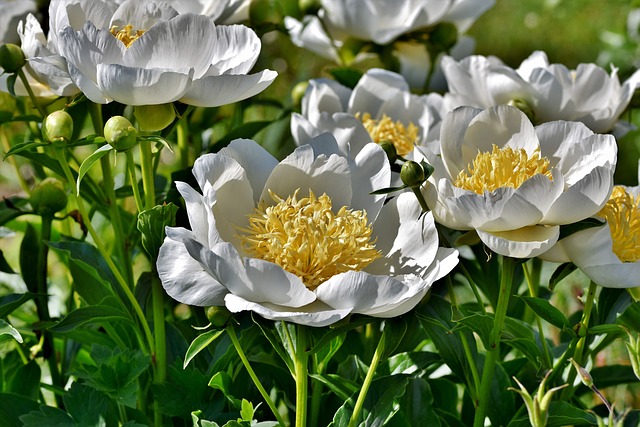
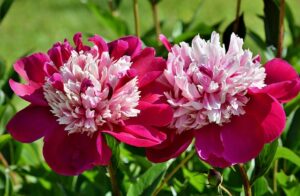
Peonies, belonging to the genus Paeonia, are among the most cherished and admired flowering plants worldwide. Renowned for their exquisite blooms, intoxicating fragrance, and rich symbolism, peonies have captivated gardeners, artists, and poets for centuries. From their fascinating history to their diverse varieties and cultivation tips, peonies continue to enchant and inspire enthusiasts across the globe.

Peonies boast a storied past steeped in symbolism and cultural significance. Originating from Asia, particularly China, where they have been cultivated for over 2,000 years, peonies hold deep-rooted symbolism in Chinese culture. Revered as the “king of flowers” and a symbol of prosperity, honor, and romance, peonies have been immortalized in Chinese art, literature, and folklore.

In Western culture, peonies have also garnered admiration and reverence. Introduced to Europe in the 18th century, peonies quickly became a symbol of wealth, beauty, and aristocracy. They found their way into royal gardens and grand estates, adorning palaces and parks with their resplendent blooms.

Varieties and Classification

Growing peonies indoors can be a delightful endeavor for flower enthusiasts seeking to bring the charm and beauty of these blooms into their homes. While traditionally associated with outdoor gardens, there are certain varieties and classifications of peonies that are particularly well-suited for indoor cultivation. From compact herbaceous varieties to elegant tree peonies, indoor peonies offer a diverse array of options for creating stunning floral displays within the confines of your home.

1. Herbaceous Indoor Peonies:

Herbaceous peonies are the most common type grown indoors due to their manageable size and adaptability to container gardening. These varieties typically die back to the ground in winter and re-emerge in spring, producing an abundance of fragrant blooms. Popular herbaceous indoor peony varieties include:

  • ‘Bowl of Beauty’ (Paeonia lactiflora): This cultivar features large, bowl-shaped flowers with delicate pink petals surrounding a golden center, creating a stunning display.
  • ‘Sarah Bernhardt’ (Paeonia lactiflora): Known for its exquisite fragrance and luxurious, fully double blooms in shades of soft pink, ‘Sarah Bernhardt’ is a timeless favorite among gardeners.
2. Tree Peonies for Indoor Cultivation:

While tree peonies require a bit more space and care, their spectacular blooms and elegant foliage make them an enchanting addition to indoor spaces. Tree peonies are characterized by their woody stems and long-lasting, often showy flowers. Some tree peony varieties suitable for indoor cultivation include:

  • ‘Shima-Nishiki’ (Paeonia suffruticosa): This Japanese cultivar features striking variegated flowers with splashes of pink, white, and magenta, adding a touch of drama to indoor settings.
  • ‘Hanakisoi’ (Paeonia suffruticosa): With its large, semi-double blooms in shades of soft apricot and pink, ‘Hanakisoi’ exudes elegance and sophistication, making it a prized specimen for indoor gardens.
3. Intersectional (Itoh) Hybrids:

Intersectional peonies, also known as Itoh hybrids, are a cross between herbaceous and tree peonies, combining the best traits of both parents. These hybrids offer a diverse range of flower forms, colors, and growth habits, making them well-suited for indoor cultivation. Notable Itoh hybrid varieties suitable for indoor growing include:

  • ‘Bartzella’ (Paeonia Itoh hybrid): This award-winning cultivar features large, lemon-yellow blooms with a delightful fragrance and vigorous growth habit, making it an excellent choice for indoor containers.
  • ‘Julia Rose’ (Paeonia itoh hybrid): With its stunning semi-double flowers in shades of pink and apricot, ‘Julia Rose’ adds a touch of romance and beauty to indoor gardens, blooming prolifically in late spring to early summer.

Indoor peonies offer a wonderful opportunity to enjoy the beauty and elegance of these exquisite blooms year-round, regardless of outdoor space limitations. Whether you opt for compact herbaceous varieties, graceful tree peonies, or captivating Itoh hybrids, there are numerous options available to suit your indoor gardening preferences and create enchanting floral displays within your home.


Growing Conditions and Care 


Growing peonies indoors requires careful attention to their specific needs to ensure they thrive and produce beautiful blooms. While peonies are typically associated with outdoor gardens, with the right conditions and care, they can flourish as captivating indoor plants, bringing elegance and charm to any indoor space.

1. Light:

Place indoor peonies in a location with ample sunlight, preferably near a south-facing window where they can receive at least 6-8 hours of direct sunlight daily.
If natural light is limited, supplement with grow lights to provide sufficient light for healthy growth and flowering.

2. Temperature and humidity:

Maintain moderate temperatures ranging from 60-70°F (15-21°C) during the day and slightly cooler temperatures at night.
Peonies thrive in moderate humidity levels. Consider using a humidifier or placing a tray filled with pebbles and water beneath the plant to increase humidity, especially during the dry winter months.

3. Soil and Potting:

Use a well-draining potting mix rich in organic matter. A mix formulated for flowering plants or roses works well for peonies.
Choose a large, sturdy container with adequate drainage holes to prevent waterlogging. Ensure the container is spacious enough to accommodate the peony’s root system.

4. Watering:

Water indoor peonies thoroughly, allowing the soil to dry out slightly between waterings to prevent waterlogged conditions.
Avoid overwatering, since it might cause root rot. Check the soil’s moisture level on a regular basis and alter the watering schedule accordingly.

5. Fertilization:

Fertilize indoor peonies with a balanced liquid fertilizer during the growing season to promote healthy foliage and flower production.
Apply fertilizer according to the manufacturer’s instructions, taking care not to over-fertilize, which can result in excessive foliage growth at the expense of flowering.

6. Dormancy Period:

To stimulate the winter dormancy period necessary for peonies to bloom, provide a period of cool temperatures (around 40-50°F or 4-10°C) for 8-12 weeks.
This can be achieved by placing the plant in a cool, dark location, such as an unheated basement or garage, during the winter months.

7. Pruning and Maintenance:

Remove spent flowers promptly to encourage continuous blooming and prevent seed formation, which can divert energy away from flower production.
To keep the plant healthy and looking good, prune any dead or damaged leaves as needed.
Divide overcrowded clumps every few years to promote vigorous growth and flowering.

With proper growing conditions and care, indoor peonies can thrive and reward you with their stunning blooms and delightful fragrance. By providing adequate light, temperature, humidity, soil, and water, as well as regular fertilization and maintenance, you can enjoy the beauty and elegance of peonies year-round within the comfort of your home.

Common pests and problem

While peonies are generally resilient plants, they can occasionally fall victim to pests and diseases. Here are some common pests and problems that may affect indoor peonies, along with tips on how to identify and address them:

1. Aphids:
  • Identification: Aphids are small, soft-bodied insects that can be green, black, brown, or pink in color. They often cluster on the undersides of leaves and flower buds, sucking sap from the plant.
  • Treatment: Hose down the infested plant with a strong stream of water to dislodge the aphids. Insecticidal soap or neem oil can also be applied to control aphid populations.
2. Powdery Mildew:
  • Identification: Powdery mildew appears as a white, powdery fungal growth on the leaves and stems of plants. It flourishes in warm, humid environments and can weaken the plant if left untreated.
  • Treatment: Improve air circulation around the plant by spacing it away from other plants. Remove and dispose of affected plant parts, and apply fungicidal sprays containing sulfur or potassium bicarbonate to control powdery mildew.
3. Botrytis Blight (Gray Mold):
  • Identification: Botrytis blight causes brownish-gray mold to develop on plant tissues, including leaves, stems, and flowers. It thrives in cool, damp conditions and can spread rapidly, especially during periods of high humidity.
  • Treatment: Remove and dispose of affected plant parts promptly. Improve air circulation around the plant and avoid overhead watering to reduce humidity levels. Apply fungicidal sprays containing copper or thiophanate-methyl to control botrytis blight.
4. Root Rot:
  • Identification: Root rot is caused by fungal pathogens that thrive in waterlogged soil conditions. Symptoms include wilting, yellowing leaves, and mushy, darkened roots.
  • Treatment: Ensure proper drainage in the plant’s container to prevent waterlogging. Repot the plant using well-draining soil if necessary, and avoid overwatering. Apply fungicidal drenches containing thiophanate-methyl or chlorothalonil to control root rot.
5. Spider Mites:
  • Identification: Spider mites are tiny arachnids that feed on plant sap, causing stippling, yellowing, and webbing on the leaves. They thrive in dry, dusty conditions.
  • Treatment: Rinse the plant with water to dislodge spider mites and their webs. Apply insecticidal soap or neem oil to control spider mite infestations, and ensure adequate humidity to discourage their proliferation.
6. Ants:
  • Identification: While ants themselves may not directly harm peonies, they are attracted to the sweet excretions produced by aphids and other sap-sucking insects. Ants may inadvertently protect these pests from predators, allowing their populations to increase.
  • Treatment: Control aphid populations to reduce ant activity. Use ant baits or barriers to deter ants from accessing plants, and eliminate ant colonies near the affected area if necessary.

Regular monitoring, proper sanitation, and prompt intervention are essential for preventing and managing pest and disease problems in indoor peonies. By addressing issues promptly and implementing preventive measures, you can help ensure the health and vitality of your cherished peony plants.

Colors and Meanings


Peonies come in various colors, each carrying its own symbolic meaning.

  1. Pink: Pink is often associated with romance, affection, and femininity. Pink peonies convey feelings of love, admiration, and gratitude. They are commonly given as gifts to express appreciation or to celebrate special occasions like anniversaries or birthdays.
  2. White: White symbolizes purity, innocence, and new beginnings. White peonies are often used in weddings to represent the purity of the bride and the couple’s sincere intentions for a lifelong commitment. They also symbolize honor, elegance, and spiritual growth.
  3. Red: Red represents passion, desire, and strong emotions. Red peonies are ideal for conveying deep love, romance, and sensuality. They symbolize strength, vitality, and intense feelings, making them suitable for expressing fiery passion or enduring devotion.
  4. Coral: It combines the energy of red with the purity of white, symbolizing warmth, enthusiasm, and optimism. Coral peonies represent friendship, affection, and admiration. They convey joy, excitement, and a zest for life, making them perfect for celebrating friendships or uplifting occasions.
  5. Yellow: Yellow symbolizes happiness, joy, and optimism. Yellow peonies represent friendship, laughter, and positive energy. They convey warmth, cheerfulness, and sunny dispositions, making them ideal for brightening someone’s day or expressing heartfelt happiness.
  6. Purple: This color signifies royalty, luxury, and admiration. Purple peonies symbolize dignity, respect, and appreciation. They convey a sense of elegance, sophistication, and regal beauty, making them suitable for honoring someone special or expressing deep admiration.
  7. Multi-colored: Peonies with multiple colors symbolize diversity, complexity, and the beauty of variety in life. They can represent harmony, unity, and interconnectedness. Multi-colored peonies are versatile and can convey a range of emotions, depending on the combination of colors present.

These meanings are often associated with the language of flowers and can vary slightly depending on cultural interpretations and personal experiences.

Uses


The uses of peonies are diverse and varied, extending beyond their ornamental beauty. Here are some common uses:

  1. Gardening and Landscaping: Peonies are popular choices for gardens and landscaping due to their stunning blooms and low maintenance requirements. They can be planted as standalone specimens, in borders, or mixed with other perennials for added visual interest.
  2. Cut Flowers: Peonies are prized as cut flowers for floral arrangements and bouquets due to their large, fragrant blooms and long vase life. They are often featured in bridal bouquets, centerpieces, and flower arrangements for weddings and special occasions.
  3. Medicinal Purposes: Certain species of peonies, particularly Paeonia lactiflora, have a history of medicinal use in traditional Chinese medicine. Peony root is believed to have anti-inflammatory, analgesic, and immune-boosting properties and is used to treat various ailments, such as pain, inflammation, and menstrual disorders.
  4. Cultural and Symbolic Significance: Peonies hold cultural significance in many societies and are often associated with prosperity, good fortune, and happiness. They are commonly used in celebrations, festivals, and religious ceremonies as symbols of abundance, love, and honor.
  5. Aromatherapy: The fragrant blooms of peonies are sometimes used in aromatherapy for their uplifting and calming properties. Peony-scented candles, oils, and perfumes are popular for creating a soothing and tranquil atmosphere.
  6. Culinary Uses: While not as common as other edible flowers, peony petals are edible and can be used to add a subtle floral flavor and decorative touch to salads, desserts, and beverages. However, it’s important to ensure that the peonies used for culinary purposes are free from pesticides and other contaminants.
  7. Art and Literature: Peonies have inspired artists, poets, and writers for centuries and are often depicted in paintings, poetry, and literature as symbols of beauty, romance, and the fleeting nature of life.

Overall, peonies are cherished for their beauty, symbolism, and versatility, and they find diverse uses in gardening, floristry, medicine, culture, and beyond.

FAQ

When do peonies bloom?

Peonies generally bloom from late spring to early summer, typically between late April and early June. The exact timing can vary based on the climate and the specific peony variety.

When Should I transplant peonies?

The best time to transplant peonies is in the fall, typically from late September to early November, after the plants have gone dormant. This allows them to establish roots in their new location before the ground freezes.

Vibrant Pansies: Tips for Growing and Enjoying Indoors

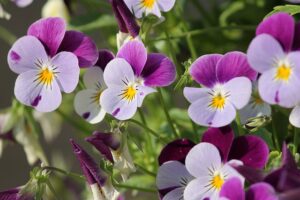
Pansies, scientifically known as Viola tricolor var. hortensis, are among the most beloved and widely cultivated flowers in gardens worldwide. Known for their vibrant colors and charming “faces,” pansies are a popular choice for both novice and experienced gardeners. This article delves into the fascinating world of pansies, exploring their history, characteristics, cultivation, and the joy they bring to gardeners and nature enthusiasts alike.

The pansy has a rich history dating back to ancient times. The wild pansy, Viola tricolor, also known as Johnny Jump Up, is native to Europe and western Asia. In the early 19th century, horticulturists in England began hybridizing Viola tricolor with other viola species, resulting in the garden pansy we know today.

These early hybrids were prized for their larger blooms and diverse colors.The name “pansy” is derived from the French word “pensée,” meaning thought or remembrance. This name reflects the flower’s symbolic association with thoughtful remembrance and love.

Characteristics

Pansies are cool-season biennials that are often grown as annuals. They thrive in cooler temperatures and are typically planted in the spring or fall. Here are some key characteristics of pansies:

  1. Flowers: Pansies are known for their distinctive, flat-faced flowers with five petals. The blooms come in a wide array of colors, including purple, yellow, blue, white, and red. Many pansies feature intricate patterns and “faces” formed by darker blotches or lines on the petals.
  2. Leaves: The leaves of pansies are oval to heart-shaped with slightly serrated edges. They are typically green and provide a lush backdrop to the vibrant flowers.
  3. Size: Pansies are relatively compact plants, growing to a height of 6 to 9 inches with a spread of 9 to 12 inches. This makes them ideal for garden beds, borders, and containers.


Varieties and Classification of Pansies


Pansies (Viola tricolor var. hortensis) are beloved for their vibrant colors and charming “faces,” making them a staple in gardens worldwide. The diversity in pansy varieties and their classification adds to their allure, offering gardeners a wide range of options to choose from. This article explores the various types of pansies and their classification, helping enthusiasts understand the richness of this delightful flower.

Classification of Pansies

Pansies belong to the genus Viola, which includes around 500 species of annuals, perennials, and biennials. The garden pansy, specifically, is a hybrid derived from Viola tricolor (wild pansy or Johnny Jump Up) and several other viola species. Here’s a brief overview of their botanical classification:

  • Kingdom: Plantae
  • Order: Malpighiales
  • Family: Violaceae
  • Genus: Viola
  • Species: Viola tricolor var. hortensis

Pansies are classified based on their flower size, plant size, and the season in which they are grown. The main types are large-flowered, medium-flowered, and multiflora pansies.

Varieties of Pansies

The variety of pansies is vast, with countless cultivars bred for specific traits such as color, size, and hardiness.

  1. Large-Flowered Pansies:
    • ‘Majestic Giants’: Known for their large blooms, often 3 to 4 inches in diameter, with vibrant colors and prominent blotches.
    • ‘Swiss Giants’: An older variety with large, showy flowers that come in a wide range of colors.
  2. Medium-Flowered Pansies:
    • ‘Delta’ Series: Compact plants with medium-sized flowers that perform well in both hot and cold weather, making them ideal for extended blooming periods.
    • ‘Matrix’ Series: Bred for uniformity and durability, this series offers a wide color range and robust plants.
  3. Multiflora Pansies:
    • ‘Sorbet’ Series: These pansies produce smaller flowers but in great abundance, creating a dense and colorful display. They are particularly suited for containers and hanging baskets.
    • ‘Panola’ Series: Combining the best traits of pansies and violas, these plants have a profusion of small flowers and excellent heat tolerance.
  4. Specialty Pansies:
    • ‘Joker’ Series: Recognized for their unique, bicolor flowers with striking color combinations.
    • ‘Colossus’ Series: Noted for their extra-large flowers and excellent performance in warmer climates.
    • ‘Ultima’ Series: Features unique color patterns, including whiskers and contrasting edges, providing a distinctive look.
  5. Fragrant Pansies:
    • ‘Frizzle Sizzle’ Series: These ruffled pansies are not only visually stunning but also emit a pleasant fragrance, adding another sensory dimension to the garden.
Seasonal Varieties

Pansies can be classified based on the season in which they are grown, each type having its own set of varieties tailored for optimal performance in specific conditions:

  1. Spring-Flowering Pansies:
    • These varieties are planted in early spring and bloom throughout the season. They are bred to withstand cooler temperatures and provide vibrant color as the garden wakes up from winter.
  2. Fall-Flowering Pansies:
    • These pansies are planted in late summer to early fall and bloom through the fall and sometimes into the winter, depending on the climate. They are known for their hardiness and ability to survive light frosts.

The world of pansies is diverse and enchanting, with a variety of options to suit any garden or container. From the large-flowered giants to the abundant multifloras, and from the fragrant varieties to the season-specific selections, pansies offer something for every gardener. Their ease of cultivation, coupled with their vibrant colors and charming faces, make them a perennial favorite. By understanding the classification and varieties of pansies, gardeners can better appreciate and utilize these beautiful flowers to enhance their landscapes and enjoy their delightful blooms throughout the seasons.


Growing Conditions and Care 


Pansies (Viola tricolor var. hortensis) are typically grown outdoors, but with the right conditions and care, they can also thrive indoors. Indoor pansies can bring a touch of vibrant color and cheer to your home. This article outlines the essential growing conditions and care practices to ensure your indoor pansies flourish.

Ideal Growing Conditions

To successfully grow pansies indoors, it’s crucial to recreate their preferred outdoor environment as closely as possible. These are the important things to think about:

Light:

  • Sunlight: Pansies need ample light to thrive indoors. Place them in a location where they receive bright, indirect sunlight for at least 6 hours a day. A south- or west-facing window is ideal. If natural light is insufficient, supplement with grow lights placed about 6 inches above the plants for 12 to 14 hours a day.
Temperature:
  • Optimal Range: Pansies prefer cool temperatures. Maintain an indoor temperature between 60°F and 70°F (15°C to 21°C) during the day and slightly cooler at night. Avoid placing pansies near heat sources, such as radiators or heating vents, which can cause them to overheat.

Humidity:

  • Moderate Humidity: Pansies prefer moderate humidity levels. Indoor air can be dry, especially in winter, so consider using a humidity tray or a room humidifier to maintain humidity around 40% to 50%.
Soil:
  • Type: Use a high-quality, well-draining potting mix. A mix specifically formulated for flowering plants is ideal.
  • pH Level: Aim for a pH range of 6.0 to 7.0, which is slightly acidic to neutral.
Containers:

Choose containers with drainage holes to prevent waterlogging. Pansies do not tolerate standing water, which can lead to root rot.

Planting and Care

Proper planting and consistent care are essential for healthy indoor pansies. Follow these steps for successful cultivation:

Planting:
  • Preparation: Select a container that is at least 6 to 8 inches in diameter to allow room for root growth. Fill the container with the potting mix, leaving about an inch of space at the top.
  • Planting Depth: Plant pansies at the same depth they were growing in their nursery pots. Avoid burying the crown to prevent rot.
Watering:
  • Frequency: Keep the soil consistently moist but not soggy. When the top inch of soil seems completely dry, water it. During the winter, reduce the frequency of watering.
  • Method: Water the soil directly, avoiding the leaves, to reduce the risk of fungal diseases. Ensure that excess water drains out to prevent waterlogging.
Fertilizing:
  • Type: Use a balanced, water-soluble fertilizer, such as 10-10-10 or 14-14-14.
  • Frequency: Fertilize every 2 to 4 weeks during the growing season. Avoid over-fertilizing, as this can lead to excessive foliage growth with fewer flowers.
Pruning and Deadheading:
  • Deadheading: Regularly remove spent flowers to encourage continuous blooming. Pinch off the flowers just above the first set of leaves.
  • Pruning: Trim back lanky or overgrown stems to keep a compact, bushy look. This also promotes better air circulation around the plants.
Pest and Disease Control:
  • Common Pests: Indoor pansies can be affected by aphids, spider mites, and whiteflies. Inspect the plants regularly, and use insecticidal soap or neem oil if needed.
  • Diseases: Ensure good air circulation and avoid overwatering to prevent fungal diseases like powdery mildew and root rot.
Additional Tips:
  • Rotation: Rotate the pots every few days to ensure even light exposure and prevent the plants from leaning toward the light source.
  • Support: If the pansies become top-heavy, use small stakes or plant ties to provide support.

Growing pansies indoors can be a rewarding experience, bringing vibrant colors and cheerful blooms to your home. By providing the right light, temperature, humidity, and care, you can enjoy the beauty of these delightful flowers year-round. Whether adorning a sunny windowsill or brightening up a living space, indoor pansies are a charming addition to any indoor garden.

Pansies Colors and Their Meanings


Pansies (Viola tricolor var. hortensis) are celebrated for their vivid and diverse color palette. Each hue not only enhances the beauty of gardens and containers but also carries its own symbolic meaning. This article explores the various colors of pansies and the traditional meanings associated with each.

  1. Purple Pansies:
    • Meaning: Purple is often associated with nobility, mystery, and spirituality. Purple pansies symbolize admiration, respect, and deep sentiment. They can also convey a sense of peace and calm.
    • Uses: Purple pansies are perfect for adding a regal touch to any garden or floral arrangement. They are often used in gardens to create a soothing and meditative space.
  2. Yellow Pansies:
    • Meaning: Yellow represents happiness, joy, and positivity. Yellow pansies symbolize friendship, warmth, and cheerfulness. They are a bright and cheerful addition to any setting.
    • Uses: Plant yellow pansies to bring a burst of sunshine to your garden, or use them in arrangements to convey joy and goodwill.
  3. Blue Pansies:
    • Meaning: Blue signifies tranquility, trust, and loyalty. Blue pansies symbolize serenity, calmness, and trustworthiness. They are often used to create a peaceful atmosphere.
    • Uses: Blue pansies are ideal for planting in areas meant for relaxation, such as around patios or outdoor seating areas. They can also be used to express loyalty and dependability.
  4. Red Pansies:
    • Meaning: Red is a color of passion, love, and energy. Red pansies symbolize strong emotions, such as love, desire, and courage. They can also signify admiration and respect.
    • Uses: Use red pansies to create a bold statement in your garden or as a romantic gesture in floral arrangements.
  5. White Pansies:
    • Meaning: White represents purity, innocence, and peace. White pansies symbolize clarity, new beginnings, and humility. They are often used in weddings and other ceremonies to signify purity.
    • Uses: Plant white pansies to create a clean, serene garden space or use them in bouquets to convey innocence and purity.
  6. Orange Pansies:
    • Meaning: Orange is associated with enthusiasm, creativity, and warmth. Orange pansies symbolize joy, energy, and optimism. They are vibrant and eye-catching.
    • Uses: Orange pansies are great for adding a lively, energetic feel to gardens and flower beds. They can also inspire creativity and enthusiasm.
  7. Black Pansies:
    • Meaning: Black represents mystery, elegance, and sophistication. Black pansies, which are actually a very deep purple, symbolize power, mystery, and farewell.
    • Uses: Use black pansies to add depth and contrast to garden designs. They are also striking in arrangements that aim to convey elegance and sophistication.
  8. Pink Pansies:
    • Meaning: Pink is a color of affection, gentleness, and sweetness. Pink pansies symbolize love, gratitude, and admiration. They are often used to express softer emotions.
    • Uses: Plant pink pansies to create a romantic and gentle ambiance in the garden. They are also perfect for expressing appreciation and love in bouquets.
  9. Multicolored Pansies:
    • Meaning: Pansies that combine multiple colors can symbolize varied emotions and versatility. Each color within the flower can represent its own meaning, making multicolored pansies rich in symbolism.
    • Uses: Multicolored pansies are ideal for creating dynamic and visually interesting garden designs. They can also be used in arrangements to convey a range of emotions and sentiments.

The wide array of colors found in pansies not only enhances their visual appeal but also allows them to convey various meanings and emotions. By understanding the symbolism behind each color, gardeners and flower enthusiasts can choose pansies that best express their feelings and intentions. Whether planting them in a garden or using them in a floral arrangement, pansies bring beauty, color, and meaning to any setting.

Uses and Cultural Significance of Pansies

Uses:

  1. Garden Design: Perfect for borders, edging, and mass plantings.
  2. Containers and Hanging Baskets: Ideal for pots and hanging displays.
  3. Companion Planting: Complements spring bulbs like tulips and daffodils.
  4. Edible Flowers: Used to garnish salads, desserts, and beverages.
  5. Wildlife Friendly: Attracts bees, butterflies, and other pollinators.
  6. Indoor Decoration: Brightens indoor spaces in pots near sunny windows.
  7. Symbolic Uses: Featured in arrangements for meanings such as love, admiration, and joy.
Cultural Significance:
  • Symbolism: Pansies symbolize various emotions and sentiments, including thoughtfulness, remembrance, and love.
  • Historical Use: Used in traditional medicine and folklore for their believed healing properties.
  • Art and Literature: Frequently depicted in art and literature as symbols of beauty and contemplation.


Mastering Indoor Dahlia Growth: Essential Care Instructions

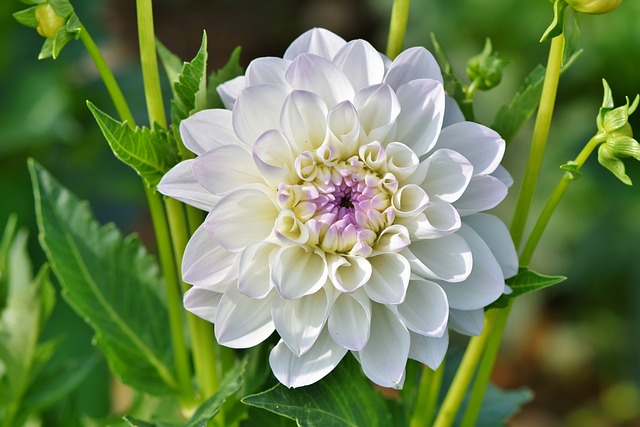
Dahlias (Dahlia spp.) are beloved flowering plants known for their strikingly diverse and vibrant blooms. Native to Mexico and Central America, these perennial plants have captured the hearts of gardeners worldwide due to their stunning flowers, which come in a wide array of shapes, sizes, and colors.

Dahlias belong to the Asteraceae family and are herbaceous perennials that grow from tuberous roots. They vary widely in height, ranging from dwarf varieties of about 30 cm (1 foot) to giants that can reach up to 1.8 meters (6 feet). The leaves are typically pinnate, and the stems are generally hollow but sturdy.

The flowers are the main attraction of dahlias, with blooms ranging in size from small, 5 cm (2 inches) diameter pompons to enormous, dinner-plate-sized flowers that can reach 30 cm (12 inches) across. The colors span almost the entire spectrum, including white, yellow, orange, red, pink, purple, and even bi-colored varieties.

Varieties and Classification of Dahlias

Dahlias are incredibly diverse, with thousands of varieties classified into several groups based on the shape and arrangement of their petals. This classification system helps gardeners and enthusiasts identify and select dahlias that meet their aesthetic and growing preferences. Here are the primary classifications of dahlias:

1. Single-flowered Dahlias
  • Description: These dahlias have a single row of petals encircling a central disc. The open, daisy-like appearance makes them attractive to pollinators.
  • Example Varieties: ‘Happy Single Flame’, ‘Alpen Cherub’
2. Anemone-flowered Dahlias
  • Description: Characterized by a central disc of elongated, tubular florets surrounded by one or more rings of flat ray petals.
  • Example Varieties: ‘Holland Festival’, ‘Blue Bayou’
3. Collarette Dahlias
  • Description: These have a single row of flat petals with an inner ring of smaller, collar-like petals around the central disc.
  • Example Varieties: ‘Fashion Monger’, ‘Night Butterfly’
4. Waterlily Dahlias
  • Description: Resembling water lilies, these dahlias have broad, slightly incurved petals that are often flat and open.
  • Example Varieties: ‘Blyton Softer Gleam’, ‘Glorie van Heemstede’
5. Decorative Dahlias
  • Description: Featuring fully double blooms with broad, flat petals that are sometimes slightly rolled at the edges. This category is divided into formal and informal types based on the petal arrangement.
  • Example Varieties: ‘Thomas Edison’, ‘Hamari Gold’
6. Ball Dahlias
  • Description: These have spherical or slightly flattened blooms with petals that are blunt or rounded at the tips. The petals are neatly arranged in a spiral pattern.
  • Example Varieties: ‘Boom Boom White’, ‘Jowey Linda’
7. Pompon Dahlias
  • Description: Similar to ball dahlias but smaller, with perfectly round blooms. The petals are tightly arranged and often incurved.
  • Example Varieties: ‘Franz Kafka’, ‘Small World’
8. Cactus Dahlias
  • Description: Characterized by pointed, rolled petals that can be straight, incurved, or twisted. These dahlias have a spiky, starburst appearance.
  • Example Varieties: ‘Black Narcissus’ and ‘White Star’
9. Semi-cactus Dahlias
  • Description: Similar to cactus dahlias but with petals that are not as tightly rolled. The petals are broad at the base and narrow toward the tips, creating a more open look.
  • Example Varieties: ‘Karma Choc’, ‘Orfeo’
10. Fimbriated Dahlias
  • Description: These dahlias have fringed or split petal edges, giving the flowers a feathery or fringed appearance.
  • Example Varieties: ‘Fancy Pants’ and ‘Fringed Star’
11. Orchid Dahlias
  • Description: Featuring a single row of flat or slightly cupped petals around an open center, these dahlias resemble orchids in shape.
  • Example Varieties: ‘Honka’, ‘Honka Fragile’
12. Peony-flowered Dahlias
  • Description: These have multiple rows of petals, creating a semi-double flower that resembles a peony. The central disc is usually visible.
  • Example Varieties: ‘Bishop of Llandaff’, ‘G.F. Hemerik’
13. Stellar Dahlias
  • Description: These dahlias have blooms with pointed petals that radiate outward, creating a star-like appearance.
  • Example Varieties: ‘Verrone’s Obsidian’, ‘Cornel Bronze’
14. Miscellaneous Dahlias
  • Description: This category includes dahlias that don’t fit neatly into the other classifications. It encompasses unique forms and experimental hybrids.
  • Example Varieties: ‘Mystery Day’, ‘Chimborazo’

These classifications help gardeners and breeders understand the vast diversity within the Dahlia genus, allowing them to choose the perfect varieties for their gardens, floral arrangements, and breeding programs. Each type offers unique beauty and character, contributing to the overall appeal of dahlias in horticulture.


Growing Conditions and Care for Dahlias


Dahlias are stunning plants that reward gardeners with vibrant blooms from midsummer until the first frost. To achieve the best results, it’s important to provide them with optimal growing conditions and consistent care.

Soil and Planting
  • Soil Requirements: Dahlias thrive in well-drained, fertile soil rich in organic matter. A slightly acidic to neutral pH (6.0 to 7.0) is ideal.
  • Preparing the Soil: Before planting, amend the soil with compost or well-rotted manure to enhance fertility and drainage.
  • Planting Time: Plant dahlia tubers in late spring, after the danger of frost has passed and the soil temperature reaches at least 15°C (60°F).
  • Planting Depth and Spacing: Plant tubers about 15 cm (6 inches) deep with the growing point or “eye” facing up. Space them 45-60 cm (18-24 inches) apart, depending on the variety’s size.
Sunlight
  • Light Requirements: Dahlias require full sun, meaning they need at least six hours of direct sunlight daily. They perform best with morning sun and some afternoon shade in extremely hot climates.
Watering
  • Moisture Needs: Dahlias need consistent moisture, especially during the growing season. Water them deeply 2-3 times a week, ensuring the soil remains moist but not waterlogged.
  • Watering Tips: Water at the base of the plant to avoid wetting the foliage, which can lead to fungal diseases. Mulching around plants can help keep soil moisture and roots cool.
Fertilizing
  • Feeding Schedule: Feed dahlias with a balanced, water-soluble fertilizer every 3-4 weeks during the growing season. Alternatively, use a slow-release fertilizer at planting time.
  • Avoiding Excess Nitrogen: High-nitrogen fertilizers should be avoided as they can promote lush foliage at the expense of flower production. Opt for a fertilizer with a higher middle number (phosphorus) to encourage blooming.
Staking and Support
  • Staking Tall Varieties: Many dahlia varieties, especially those with large blooms, require staking to prevent their stems from breaking. Install stakes or a support system at planting time to avoid damaging the tubers later.
  • Tying Plants: As the plants grow, tie the stems to the stakes using soft ties or garden twine to provide support and keep the flowers upright.
Pruning and deadheading
  • Pinching: To encourage bushier growth and more blooms, pinch out the top of the main stem when the plant is about 30 cm (12 inches) tall. This will stimulate lateral branching.
  • Deadheading: Remove spent flowers regularly to promote continuous blooming and prevent the plant from directing energy into seed production. Cut the flower stem back to a leaf joint to encourage new growth.
Pest and disease management
  • Common Pests: Aphids, slugs, and earwigs can be problematic. Use appropriate insecticidal soaps or organic pest control methods to manage these pests.
  • Diseases: Dahlias can be susceptible to fungal diseases such as powdery mildew and botrytis. Ensure good air circulation around the plants, avoid overhead watering, and remove any affected plant parts promptly.
  • Preventive Measures: Mulching and proper spacing can help prevent diseases by reducing soil splashing onto the leaves and improving air circulation.
Overwintering
  • Frost Protection: In colder climates, dahlia tubers need to be dug up and stored over winter to protect them from freezing temperatures.
  • Lifting Tubers: After the first frost blackens the foliage, carefully dig up the tubers, leaving some stem attached. Brush off excess soil and allow the tubers to dry in a cool, dry place for a few days.
  • Storing Tubers: Store the tubers in a cool, frost-free location in a box filled with peat moss, vermiculite, or sawdust. Check periodically for rot or drying out, and discard any affected tubers.

Dahlias are a rewarding addition to any garden, providing a spectacular display of color and form. By ensuring they receive the right soil, sunlight, water, and care, you can enjoy their beautiful blooms throughout the growing season. Whether you’re a seasoned gardener or a novice, the vibrant and diverse dahlia is a plant that offers endless possibilities for garden design and personal enjoyment.

Dahlia Colors and Their Meanings


Dahlias are celebrated not only for their stunning variety of shapes and sizes but also for their rich palette of colors, each carrying its own symbolism and meaning. Here are some common dahlia colors and what they typically represent:

Red Dahlias
  • Meaning: Strength, power, and love
  • Significance: Red dahlias are often associated with deep emotions, making them perfect for expressing passion, courage, and affection. They can also symbolize a lasting bond or commitment.
Pink Dahlias
  • Meaning: Grace, kindness, and femininity
  • Significance: Pink dahlias convey feelings of gentle love and admiration. They are ideal for romantic gestures, celebrations of friendship, or showing appreciation and gratitude.
White Dahlias
  • Meaning: Purity, innocence, and new beginnings
  • Significance: White dahlias are often used in weddings and other ceremonies to symbolize purity and starting anew. They also represent a focus on inner truth and clarity.
Yellow Dahlias
  • Meaning: joy, happiness, and friendship
  • Significance: Yellow dahlias are associated with positivity and energy. They are perfect for brightening someone’s day, celebrating friendships, and conveying good cheer.
Purple Dahlias
  • Meaning: dignity, royalty, and grace
  • Significance: Purple dahlias convey a sense of sophistication and elegance. They are often used to symbolize admiration and respect, making them suitable for honoring someone special.
Orange Dahlias
  • Meaning: enthusiasm, creativity, and excitement
  • Significance: Orange dahlias represent energy and enthusiasm. They are ideal for celebrating achievements, encouraging creativity, and adding a vibrant touch to any occasion.
Blue Dahlias
  • Meaning: trust, loyalty, and serenity
  • Significance: Blue dahlias, though less common and often achieved through hybridization, symbolize calmness, trustworthiness, and harmony. They are perfect for expressing stable and enduring emotions.
Black Dahlias (Dark Burgundy)
  • Meaning: Elegance, mystery, and strength
  • Significance: Black dahlias, which are actually very dark burgundy or purple, represent a touch of mystery and sophistication. They are often associated with overcoming challenges and inner strength.
Bi-colored Dahlias
  • Meaning: Diversity, unity, and change
  • Significance: Bi-colored dahlias, featuring multiple colors on a single bloom, symbolize the beauty of diversity and the harmony of unity. They can also represent transitions and adaptability.

Each dahlia color brings its own unique meaning, allowing gardeners and florists to use them in a variety of contexts to convey specific messages and emotions. Whether used in gardens, bouquets, or decorations, dahlias offer a vibrant and meaningful way to express a wide range of sentiments.

Uses and Cultural Significance of Dahlias

Uses

  • Ornamental Gardens: Dahlias are widely used in gardens and landscapes for their vibrant, diverse blooms and extended flowering season.
  • Cut Flowers: They are popular as cut flowers due to their long vase life and striking appearance.
  • Floral Arrangements: Ideal for bouquets and floral displays, dahlias add color and texture.
  • Container Gardening: Dwarf varieties are perfect for patios and small garden spaces.

Cultural Significance

  • National Flower: Dahlias are the national flower of Mexico, symbolizing elegance, creativity, and dignity.
  • Festivals and Celebrations: Featured prominently in festivals, floral exhibitions, and cultural events, particularly in Mexico and the United States.
  • Symbolism: Often associated with themes of inner strength, change, and personal growth.
  • Historical Importance: Historically valued by Aztecs for their medicinal properties and ornamental beauty.

Dahlias continue to hold a cherished place in gardens and cultural traditions around the world, admired for their beauty and versatility.


FAQ

When do dahlias bloom?

Dahlias generally burst into bloom from mid-summer, continuing their vibrant display until the first frost of autumn, with their peak flowering period usually falling between July and September.

How to Grow & Care for Indoor Croton: Essential Tips

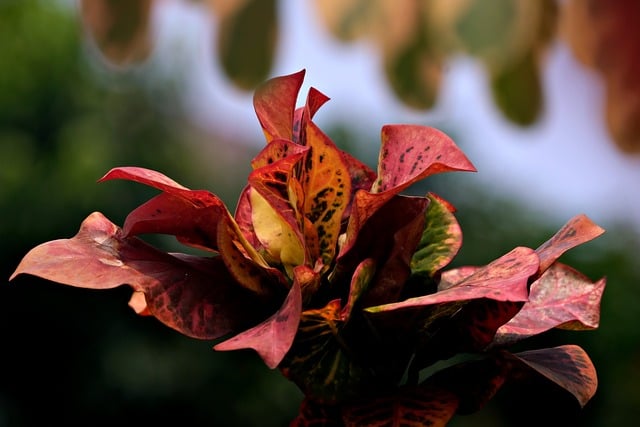
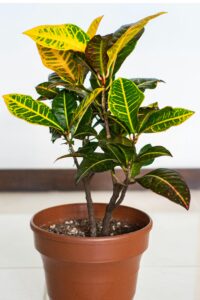
Crotons, Their botanical name is Codiaeum variegatum. Croton (Codiaeum variegatum) stands as a vibrant testament to nature’s palette, boasting leaves that dazzle with a spectrum of colors from fiery reds and oranges to deep greens and yellows. Each leaf unfurls as a unique canvas, often marked with striking patterns that can include speckles, stripes, and patches.

Originating from the warm, tropical climates of Southeast Asia and the Pacific, crotons thrive under bright, indirect light, reveling in the warmth and humidity reminiscent of their native habitats. While they demand consistent moisture and a well-draining soil to flourish, crotons are forgiving of the occasional oversight, making them a resilient and captivating addition to any indoor or outdoor garden.

Beyond their ornamental allure, it’s important to handle crotons with care, as their sap is known to be irritating and their leaves toxic if ingested, necessitating caution in households with pets and young children.

Types of Croton


Within the vibrant world of indoor gardening, Crotons (Codiaeum variegatum) stand out with their spectacular display of colors and patterns. These tropical treasures come in a variety of types, each bringing its own unique flair to indoor spaces. Let’s dive into a few standout types of croton that can transform your home into a tropical paradise:

1. Petra

Petra Crotons are among the most popular, boasting broad, oval leaves richly veined in shades of yellow, red, and deep green. Their classic look makes them a favorite for adding a splash of color to any room.

2. Mammy

Mammy Crotons are known for their uniquely curled leaves, which spiral in a dance of red, yellow, and green. Their compact, curvy nature adds a whimsical touch to your indoor plant collection.

3. Gold Dust

As if sprinkled with fairy dust, the Gold Dust Croton showcases small, dark green leaves heavily speckled with bright yellow spots. This variety has a subtle sparkle and is perfect for brightening dim corners.

4. Red Iceton

Dramatic and bold, the Red Iceton Croton features leaves that transition from pink to rich burgundy, with veins of bright yellow. It’s a stunning choice for adding warmth and depth to your indoor palette.

5. Zanzibar

Zanzibar Crotons have narrow, long leaves that explode in a mix of yellow, orange, red, and purple. Their fine, feather-like foliage offers a distinct texture and an explosion of color.

6. Magnificent

True to its name, the Magnificent Croton displays large leaves marbled with green, yellow, red, and even some purple. It’s a visually striking variety that lives up to its grandiose title.

Each type of Croton brings its own special character to indoor environments, turning spaces into lush, vibrant oases. Beyond their stunning appearance, Crotons are celebrated for their air-purifying qualities, making them not just beautiful but beneficial to indoor living spaces. Choosing the right Croton variety can add a personal touch to your home, reflecting your style through the unique beauty of these tropical plants.


Croton Care


Planting crotons outdoors necessitates airy, well-draining soil to thrive. If temperatures in your region dip below 50 degrees Fahrenheit at night, regardless of the season, you’ll need to pot your croton for indoor living. Opt for a robust pot that can support the plant’s growth as it reaches upward. Indoors, crotons flourish best in windows that let in abundant light. The potting mix should be of premium quality, ensuring excellent drainage. To protect your croton, make sure it’s positioned away from drafts that can sneak in through windows, doors, and near air conditioning vents.

Light


For Croton plants indoors, lighting is a pivotal aspect of their care. These vibrant tropical beauties crave bright, indirect sunlight to showcase their colorful foliage. Situate them near a window that bathes them in light but shields them from the harsh midday sun, which can scorch their leaves. East or west-facing windows are ideal spots, offering the golden balance of light that Crotons need to thrive and keep their leaves vividly painted in hues of red, yellow, and green. This optimal lighting condition encourages lush growth and ensures that Crotons remain a stunning focal point in your indoor garden.

Soil


For indoor Croton care, the soil foundation is crucial. A well-draining, peat-based potting mix strikes the perfect chord for these tropical natives. Aim for a blend that holds moisture yet allows excess water to escape freely, preventing root rot. Incorporating perlite or coarse sand into the mix enhances drainage, while a touch of organic compost provides the rich nutrients Crotons adore. This setup mimics their natural growing conditions, supporting robust health and the vibrant display of their leaves. Regularly check the soil’s condition and refresh it as needed to maintain the ideal growing environment for your Croton.

Water


Watering your indoor Croton correctly is essential for its vibrant growth. These plants prefer a consistent moisture level, meaning the soil should be kept evenly moist but never waterlogged. Water your Croton when the top inch of soil feels dry to the touch, using lukewarm water to avoid shocking the plant’s roots. Over-watering can lead to root rot, while under-watering may cause leaf drop. It’s a delicate balance that reflects their tropical origins, where rainfall is frequent but drainage is quick. Adapting to this rhythm will keep your Croton’s foliage lush and colorful, embodying the essence of its tropical spirit indoors.

Temperature and Humidity


For indoor Crotons, creating a cozy, tropical-like environment is key to their thriving. These plants favor warmth, thriving in temperatures between 60°F and 85°F (15°C to 29°C). They’re sensitive to cold drafts and sudden temperature drops, which can lead to leaf loss. Equally important is humidity; Crotons love a humid atmosphere reminiscent of their native tropics. Aim for humidity levels around 40-80 to keep their leaves vibrant and healthy. In drier indoor environments, a humidifier, regular misting, or a pebble tray with water placed under the pot can help boost humidity levels. This combination of warmth and moisture creates the perfect microclimate for your Croton to flourish indoors.

Fertilizer


Feeding your indoor Croton the right way can significantly enhance its lush, colorful foliage. During the growing seasons of spring and summer, a balanced, water-soluble fertilizer every 4 to 6 weeks will do wonders. Opt for a formula that’s equally proportioned (e.g., 20-20-20) to support both leaf growth and vibrant coloration. In the fall and winter, reduce feeding to every 8 weeks as the plant’s growth slows down. Over-fertilizing can harm your Croton, leading to leaf burn or even drop, so it’s crucial to follow the recommended dosage on the fertilizer package. This nourishment routine ensures your Croton remains a stunning, healthy addition to your indoor garden.

Potting and Repotting 


In the care of Crotons indoors, potting and repotting emerge as key elements to sustain their vibrant vitality. Initially, selecting a container that ensures proper drainage is crucial to avoid the perils of root rot. A pot that comfortably accommodates the Croton’s root ball, with a bit of room to grow yet not so spacious as to retain excessive moisture, is ideal.

As Crotons are relatively cozy in their containers, they only require repotting every couple of years, or when you notice signs of root crowding. Spring serves as the perfect season for this transition, offering your plant a fresh start with nutrient-rich, well-draining soil in a new abode just a size larger. This not only invigorates the plant with renewed vigor but also supports the dazzling display of its foliage, ensuring your Croton thrives indoors with just the right balance of room to grow and nutritional support.


Common Pests & Problem


Indoor Crotons, with their striking foliage, can sometimes attract unwanted attention from pests and encounter common problems that may affect their health and appearance. Here are some of the issues to watch for and how to address them:

Pests

  • Spider Mites: These tiny pests love dry conditions and can cause the leaves to look speckled and dull. Increasing humidity and washing the leaves with soapy water can help combat them.
  • Mealybugs and Scale: These sap-sucking insects can weaken your plant, leading to yellowing leaves and stunted growth. Wiping the leaves with a cotton swab dipped in rubbing alcohol can be effective against these pests.
  • Thrips: These pests can also affect Crotons, causing silvery trails on the leaves. A thorough rinse of the plant and using insecticidal soap can help manage thrips.

Problems

  • Leaf Drop: Sudden changes in temperature, light, or watering can stress Crotons, causing them to drop leaves. Keeping a consistent environment is key to prevention.
  • Fading Leaf Color: Insufficient light is a common culprit behind the loss of vibrant leaf colors. Ensuring your Croton receives plenty of indirect sunlight can help maintain its bright hues.
  • Root Rot: Over-watering can lead to root rot, a serious condition that can be prevented by ensuring your pot has good drainage and by letting the topsoil dry out slightly between waterings.

Being vigilant about these potential issues and providing your Croton with the right care and environment will help keep it healthy and vibrant, allowing its stunning foliage to continue to brighten your indoor space.

Propagating


Propagating a Croton indoors breathes new life into your space with its burst of color. Stem cuttings are your go-to method for this vibrant endeavor. Here’s a succinct guide: Snip a healthy stem about 4-6 inches long, ensuring it has a few leaves. Strip the lower leaves to focus the plant’s energy on rooting. Optionally, dip the cut end in rooting hormone to spur growth.

Plant this cutting in moist, well-draining soil and cover it with a clear plastic bag to create a mini greenhouse effect, boosting humidity. Place it in a spot with bright, indirect sunlight and maintain the soil’s moisture. In about 4-6 weeks, a gentle tug will reveal if roots have taken hold, signaling the start of a new Croton plant ready to add more tropical flair to your indoor garden.


Uses

Indoor Crotons serve as vibrant ambassadors of the tropics, offering more than just their stunning visual appeal. These colourful plants play a multifaceted role in indoor settings, blending aesthetic beauty with practical benefits. Here’s a concise look at their uses:

  • Decorative Flair: With their dazzling array of colors and patterns, Crotons effortlessly elevate the visual interest of any room, acting as natural art pieces that infuse life and color into spaces.
  • Mood Enhancer: The bright and varied hues of Croton leaves can boost mood and creativity, making them perfect companions in living areas, workspaces, and any place in need of a splash of cheer.
  • Air Quality: Crotons are part of the broader family of plants that contribute to purifying indoor air, albeit to a lesser extent compared to some other houseplants. They help in filtering out certain pollutants, promoting a healthier living environment.
  • Thematic Landscaping: For those who love to theme their indoor gardens, Crotons offer a way to create a tropical or exotic vibe without needing a greenhouse. Their versatility in size and color makes them suitable for various interior designs, from minimalist to bohemian.

Incorporating Crotons into your indoor plant collection not only adds a burst of color but also transforms your home into a more vibrant, welcoming space. Their easy care and striking appearance make them an excellent choice for both seasoned plant enthusiasts and beginners alike.


FAQ

How to Get Croton to Bloom?


To get a croton plant to bloom, follow these steps:

  • Light: Ensure the plant receives bright, indirect sunlight. Too little light inhibits blooming.
  • Watering: Maintain a regular watering schedule to keep the soil continuously damp but not soggy.
  • Humidity: Maintain high humidity around the plant, ideally 40-80%.
  • Temperature: Keep the plant in a warm environment, between 60 and 85°F (15 and 29°C).
  • Fertilizing: Feed the plant with a balanced, slow-release fertilizer every 2-4 weeks during the growing season.
  • Pruning: Trim the plant to encourage new growth and potential blooming.
  • Stress Reduction: Avoid sudden changes in temperature, light, or watering routines, as stress can prevent blooming.

By following these care tips, you can encourage your croton to produce blooms.

How to Grow and Maintain Healthy Jade Plants Indoors

Jade plant

Jade plants (Crassula ovata), with their vibrant green leaves and sturdy, woody stems, are not just plants but natural sculptures that beautify indoor spaces. Revered for symbolizing prosperity and friendship, these succulents are a staple in homes and offices for their ease of care and long lifespan, often passing from one generation to the next. Cultivating jade plants indoors merges the art of gardening with the simplicity of modern living, offering a lush, miniature tree that thrives with minimal attention.

Jade Plants Indoor care


Setting the Stage: Planting Essentials
  • Choosing the Right Container: A well-draining pot is crucial, as stagnant water is the bane of jade plants. Terra cotta pots are ideal due to their porous nature, promoting evaporation and preventing waterlogged soil.
  • Soil Mix: Opt for a cactus or succulent potting mix, or create your own blend with equal parts potting soil, coarse sand, and perlite. This ensures quick drainage and mimics the dry, rocky environments jade plants originate from.
Changing Growth: Sunlight and Placement

Jade plants are sun worshipers. Position them where they can soak in at least four to six hours of bright, indirect sunlight daily. A south or west-facing window ledge is a prime location, offering the golden rays these succulents crave. If your space lacks natural light, complement their growth with a grow light to keep them vigorous and happy.

The Art of Hydration: Watering Techniques

The golden rule for watering jade plants is restraint. These succulents store water in their fleshy leaves, allowing them to withstand periods of drought. Water deeply, allowing the soil to become fully saturated before letting it drain completely. Then, wait. Let the soil dry out entirely between watering sessions. This practice encourages strong root development and prevents the common pitfall of overwatering, which can lead to root rot.

Nourishment for Vitality: Fertilizing

Jade plants require minimal feeding, but a light touch of fertilizer can support their growth. During the growing season (spring and summer), feed your jade plant with a diluted, balanced liquid fertilizer once every three to four months. Pause fertilization during the dormant winter months to avoid stressing the plant.

Sculpting Beauty: Pruning and Shaping

Pruning not only maintains the jade plant’s aesthetic appeal but also encourages a denser, more robust form. Use clean, sharp shears to trim back overgrown branches or to shape the plant. Pruning is best done in spring or early summer when the plant is in its active growth phase. Additionally, removing any damaged or dead leaves keeps the plant healthy and attractive.

Repotting for Growth

Jade plants grow slowly, but they will eventually outgrow their pots. Repotting every two to three years in spring provides fresh nutrients and encourages continued growth. Choose a pot only slightly larger than the current one to prevent excess soil moisture, which could harm the plant.

Propagation: Sharing Prosperity

Jade plants easily propagate from leaves or stem cuttings, making it simple to share this symbol of prosperity with friends and family. Place a fresh cutting in soil, and with patience, it will root and grow into a new plant.

In Closing: The Joy of Jade

The jade plant is more than an indoor succulent; it’s a living emblem of growth and renewal. Its minimal care requirements paired with its striking appearance make it an ideal companion for both seasoned gardeners and novices. By following these guidelines, your jade plant will not only grow but flourish, bringing a piece of enduring nature into your home. Whether as a beacon of good luck, a testament to friendship, or simply for its serene beauty, the jade plant remains a cherished addition to any indoor garden.


Common problem,pests and solution


Growing jade plants can be quite rewarding, but they can occasionally face problems and pests.

Common Problems and Solutions

Overwatering:

  • Symptoms: Yellowing leaves, root rot.
  • Solution: Dry out the soil in between waterings.. Ensure the pot has good drainage. Reduce watering frequency.

Underwatering:

  • Symptoms: Wrinkled, dry leaves.
  • Solution: Water the plant thoroughly, ensuring excess water drains away. Adjust watering schedule to prevent prolonged dryness.

Lack of Light:

  • Symptoms: Leggy growth, pale leaves.
  • Solution: Place the plant in a bright location with indirect sunlight. If there is not enough natural light, think about utilizing grow lights.

Nutrient Deficiency:

  • Symptoms: Slow growth, pale or discolored leaves.
  • Solution: Fertilize with a balanced, water-soluble fertilizer diluted to half strength during the growing season (spring and summer).
Common Pests and Solutions

Mealybugs:

  • Symptoms: White, cottony masses on leaves and stems.
  • Solution: Dab mealybugs with a cotton swab dipped in rubbing alcohol. Use neem oil or insecticidal soap for more extensive infestations.

Spider Mites:

  • Symptoms: Fine webbing, tiny speckles on leaves.
  • Solution: Increase humidity around the plant. Spray with a mixture of water and insecticidal soap or neem oil. Wipe leaves often with a moist towel.

Aphids:

  • Symptoms: Sticky residue on leaves, distorted growth.
  • Solution: Rinse the plant with water to remove aphids. Apply insecticidal soap or neem oil as needed.

Scale Insects:

  • Symptoms: Brown, shell-like bumps on leaves and stems.
  • Solution: Remove scales by hand or with a toothbrush. Apply insecticidal soap or horticultural oil as a treatment.
General Preventive Tips
  • Regularly inspect plants for early signs of pests and issues.
  • Maintain proper watering practices to avoid root problems.
  • Ensure good air circulation around the plant.
  • Quarantine new plants to prevent pest introduction.

By staying vigilant and addressing problems early, you can keep your jade plant healthy and thriving.

Jade plants types


Jade plants, belonging to the genus Crassula, offer a variety of species and cultivars beyond the well-known Crassula ovata. Each type brings its own unique charm to indoor and outdoor gardens, with variations in leaf color, shape, and growth habits. Here’s a look at some captivating types of jade plants:

1. Crassula ovata (Classic Jade Plant)
  • The classic jade plant features fleshy, oval-shaped leaves that are a rich green color, often with red-tinted edges when exposed to sunlight.
2. Crassula ovata ‘Gollum’ (Gollum Jade)
  • This cultivar has tubular green leaves with reddish tips, resembling the fingers of the mythical character it’s named after. It’s a quirky addition to any succulent collection.
3. Crassula ovata ‘Hobbit’ (Hobbit Jade)
  • Similar to ‘Gollum’, ‘Hobbit’ has slightly curled, tubular leaves with a more open and spreading habit. The tips are often tinged with red, especially when grown in bright light.
4. Crassula ovata ‘Variegata’ (Variegated Jade Plant)
  • This variety stands out with its cream or yellow-striped leaves alongside the standard green. It adds a pop of color and contrast to any succulent display.
5. Crassula ovata ‘Minima’ (Miniature Jade Plant)
  • ‘Minima’ is a compact variety that grows more slowly and stays smaller than its classic counterpart, making it ideal for tight spaces and miniature gardens.
6. Crassula ovata ‘Sunset’
  • This jade plant variety has leaves that turn a beautiful orange-red under the right lighting conditions, giving it a warm, glowing appearance.
7. Crassula arborescens (Silver Jade Plant)
  • Silver jade features round, blue-green leaves with a silvery sheen and reddish margins. It’s known for its striking color and thicker trunk.
8. Crassula arborescens ‘Blue Bird’ (Blue Bird Jade Plant)
  • A variant of the silver jade, ‘Blue Bird’ offers more pronounced blue-toned leaves with a powdery finish, making it a visually stunning choice.
9. Crassula arborescens subsp. undulatifolia (Ripple Jade)
  • Distinguished by its wavy, rippled green leaves, this subspecies presents a unique texture and form, adding interest to any collection.
10. Crassula ‘Blue Whale’
  • An attractive hybrid with large, round, bluish leaves and a compact growth habit. It’s known for its drought tolerance and ease of care, similar to other jades.

Each of these jade plant types can offer something special to your indoor or outdoor succulent garden. Whether you’re drawn to the classic green of Crassula ovata or the unusual shapes of ‘Gollum’ and ‘Hobbit’, there’s a jade plant variety to suit every taste and gardening style. With proper care, these succulents can provide years of beauty and enjoyment, making them a beloved choice for gardeners around the world.

Uses of Jade plants


Jade plants, with their lush greenery and minimal care requirements, are a popular choice for both indoor and outdoor environments. Beyond their decorative appeal, these succulents are attributed with several uses:

  • Indoor Decoration: Jade plants add a touch of nature and vitality to homes and offices, thriving in bright, indirect light.
  • Symbolic Gift: Often symbolizing good luck and prosperity, jade plants are a thoughtful gift for housewarmings, new businesses, or as a gesture of friendship.
  • Air Purification: Like many houseplants, jade plants are believed to improve air quality by absorbing trace toxins and emitting oxygen, contributing to a healthier indoor environment.
  • Therapeutic Use: In some traditional medicine practices, the sap from jade plant leaves is used topically to treat minor skin irritations and burns, though scientific evidence to support these uses is limited.
  • Educational Tool: For those interested in botany or gardening, jade plants offer a hands-on way to learn about succulent care, propagation, and drought-resistant plant species.

Compact, resilient, and requiring minimal upkeep, jade plants serve multiple purposes that extend far beyond their beauty, making them a versatile addition to any space.


FAQ

How to Grow Jade plants From Seed?


Growing jade plants from seed involves a few careful steps:

  • Obtain Seeds: Purchase jade plant seeds from a reputable supplier.
  • Prepare Soil: Use a well-draining succulent or cactus mix. Fill a shallow tray or small pots with the soil.
  • Sow Seeds: Sprinkle the seeds on the surface of the soil and lightly cover them with a thin layer of soil or sand.
  • Watering: Mist the soil gently to moisten it. Maintain a regular moisture level in the soil while avoiding overwatering.
  • Lighting: Place the tray or pots in a bright, indirect light location. Avoid direct sunlight which can be too intense for young seedlings.
  • Temperature: Maintain a warm environment, ideally between 70-75°F (21-24°C).
  • Germination: Seeds typically germinate within 2-3 weeks. Look out for little sprouts.
  • Transplanting: Once seedlings are large enough to handle, carefully transplant them into individual pots.

Patience is key, as growing jade plants from seeds can be a slow process.


How to grow & care for Indoor Sempervivum (Hens and Chicks)

Sempervivum

Hens and chicks (Sempervivum tectorum) are captivating succulents that have enchanted gardeners for centuries. Sempervivum tectorum is highly valued for its decorative appearance, ease of care, and ability to tolerate extreme conditions, including frost. They prefer well-draining soil and plenty of sunlight, making them perfect for rock gardens, container gardening, and as ground cover in drought-prone areas.

With their wide range of colors—from green to red to purple—and their fascinating growth habits, hens and chicks offer visual interest year-round. They require minimal watering and are resistant to pests, making them a low-maintenance choice for gardeners of all skill levels.

Growing hens and chicks indoors allows you to enjoy their beauty up close, and with the right care, they can flourish and multiply, offering a verdant touch to your home environment and making them ideal for indoor cultivation. This article will guide you through the essentials of cultivating and nurturing hens and chicks indoors.


Indoor Grow & Care 


Choosing the right spot

Light is crucial for hens and chicks. Indoors, they thrive in bright, indirect light. A south-facing window is ideal, but any spot receiving plenty of light will suffice. If natural light is limited, consider supplementing with a grow light to mimic their natural habitat and encourage vibrant growth.

Planting Your Hens and Chicks

When planting hens and chicks indoors, drainage is key. Opt for a well-draining cactus or succulent mix, and ensure the container has adequate drainage holes to prevent water from pooling. Terracotta pots are a great choice as they allow the soil to dry more evenly between waterings, mimicking the dry conditions these plants prefer.

Watering Wisely

Overwatering is the quickest way to harm hens and chicks. These succulents store water in their leaves, allowing them to withstand periods of drought. Water your hens and chicks sparingly, allowing the soil to dry out completely between waterings. In the winter, reduce watering even further as the plant’s growth slows down.

Feeding your plants

Hens and chicks require minimal feeding. A light application of a balanced, water-soluble fertilizer at the beginning of the growing season is sufficient. Avoid over-fertilizing, as these plants are adapted to thrive in nutrient-poor soils.

Temperature and humidity

Hens and chicks prefer cooler temperatures and will thrive in most indoor environments. They are quite frost-hardy outdoors, but indoors, they aim to keep the temperature around 65°F to 75°F during the day, allowing it to drop slightly at night. These succulents are not humidity lovers, so typical household humidity levels are adequate.

Propagation: Multiplying Your Collection

One of the joys of growing hens and chicks is their ease of propagation. The “chicks” can be gently removed once they’ve grown a bit and replanted in their own container. They root easily, making it simple to expand your collection or share with friends.

The Joy of Indoor Gardening with Hens and Chicks

Growing hens and chicks indoors is a rewarding experience that brings a piece of the rugged outdoors into your home. Their ease of care, fascinating growth patterns, and the simple joy of propagation make them a favorite among both novice and experienced gardeners.

By providing the right conditions and a little attention, you can enjoy the robust beauty of hens and chicks and watch as they transform your indoor spaces into lush, green retreats. Whether you’re an avid gardener or looking to start your indoor plant journey, hens and chicks offers a delightful and enduring addition to any indoor garden.


Common Problems, Pests, and Solutions


Overwatering

  • Problem: Leads to root rot and fungal diseases.
  • Solution: Water sparingly, allowing soil to dry out completely between waterings. Ensure pots have good drainage.
Underwatering
  • Problem: Causes leaves to shrivel and die.
  • Solution: Water thoroughly when the soil is completely dry. Adjust watering frequency based on the season and indoor humidity levels.

Lack of Sunlight

Problem: Results in elongated, pale, or weak plants.
Solution: Place Sempervivum in a spot where they receive at least 4-6 hours of bright, indirect sunlight daily. If there is not enough natural light, think about utilizing grow lights.

Aphids
  • Problem: Small insects that suck plant sap, causing leaves to curl and stunt growth.
  • Solution: Spray plants with a mixture of water and a few drops of dish soap. Introduce helpful insects, such as ladybugs, or use insecticidal soap.

Mealybugs

  • Problem: White, cotton-like pests that feed on plant sap, weakening the plant.
  • Solution: Remove mealybugs manually with a cotton swab dipped in alcohol. Apply insecticidal soap or neem oil for treatment.
Spider Mites
  • Problem: Tiny pests that cause webbing and yellowing of leaves.
  • Solution: Increase humidity around plants by misting them. Use a strong water spray to dislodge mites and apply miticides if necessary.

Etiolation

  • Problem: Stretching of the plant due to insufficient light.
  • Solution: Move the plant to a brighter location or provide supplemental lighting. Prune leggy growth to encourage compact growth.
Fungal Diseases
  • Problem: Manifest as black spots, mold, or mildew on leaves.
  • Solution: Improve air circulation, avoid overhead watering, and remove affected leaves. Apply fungicides if needed.

By addressing these common issues and pests promptly, you can ensure your indoor Sempervivum (hens and chicks) remain healthy and thrive.

Types of Hens and Chicks


The world of hens and chicks (Sempervivum) is diverse and colorful, offering a plethora of types that captivate with their unique forms, textures, and hues. These hardy succulents, celebrated for their ease of care and architectural beauty, can transform any space into a succulent showcase. Here’s a spotlight on some distinctive varieties:

1. Sempervivum, ‘Emerald Empress’

This jewel among Hens and Chicks dazzles with emerald green rosettes that can develop pinkish hues along the edges in cooler temperatures, resembling a regal crown.

2. Sempervivum, ‘Bronze Beauty’

‘Bronze Beauty’ lives up to its name with rosettes that shimmer in shades of bronze and gold, especially when kissed by the sun, adding a metallic allure to your collection.

3. Sempervivum ‘Crimson Velvet’

Notable for its deep, velvety red rosettes, ‘Crimson Velvet’ offers a plush texture and rich color that seems to deepen under stress, providing dramatic visual interest.

4. Sempervivum ‘Fuzzy Wuzzy’

A curiosity in the succulent world, ‘Fuzzy Wuzzy’ features rosettes covered in fine, hair-like filaments, giving it a fuzzy appearance. Its green leaves are tipped with red, creating a soft yet vibrant look.

5. Sempervivum ‘Green Wheel’

This variety forms large, tight rosettes of bright green, resembling a wheel. Its uniform shape and striking color make it a visual anchor in any succulent display.

6. Sempervivum, ‘Lavender and Old Lace’

With a name that evokes a delicate elegance, this variety showcases pale green rosettes with lavender overtones, edged in fine, web-like filaments, reminiscent of antique lace.

7. Sempervivum ‘Moonshadow’

‘Moonshadow’ casts a mystical spell with its deep purple, almost black rosettes, creating a stunning contrast when paired with lighter varieties.

8. Sempervivum ‘Piliosum’ (Cobweb Hen and Chick)

A variant of the cobweb Hens and Chicks, ‘Piliosum’ is notable for its dense webbing that covers the rosettes, giving it an ethereal, snow-capped appearance.

9. Sempervivum ‘Red Rubin’

This striking cultivar boasts rosettes of deep burgundy that intensify in color with more sunlight, adding a touch of opulence to your indoor garden.

10. Sempervivum ‘Sunset’

‘Sunset’ illuminates with rosettes that transition from green at the base to a fiery orange-red at the tips, mimicking the colors of a sunset sky.

These varieties represent just a glimpse into the fascinating world of hens and chicks. Each brings its own story and character to the garden, offering endless possibilities for creativity and design. Whether you’re an experienced succulent collector or just starting out, exploring the types of hens and chicks can be a rewarding journey into the diversity and resilience of these charming plants.


Uses of  Hens and Chicks


Hens and chicks (Sempervivum species) are not only admired for their aesthetic appeal but also valued for their versatility and resilience. These succulents have a variety of uses that make them indispensable in both gardens and homes. Here are some of the ways hens and chicks can be utilized:

  1. Ornamental Gardening

Rock Gardens: Their ability to thrive in rocky, less fertile soils makes hens and chicks a perfect choice for rock gardens, where they can be planted in crevices or between stones.

Container Gardening: They are ideal for container gardening, adding texture and color to patios, balconies, and indoor spaces. Their compact size and minimal root system allow for creative arrangements in small pots or mixed succulent planters.

Ground Cover: Hens and chicks can be used as a drought-resistant ground cover in sunny areas. They spread easily, forming a dense mat that suppresses weeds and stabilizes the soil.

2. Green Roofing and Walls

Due to their hardiness and low maintenance, hens and chicks are excellent choices for green roofing projects. They can survive with minimal water and soil, reducing the need for irrigation and providing insulation.

Similarly, they can be incorporated into living walls or vertical gardens, where their varied textures and colors create visually striking patterns.

  1. Decorative Uses

Wedding Decorations and Bouquets: Their rosette shape and longevity make Hens and Chicks popular in wedding bouquets, boutonnieres, and table arrangements, where they add a touch of natural elegance that can be preserved as a reminder after the event.

Craft Projects: They can be used in a variety of craft projects, including wreaths, living frames, and other decorative items, thanks to their ability to survive off the root for periods of time.

  1. Medicinal Uses

In traditional medicine, some species of Sempervivum have been used for their purported medicinal properties, such as treating skin conditions and minor wounds. The leaves can be applied topically as a natural remedy for cuts, burns, and skin irritations, although scientific evidence supporting these uses is limited.

  1. Educational Projects

Hens and chicks are an excellent tool for educational projects about plant propagation, drought tolerance, and succulent care. Their easy propagation from offsets allows for hands-on learning about plant growth and reproduction.

  1. Environmental Benefits

Biodiversity: Planting hens and chicks in outdoor gardens can contribute to biodiversity by offering habitats and resources for various insects and small wildlife.

Soil Erosion Control: Their root systems help stabilize the soil, preventing erosion in sloped gardens and landscapes.

   7. Gifts and Favors

Due to their easy care and propagation, hens and chicks make thoughtful gifts or favors for gardening enthusiasts or as a sustainable option for event favors, symbolizing growth and resilience.

Hens and chicks offer a unique combination of decorative appeal, practical utility, and environmental benefits, making them a valuable addition to any gardening or indoor plant collection. Whether used for their beauty, for functional landscaping, or as part of eco-friendly projects, these versatile succulents continue to be cherished by gardeners around the world.


FAQ

How to Get Hens and Chicks to Bloom?


To get hens and chicks (Sempervivum) to bloom, follow these tips:

Sunlight: Ensure they receive full sun, at least 6 hours daily.

Soil: Plant in well-draining soil to prevent root rot.

Watering: Use water sparingly, letting the soil dry up in between applications.

Temperature: Provide a cold period in winter; they bloom best after experiencing cold weather.

Age: Understand that these plants typically bloom after 2-3 years.

Stress: Mild stress, such as less frequent watering, can sometimes encourage blooming.

By providing the right conditions and a bit of patience, your hens and chicks will reward you with their unique blooms.


How to Grow Hens and Chicks From Seed?


To grow hens and chicks (Sempervivum) from seed, follow these steps:

Seed Selection: Select premium seeds from a reliable supplier.

Soil preparation: Use a well-draining succulent or cactus mix. Additionally, you can use sand or perlite with ordinary potting soil.

Seed Sowing: Fill a seed tray or small pots with the prepared soil. Sprinkle the seeds on the surface; do not bury them, as they need light to germinate.

Watering: Mist the soil lightly to keep it moist but not soggy. Cover the tray or pots with a plastic lid or clear plastic wrap to retain humidity.

Light: Place the tray or pots in a bright location with indirect sunlight. Avoid direct sunlight, which can scorch the seeds.

Germination: Seeds typically germinate in 2-4 weeks. Maintain a consistent temperature of around 70°F (21°C).

Transplanting: Once the seedlings are large enough to handle, transplant them into individual pots or a prepared garden bed with well-draining soil.

Care: Water sparingly, allowing the soil to dry out between waterings. Gradually acclimate the young plants to full sun.

With patience and proper care, your hens and chicks will grow from seeds into thriving plants.


How to plant,Grow & Care Indoor Echeveria

Echeveria

Echeveria is a succulent plant genus that grows in desert-like regions of Central America, Mexico, and northwestern South America.  These plants are admired for their striking, rosette-shaped foliage, which comes in a variety of colors, sizes, and textures. Echeverias are highly regarded in gardening and indoor plant decor for their aesthetic appeal and low maintenance requirements.

They thrive in well-draining soil, need moderate to bright light, and prefer sparse watering following the “soak and dry” method to avoid root rot. Echeverias can easily be propagated from leaves, stem cuttings, or offsets, making them a popular choice for plant enthusiasts. Their resilience and ease of care, coupled with their diverse and beautiful appearances, make Echeveria a beloved genus in the succulent family.

The Echeveria genus comprises over 150 recognized species and numerous hybrids, each with its own unique charm. From the powdery blue Echeveria ‘Blue Prince’ to the strikingly red-tipped Echeveria ‘Ruby Blush’, the diversity is astounding. These plants can vary greatly in size, from tiny, compact rosettes just a few inches in diameter to larger species that spread outward with time.

Beyond their aesthetic appeal, echeverias play a vital role in their native ecosystems. They provide crucial shelter and moisture for a variety of insects and small wildlife, especially during dry spells. Moreover, their ability to propagate easily helps with soil stabilization and the prevention of erosion, making them invaluable in their natural habitats.

Type of Echeveria


Here are some notable types of Echeveria that are popular among gardeners and succulent enthusiasts:

Echeveria elegans (Mexican Snowball)
  • Characteristics: Forms a dense, symmetrical rosette of spoon-shaped, silvery-green leaves. It produces pink to coral-red flowers in late winter and early spring.
  • Care: Prefers bright light and occasional watering.
Echeveria laui
  • Characteristics: A highly sought-after species for its powdery blue leaves and sparse rosette formation. It has pink flowers with a yellow tip.
  • Care: It requires a bit more protection from direct sunlight than other species to maintain its delicate color.
Echeveria agavoides (Lipstick Echeveria)
  • Characteristics: Known for its sharp, pointed leaves resembling an agave. The leaves are bright green with red edges, resembling lipstick. It blooms with red-to- yellow flowers.
  • Care: It needs bright light to develop its vivid leaf colors fully.
Echeveria, ‘Black Prince’
  • Characteristics: A hybrid with dark, nearly black leaves that form a tight rosette. It blooms with dark red flowers in the fall or early winter.
  • Care: Requires full sun to partial shade and infrequent watering.
Echeveria ‘Perle von Nürnberg’
  • Characteristics: Boasts a beautiful rosette of purple-pink leaves with a powdery coating. It’s one of the most popular Echeveria hybrids.
  • Care: It thrives in bright light to maintain its coloration.
Echeveria pulvinata (Chenille Plant)
  • Characteristics: Features plush, velvety leaves that are green with red tips. It produces bright orange flowers.
  • Care: Prefers partial shade and needs protection from intense afternoon sun.
Echeveria ‘Afterglow’
  • Characteristics: Produces large rosettes of powdery lavender-pink leaves with a brighter pink margin. It’s drought-tolerant and easy to care for.
  • Care: It needs bright light to maintain its stunning color.
Echeveria runyonii, ‘Topsy Turvy’
  • Characteristics: Known for its unusual, twisted leaves that curve upwards, giving it a unique, sculptural appearance. In the fall, it bears yellow blooms.
  • Care: Requires full sun to partial shade and minimal watering.
Echeveria secunda
  • Characteristics: It forms tight rosettes of blue-green leaves and produces bright orange-red flowers. It’s an excellent groundcover succulent.
  • Care: Enjoys bright sunlight and moderate watering.
Echeveria peacockii (Peacock Echeveria)
  • Characteristics: Displays a beautiful rosette of silver-blue leaves with red tips. It blooms with orange-pink flowers in the summer.
  • Care: Prefers full to partial sun and occasional watering.

These are just a few examples of the diverse world of echeveria. Each species and hybrid brings its own unique beauty to gardens, homes, and collections, offering endless possibilities for enthusiasts to explore.

Indoor Planting ,grow & care 


Echeveria species are cherished for their architectural beauty, offering a palette of colors from green and blue to pink and silver. Their ability to store water in their thick, fleshy leaves allows them to withstand periods of drought, embodying the perfect blend of ornamental appeal and low-maintenance care. Understanding the basics of their care requirements is key to enjoying these succulents’ long-lasting beauty indoors.

Planting echeveria indoors


Choosing the Right Soil: Begin with a well-draining cactus or succulent potting mix. The ideal soil for Echeveria should contain a mix of potting soil, coarse sand, and perlite or pumice to ensure excellent drainage and prevent waterlogged roots.

Selecting a Container: Opt for pots with drainage holes to allow excess water to escape. Terra cotta pots are particularly beneficial as they are porous, helping the soil dry more evenly. Make sure the pot is slightly larger than the plant’s root ball to allow for growth.

Growing Echeveria Indoors
Light Requirements: Echeveria needs bright, indirect sunlight to thrive. A south-or west-facing window that receives several hours of sunlight is ideal. In regions with less intense sunlight, a grow light can provide supplemental light, especially during the winter months.

Watering Practices: Water your echeveria using the “soak and dry” method. Permit the soil to totally dry before watering properly. Reduce watering frequency during the winter, when the plant is resting. Always avoid letting water sit in the rosette of the leaves, as this can lead to rot.

Temperature and Humidity: Echeveria prefers average room temperatures between 60°F and 80°F (15°C to 27°C). They are not fond of cold drafts or temperatures below 50°F (10°C). Room humidity is generally sufficient, but they can benefit from increased airflow.

Fertilization: Feed your echeveria with a diluted, balanced, liquid succulent fertilizer once at the beginning of spring. Over-fertilizing can harm the plant, so it’s crucial to follow a less-is-more approach.
Caring for Echeveria

Pruning and Maintenance: Remove dead leaves from the plant’s base to prevent pests and diseases. Pruning is rarely needed but can be performed to shape the plant or remove damaged parts.

Pest and Disease Management: Echeveria can attract pests such as mealybugs, spider mites, and aphids. Apply insecticide soap or neem oil as a medicine to treat problems early on. Good cultural practices, like proper watering and airflow, minimize the risk of pests and diseases.

Propagation: Echeveria can be propagated from leaves, stem cuttings, or offsets, making it easy to expand your collection. Gently twist a leaf from the stem, allow it to callous over for a few days, then place it on top of moist soil until roots develop. Offsets can be carefully separated and repotted.

Common Issues, Pests, and Solutions for Echeveria


Echeverias are hardy succulents, but they can encounter issues that may affect their health and appearance. Here’s a guide to troubleshooting common problems, identifying pests, and finding effective solutions:

Common Issues

Overwatering

  • Symptoms: yellowing leaves, mushy stems, root rot.
  • Solution: Reduce watering frequency. Ensure that the soil dries thoroughly between waterings. Choose well-drained soil and pots with drainage holes.
Underwatering
  • Symptoms: wrinkled or shriveled leaves.
  • Solution: Increase watering frequency. Water thoroughly when the soil is dry, but avoid leaving the plant in standing water.
Insufficient Light
  • Symptoms: leggy growth, pale or etiolated leaves.
  • Solution: Move the plant to a brighter location. Echeverias need plenty of indirect sunlight. A south-facing window is ideal.
Sunburn
  • Symptoms: brown or white patches on the leaves.
  • Solution: Provide protection from intense, direct sunlight, especially during the hottest part of the day. Gradually expose the plant to increased light levels.
Nutrient Deficiency
  • Symptoms: slow growth, pale or yellowing leaves.
  • Solution: Fertilize sparingly with a balanced, diluted succulent fertilizer during the growing season (spring and summer).
    Common Pests

Mealybugs

  • Symptoms: white, cotton-like masses on leaves and stems.
  • Solution: Remove manually with a cotton swab dipped in rubbing alcohol. In severe situations, apply insecticidal soap or neem oil.
Aphids
  • Symptoms: small green, black, or brown insects on new growth; sticky residue (honeydew).
  • Solution: Spray the plant with a strong stream of water to dislodge aphids. Use insecticidal soap or neem oil if the infestation persists.
Spider Mites
  • Symptoms: tiny webbing, speckled leaves, yellowing or bronzing of leaves.
  • Solution: Increase humidity around the plant. Spray with insecticidal soap or neem oil. Regularly clean the plant with water.
Fungus Gnats
  • Symptoms: tiny black flies around the soil; larvae in the soil.
  • Solution: Let the soil dry between waterings. Use sticky traps to catch adults. Treat the soil with beneficial nematodes or a biological control like Bacillus thuringiensis.
Preventive Measures

Proper Watering: Ensure you follow correct watering practices to prevent root rot and discourage pest infestations.
Good Air Circulation: Place echeverias in well-ventilated areas to prevent fungal infections and discourage pests.

Quarantine New Plants: Isolate new plants for a few weeks to ensure they are pest-free before introducing them to your collection.
Regular Inspection: Frequently check your plants for early signs of pests or disease. Effective therapy depends on early discovery.

By following these guidelines, you can keep your echeverias healthy and vibrant, enjoying their beauty with minimal issues.

Uses of Echeveria

Echeveria, a popular genus of succulent plants, is cherished for its rosette-shaped, fleshy leaves and vibrant colors. Here are some common uses:

  1. Ornamental Purposes: Echeverias are primarily used as ornamental plants due to their stunning appearance. They are perfect for decorating homes, offices, and gardens. Their diverse shapes and hues add aesthetic appeal to indoor and outdoor spaces.
  2. Drought-Resistant Landscaping: These succulents are ideal for xeriscaping, a landscaping method that reduces the need for irrigation. Echeverias thrive in dry environments, making them suitable for arid regions and water-conscious gardening.
  3. Container Gardening: Echeverias are often grown in pots and containers, making them versatile for small spaces such as balconies, patios, and windowsills. Their compact size and low maintenance requirements make them perfect for urban gardening.
  4. Terrariums and Fairy Gardens: Their unique shapes and sizes make echeverias a popular choice for creating miniature landscapes and terrariums. They are often used in fairy gardens, adding a whimsical touch to these miniature worlds.
  5. Living Walls and Green Roofs: Echeverias can be incorporated into living walls and green roofs, providing a splash of color and texture. Their ability to store water in their leaves helps them survive in these environments with limited soil and water.
  6. Wedding and Event Decor: Due to their elegant and varied appearance, echeverias are frequently used in floral arrangements, bridal bouquets, and as decorative elements in weddings and events. Their durability ensures they remain fresh throughout the occasion.
  7. Propagation and Gifting: Echeverias are easy to propagate from leaf cuttings, making them a favorite among gardening enthusiasts. They make excellent gifts, offering a long-lasting and beautiful plant that can be shared and grown easily.

Echeverias are not only visually appealing but also versatile, fitting seamlessly into various gardening styles and uses. Their ease of care and unique beauty continue to make them a beloved choice among plant enthusiasts.

FAQ


How to prune Echeveria?

Pruning Echeveria is straightforward and helps maintain its shape and health. Here’s a quick guide:

  1. Gather Tools: Use sharp, clean scissors or pruning shears to prevent infection.
  2. Remove Dead Leaves: Gently pull off any dead or dying leaves at the base of the rosette.
  3. Trim Leggy Growth: If your Echeveria has grown tall and leggy, cut the stem just below the rosette, leaving a few inches of stem.
  4. Allow to Callous: Let the cut end of the stem callous over for a few days to prevent rot before replanting.
  5. Replant: Place the trimmed rosette in well-draining soil. The remaining stem can also produce new offsets.
  6. Water sparingly: Water the newly planted rosette sparingly until it establishes roots.

Regular pruning helps Echeveria stay compact and encourages healthy growth.