Guide to Growing and Caring for Aloe Vera Indoors

Aloe Vera

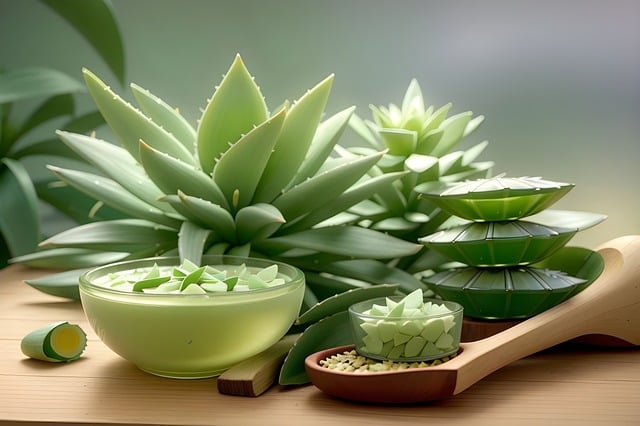
Aloe vera, a succulent marvel, thrives in arid climates, unfurling its emerald embrace to offer a treasure trove of health and beauty benefits. Nestled within its plump leaves lies a translucent gel, a natural elixir enriched with vitamins, minerals, and amino acids. This gel is a testament to nature’s healing prowess, soothing burns, hydrating skin, and championing wound recovery. Beyond its medicinal might, aloe vera graces the cosmetic realm, infusing products with its moisturizing magic. As a dietary supplement, its juice whispers promises of digestive harmony. In homes, it stands as a silent guardian, purifying the air while asking for little in return. Aloe vera, in its serene simplicity, encapsulates nature’s gentle power to heal, nurture, and beautify.


Types of Alon Vera


Aloe vera, commonly known for its medicinal and cosmetic benefits, is just one species within the Aloe genus, which comprises over 500 species of flowering succulent plants. However, the term “Aloe vera” specifically refers to “Aloe barbadensis Miller ,” widely recognized for its health-promoting properties. While there’s primarily one true Aloe vera species, the Aloe genus includes a variety of plants with diverse characteristics and uses. Here are a few notable types within the broader aloe family:


Aloe Arborescens
Aloe Arborescens


  1. Aloe Arborescens (Krantz Aloe)

Known for its medicinal properties similar to aloe vera. It’s used in traditional medicine and has a striking appearance with red or orange flowers.


Aloe Ferox
Aloe Ferox


  1. Aloe Ferox (Cape Aloe)

Native to South Africa, this species is taller, with more pronounced spikes on its leaves. Aloe ferox is used in cosmetics and health supplements and is known for its laxative properties.
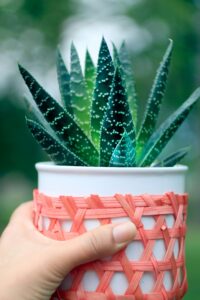
 

Aloe Variegata
Aloe Variegata


  1. Aloe variegata (Tiger Aloe or Partridge-Breasted Aloe)

It is recognized for its distinctive, patterned leaves that resemble a partridge’s breast. It’s popular as an ornamental plant rather than for medicinal use.
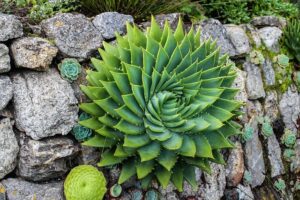
 

Aloe Polyphylla
Aloe  Polyphylla


  1. Aloe Polyphylla (Spiral Aloe)

Famous for its unique spiral shape, this aloe is sought after for its aesthetic appeal in gardens and as a potted plant. It doesn’t have the same widespread medicinal use as aloe vera.
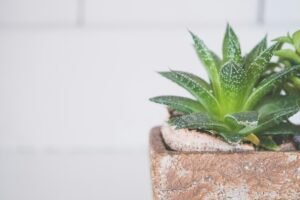
 

Aloe Humilis
Aloe Humilis


  1.  Aloe Humilis (Spider Aloe)

A compact aloe species with spiky leaves and attractive, bright flowers. It’s often used in rock gardens and as a decorative indoor plant.
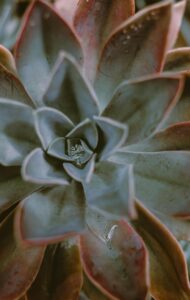
 

Aloe Striata
Aloe Striata


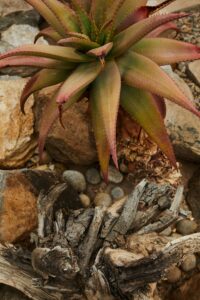
  1. Aloe striata (Coral Aloe)

Noted for its smooth, stripe-less leaves with a pinkish hue on the edges and coral-colored flowers, this species is mainly grown for ornamental purposes.
 

Aloe Perryi
Aloe Perryi


  1. Aloe Perryi (Perry’s Aloe)

It grows largely on the Arabian Peninsula and is utilized in traditional medicine in the same way that aloe vera is, particularly for its soothing gel.


Aloe Ciliaris
Aloe Ciliaris


  1. Aloe Ciliaris (Climbing Aloe)

As the fastest-growing aloe species, it’s unique for its ability to climb if supported. It features vibrant red-orange flowers.

While Aloe vera is most commonly known for its gel’s soothing and healing properties, the Aloe genus as a whole offers a wide range of plants with various uses, from decorative to medicinal. Each species brings its own unique beauty and potential benefits to gardens, homes, and health practices worldwide.


Grow & Care Indoor Aloe Vera


Growing aloe vera indoors is both rewarding and practical, given its minimal care requirements and numerous benefits. Aloe vera, with its succulent leaves and medicinal properties, makes for a perfect houseplant. Here’s a straightforward guide to help you grow and care for aloe vera indoors:

Choosing the Right Pot
  • Drainage: Select a pot with good drainage holes to prevent water from sitting at the bottom, which can cause root rot.
  • Material: Terracotta pots are ideal as they allow the soil to dry out more evenly than plastic pots.
  • Size: The pot should be a little larger than the plant’s root ball. Aloe vera plants prefer to be snug in their pots.
  • Soil: Use a well-drained potting mix specifically formulated for succulents or cacti. These mixes usually contain sand or perlite, which improves drainage and mimics the plant’s natural arid environment.
Light
  • Sunlight: Aloe vera thrives in bright, indirect sunlight. Place it near a south- or west-facing window where it will receive plenty of light but not direct sun, which can scorch its leaves.
  • Artificial Light: If you don’t have enough natural light, consider using a grow light.
Watering
  • Frequency: Water your aloe vera deeply but infrequently, allowing the soil to dry out completely between waterings. This might mean watering every 3 weeks or more, depending on the humidity and temperature of your home.
  • Method: Avoid watering directly into the center of the plant, as this can cause rot. Instead, water around the base of the plant.
Temperature and Humidity

Aloe vera prefers warmer temperatures between 55°F and 80°F (13°C and 27°C) and does not require high humidity. Protect it from cold drafts in the winter, especially if is is near a window.

Feeding

Fertilize sparingly, no more than once in the spring and once in the summer, with a balanced, diluted houseplant fertilizer. Aloe vera does not need much feeding.

Repotting

Repot your aloe vera every few years or when it becomes root-bound. Choose a pot one size larger than your present one. Repotting is also an opportunity to propagate any offshoots or “pups” that have formed.

Common Pests, Issues and Solutions


Aloe vera, renowned for its medicinal properties and ease of care, can still face problems, particularly from pests. Understanding these common pests, their associated issues, and how to address them can help keep your aloe vera plant healthy and thriving.

1. Aphids
  • Issue: Aphids are small, sap-sucking insects that can cause yellowing and distorted leaves. They also excrete honeydew, which can lead to sooty mold growth.
  • Solution: Wash off aphids with a strong stream of water. If the infestation is persistent, apply insecticidal soap or neem oil. Introducing natural predators such as ladybugs can also help to control aphid populations.
2. Mealybugs
  • Issue: Mealybugs appear as small, white, cotton-like clusters on the plant. They suck sap from the leaves, leading to yellowing, wilting, and stunted growth.
  • Solution: Use a cotton swab dipped in rubbing alcohol to physically remove mealybugs. To treat heavier infestations, use insecticidal soap or neem oil. Regularly check for re-infestation and treat promptly.
3. Spider Mites
  • Issue: Spider mites are tiny pests that can cause stippling on the leaves and fine webbing. Infested leaves may darken and fall off.
  • Solution: Increase humidity around the plant and regularly mist it with water, as spider mites thrive in dry conditions. Use a miticide or insecticidal soap if necessary. Ensure good airflow around the plant to prevent infestations.
4. Scale Insects
  • Issue: Scale insects are small, brown, or gray bumps on the leaves and stems. They suck plant sap, causing the plant to yellow and weaken.
  • Solution: Scrape off scale insects with a soft brush or cloth. Use horticultural oil or insecticidal soap to treat infestations. Prune heavily infested areas if necessary.
General Care Issues and Solutions
5. Overwatering
  • Issue: Overwatering can lead to root rot, characterized by mushy, brown roots and a foul smell. The leaves may become soft and discolored.
  • Solution: Let the soil dry completely between waterings. Choose well-drained soil and pots with drainage holes. Reduce your watering frequency, particularly during the cooler months.
6. Underwatering
  • Issue: Underwatered aloe vera will have thin, curled, and brown-tipped leaves. The plant may appear shriveled.
  • Solution: Water the plant thoroughly but infrequently, ensuring the soil dries out between waterings. Increase watering during hot, dry periods, but avoid overcompensating.
7. Insufficient light
  • Issue: Aloe vera plants require plenty of sunlight. Insufficient light can cause the plant to become leggy and lose its vibrant green color.
  • Solution: Place the plant in a location with bright, indirect sunlight, such as a south or west-facing window. If natural light is insufficient, use a grow light to provide the necessary illumination.
8. Poor soil drainage
  • Issue: Poorly draining soil can lead to root rot and other moisture-related issues.
  • Solution: Use a cactus or succulent potting mix that provides excellent drainage. Avoid heavy, compact soils and ensure the pot has drainage holes.
9. Nutrient Deficiency
  • Issue: Aloe vera, while not requiring heavy feeding, can suffer from nutrient deficiencies, leading to slow growth and pale leaves.
  • Solution: Fertilize sparingly with a balanced, water-soluble fertilizer diluted to half strength during the growing season. Avoid fertilizing during the plant’s dormant period in the winter.

By understanding these common pests and care issues, along with their solutions, you can ensure your aloe vera remains a healthy and robust addition to your home or garden. Regular monitoring and appropriate care are key to preventing and addressing these problems effectively.


Uses Of Alon Vera

Aloe vera is renowned for its wide array of uses, spanning from health and beauty to household applications. Here’s a summary of the diverse uses of aloe vera:

Health and Medicinal Uses


  • Skin Care: Aloe vera gel’s cooling and anti-inflammatory characteristics make it popular for repairing sunburns, small burns, wounds, and other skin problems.
  • Wound Healing: The gel promotes healing by improving blood circulation through the area and preventing cell death around a wound.
  • Digestive Aid: Drinking aloe vera juice is believed to aid in digestion, relieve constipation, and help with stomach ulcers and gastrointestinal health.
  • Immune Boost: It’s thought to have immune-boosting properties due to its high antioxidant content.
  • Anti-inflammatory: Aloe vera has been used to treat conditions like psoriasis, acne, and eczema, thanks to its anti-inflammatory effects.
  • Oral Health: Its antibacterial properties make it effective in combating gum diseases when used as a mouthwash.
Beauty and cosmetic uses
  • Moisturizer: Aloe vera is a common ingredient in moisturizers and lotions, ideal for hydrating the skin without leaving a greasy feel.
  • Hair Care: Used in shampoos and conditioners, aloe vera can soothe the scalp, condition the hair, and promote healthy hair growth.
  • Makeup Remover: A gentle and effective natural alternative to chemical makeup removers.
  • Anti-Aging: The vitamins and antioxidants in Aloe vera can help combat the signs of aging by improving the skin’s elasticity and reducing the appearance of fine lines and wrinkles.
Household and Other Uses
  • Air Purification: Aloe vera can help purify the air by removing toxins from the environment, making it a beneficial indoor plant.
  • Decorative: With its attractive and hardy nature, aloe vera serves as a low-maintenance decorative plant for homes and offices.
  • Nutritional Medicines: Aloe vera is used in a number of health products, given its suggested nutritional benefits.

While aloe vera is a potent natural remedy with a myriad of uses, it’s important to note that it should be used with caution. Some people may experience allergic reactions, and ingesting aloe vera in large quantities can have adverse effects. Always do a patch test before applying it to the skin, and consult a healthcare provider before using it for medicinal purposes.


FAQ


How to propagate aloe vera?


Propagating aloe vera is a straightforward process that can be done using offshoots, also known as “pups.” Here’s a step-by-step guide:

  • Identify Pups: Look for small offshoots growing at the base of the mother plant. These should be at least a few inches tall, with their own roots.
  • Remove the Pup: Carefully remove the aloe vera plant from its pot. Gently separate the pup from the mother plant, ensuring the pup has some roots attached. Use a clean, sharp knife if needed.
  • Let It Heal: Allow the pup to sit in a dry, shaded area for a couple of days. This helps the cut or separation area to callous over, reducing the risk of rot.
  • Plant the Pup: Fill a small pot with well-draining cactus or succulent soil mix. Plant the pup in the soil, burying its roots but keeping the leaves above the soil surface.
  • Water sparingly: Lightly water the pup after planting, then allow the soil to dry out completely before watering again. Over the next few weeks, water sparingly to avoid rot.
  • Provide light: Place the pot in a location with bright, indirect sunlight. To avoid leaf burn, start by staying out of direct sunlight.

By following these steps, your aloe vera pup will establish roots and grow into a healthy new plant.


How to make aloe vera juice?


Aloe vera juice is a refreshing and healthful drink known for its soothing and healing properties. Here’s a simple guide to making aloe vera juice at home:

Ingredients:

  • One large aloe vera leaf
  • 1 cup of water or any preferred juice (like orange or apple juice)
  • Honey or another sweetener (optional)
  • Lemon juice (optional, for flavor)


Steps:

Harvest the aloe vera leaf:

  • Select a thick, healthy leaf from the outer section of the aloe vera plant.
  • Use a clean, sharp knife to cut the leaf close to the base.

Prepare the leaf:

  • Thoroughly wash the leaf to get rid of any dirt or debris.
  • Stand the leaf upright in a container for 10-15 minutes to allow the yellowish sap (aloin) to drain out. This sap can be bitter and may cause digestive discomfort.

Extract the gel:

  • Place the leaf on a cutting board, and carefully cut off the spiky edges along both sides.
  • Slice the leaf lengthwise to expose the gel inside.
  • Using a spoon, scoop out the clear, gooey gel, avoiding any remaining yellowish sap and the green outer skin.

Blend the gel:

  • Add about 2 tablespoons of the aloe vera gel to a blender.
  • Pour in 1 cup of water or your preferred juice.
  • Blend until the mixture is smooth. If desired, add a teaspoon of honey or a squeeze of lemon juice for extra flavor.

Strain and serve:

  • For a smoother consistency, you can strain the blended juice through a fine mesh strainer or cheesecloth.
  • Enjoy the juice right away after pouring it into a glass. Aloe vera juice is best consumed fresh.
Tips:
  • Storage: If you make a larger batch, store the extra juice in the refrigerator and consume it within a few days.
  • Dosage: Start with small amounts, such as 1-2 tablespoons, to see how your body reacts. Gradually increase the amount as desired.
  • Caution: Consult with a healthcare provider before consuming aloe vera juice regularly, especially if you have underlying health conditions or are pregnant.

Making aloe vera juice at home ensures that you get a fresh and pure product, free from additives and preservatives commonly found in store-bought versions. Enjoy the natural benefits of aloe vera in a delicious and hydrating drink!


How to make aloe vera gel?


Making aloe vera gel at home is simple and requires minimal ingredients. Here’s a quick guide:

Ingredients:

  • One large aloe vera leaf
  • Vitamin E oil (optional, for preservation)
  • Essential oil (optional, for fragrance)

Steps:

Harvest the aloe vera leaf:

  • Select a thick, healthy leaf from the outer section of the aloe vera plant.
  • Cut the leaf close to the base with a clean, sharp knife.

Prepare the leaf:

  • Carefully wash the leaves to get out any dirt.
  • Stand the leaf upright for 10-15 minutes to drain the yellowish sap (aloin), which can be irritating.

Extract the gel:

  • Lay the leaf flat on a cutting board.
  • Cut off the spiky edges on both sides.
  • Slice the leaf lengthwise to open it up.
  • Scoop out the clear gel inside using a spoon.

Blend the gel:

  • Place the extracted gel in a blender.
  • Blend until smooth.

Optional Additives:

  • Add a few drops of vitamin E oil to help preserve the gel.
  • Add a few drops of essential oil for fragrance, if desired.

Store the gel:

  • Transfer the blended gel into a clean, airtight container.
  • Refrigerate for up to one week.

Now you have fresh aloe vera gel, ready for use in skincare, haircare, or as a soothing remedy for minor burns and irritations.

How to use aloe vera on hair?


Aloe vera can be a great natural treatment for your hair. Here’s a quick guide:

Extract the gel:

  • Cut a fresh aloe vera leaf and scoop out the clear gel with a spoon.
  • Blend the gel until smooth.

Apply Directly:

  • Massage the aloe vera gel into your scalp and hair.
  • Ensure even coverage from roots to tips.

Leave On:

  • Leave the gel on for 30 minutes to 1 hour.
  • For deeper conditioning, you can leave it on overnight and cover your hair with a shower cap.

Rinse:

  • Rinse the gel out with lukewarm water.
  • If desired, use your regular shampoo and conditioner.

Use Regularly:

  • For best results, use aloe vera gel on your hair 1-2 times a week.

Aloe vera can help moisturize, reduce dandruff, and promote healthy hair growth.

How to store aloe vera leaf?


Storing aloe vera leaves properly ensures they stay fresh and retain their beneficial properties. Here’s a short guide:

Refrigeration:

  • Wrap: Wrap the aloe vera leaf in plastic wrap or place it in an airtight plastic bag.
  • Store: Keep the wrapped leaf in the refrigerator. It can stay fresh for up to two weeks.

Freezing:

  • Cut: Slice the leaf into smaller, usable portions.
  • Wrap: Wrap each piece in plastic wrap or use a silicone ice cube tray.
  • Freeze: Place the wrapped pieces or tray in the freezer. Frozen aloe vera can last for several months.

Airtight Container:

  • Prepare: After cutting the leaf, scoop out the gel.
  • Store: Put the gel in an airtight container.
  • Refrigerate: Store the container in the refrigerator for up to one week.

Using these methods, you can extend the life of your aloe vera leaf and have its soothing gel readily available whenever you need it.

How to use aloe vera on face?


Aloe vera is excellent for skin care due to its soothing, moisturizing, and healing properties. Here’s a quick guide on how to use it on your face:

Extract the gel:

  • Cut a fresh aloe vera leaf.
  • Scoop out the clear gel with a spoon.
  • Blend the gel until smooth for a consistent texture.

Cleanse Your Face:

  • Wash your face with a gentle cleanser.
  • Pat it dry with a clean towel.

Apply the gel:

  • Use a tiny amount of the blended aloe vera gel.
  • Gently apply it to your face in circular strokes.
  • Ensure even coverage, avoiding the eye area.

Leave On:

  • Let the gel sit on your skin for about 10-20 minutes.
  • For a more intensive treatment, you can leave it on overnight.

Rinse:

  • Rinse off with lukewarm water.
  • Dry your face with a clean towel.

Moisturize:

  • If necessary, apply your normal moisturizer afterward.

Tips:

  • For acne: Aloe vera can help reduce inflammation and redness. Apply it directly to the affected areas.
  • For sunburn: Its cooling properties can soothe sunburnt skin. Apply generously to the affected areas.
  • For dry skin: Mix aloe vera gel with a few drops of essential oil or honey for added hydration.

Using aloe vera on your face regularly can help keep your skin clear, hydrated, and glowing.


A Complete Guite to How to plant ,Grow & care for Sunflowers

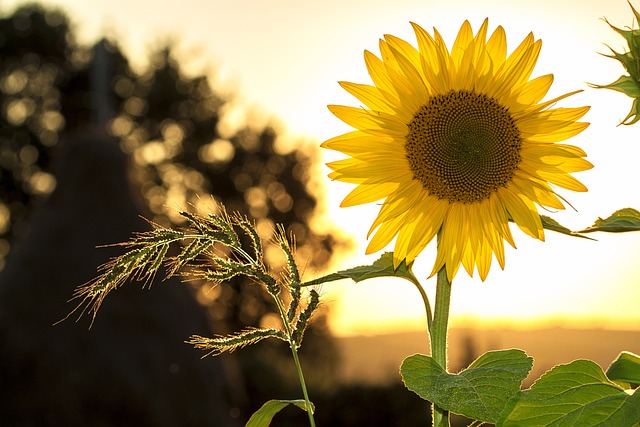
Sunflowers (Helianthus annuus) are one of the most recognizable and beloved flowers, celebrated for their bright, sunny appearance and towering heights. Native to North America, these annual plants have captivated cultures worldwide, not only for their beauty but also for their utility and symbolic meanings.

Sunflowers are relatively easy to grow, thriving in well-drained soil with full sun exposure. They are drought-resistant, making them suitable for various climates, but they perform best with regular watering and fertilization. Sunflowers are fast-growing plants that bloom from summer into early fall, offering a prolonged period of enjoyment.


Types of Sunflowers

Sunflowers have distinctively large, bright yellow petals that surround a dark center, which can grow to become quite large. They are known for their heliotropism when they are young; the flower heads track the sun’s movement across the sky from east to west, which maximizes light absorption throughout the day.

However, mature sunflowers generally face east to catch the early morning light. These plants can vary significantly in size, from small varieties that are a few feet tall to giant types that can grow over 12 feet in height. Sunflowers produce seeds in their dense, brown centers, which are harvested for various uses.

Here are some of the most popular types of sunflowers that you might consider for your garden or floral arrangements:

1. Tall sunflowers
  • ‘Russian Mammoth’: Perhaps the quintessential sunflower, this variety can grow up to 12 feet tall with large heads that are ideal for seed production.
  • ‘American Giant’: Living up to its name, this variety can reach heights of 14 feet or more with sturdy stalks and massive flowers.
2. Dwarf sunflowers
  • ‘Teddy Bear’: A miniature variety that grows to about 2-3 feet tall with fluffy, dense golden blooms resembling a teddy bear’s fur.
  • ‘Sunny Smile’: Perfect for pots and small spaces, this variety reaches about 12-18 inches in height, producing cheerful, small blooms.
3. Colored sunflowers
  • ‘Autumn Beauty’: This variety produces flowers in shades of orange, bronze, and red, adding a warm palette to the garden.
  • ‘Moulin Rouge’: A striking, branching variety that bears deep burgundy flowers, offering a dramatic contrast to the traditional yellow sunflower.
4. Branching sunflowers
  • ‘Italian White’: Featuring creamy white petals with a dark center, this variety produces multiple blooms on branching stems.
  • ‘Lemon Queen’: Known for its pale yellow petals and a lemony hue, this sunflower produces several flowers per stem, attracting pollinators.
5. Single-Stem sunflowers
  • ‘Velvet Queen’: This variety has rich, velvety red petals with a chocolate brown center and grows on a single, tall stem.
  • ‘Gold Rush’: A classic single-stem sunflower with bright, golden-yellow petals and a dark center, known for its tall and straight posture.
6. Pollinator-Friendly sunflowers
  • ‘ProCut Series’: Designed for cut flower production, these sunflowers come in various colors and are pollen-free, making them less messy for indoor arrangements but still attractive to outdoor pollinators.
  • ‘Sunrich Series’: Another pollen-free option, these sunflowers bloom in orange, lemon, and gold shades, perfect for bouquets and arrangements.


Indoor Plant,grow & Care


Growing sunflowers (Helianthus annuus) indoors can be a rewarding endeavor, bringing a slice of the summer’s brightness into your home. While sunflowers are traditionally grown outdoors, certain dwarf varieties can thrive indoors with proper care. Here’s how to plant, grow, and care for sunflowers inside your home.

Selecting the Right Variety

For indoor cultivation, choose dwarf sunflower varieties such as ‘Teddy Bear’ or ‘Sunny Smile,’ which are more suited to pot growing due to their compact size.

Potting and Soil

Pot Selection: Choose a pot with adequate drainage holes to prevent waterlogging. The pot size should accommodate the mature size of the sunflower, generally at least 12 inches deep and wide for dwarf varieties.

Soil: Use a well-draining potting mix. You can enhance regular potting soil with perlite or vermiculite to improve drainage.

Planting

Sowing Seeds: Plant sunflower seeds 1 inch deep in the potting mix. You can start with 2-3 seeds per pot and thin out the weakest seedlings, leaving the strongest ones to grow.

Germination: Place the pot in a warm area and keep the soil moist. Seeds usually germinate between 7 and 10 days.

Light

Sunlight: Sunflowers need ample sunlight to grow. Place your pot near a south-facing window where it can receive at least 6-8 hours of direct sunlight daily. If you lack sufficient natural light, consider using a grow light as a supplement.

Watering

Water Conditions: Keep the soil humid but not soggy. Water once the top step of the soil is dry to the touch. The frequency will depend on the humidity and temperature of your home.

Fertilizing

Nutrient Needs: Feed your sunflower a balanced, water-soluble fertilizer once a month to support its growth. Ensure the fertilizer is diluted to half the recommended strength to avoid nutrient burn.

Care Tips

Staking: Some dwarf sunflowers may still need support as they grow. Use a small stake or stick to support the stem if it begins to lean or bend. Rotating the Pot: To encourage even growth, rotate the pot every few days so that all sides of the plant receive equal light, mimicking their natural heliotropic movement.

Pollination

Indoor sunflowers may need help with pollination since they won’t have natural pollinators like bees and birds. You can gently shake the flower to release pollen or use a small paintbrush to transfer pollen from one flower to another if you’re growing multiple plants.

Harvesting

If you’re growing sunflowers for their seeds, wait until the flower head turns brown and the back of the head turns yellow. You can then cut the flower head and allow it to dry in a warm, ventilated area before extracting the seeds.

Growing sunflowers indoors requires a bit of care to ensure they receive enough light and aren’t overwatered. With the right conditions, even an indoor sunflower can bring a cheerful splash of color and a touch of summer warmth to your home.

Common Problems and Solutions


Sunflowers are beloved for their bright blooms and easy-growing nature. However, even these hardy plants can face problems. Here are some common issues and their solutions to ensure your sunflowers thrive.

1. Poor Germination

  • Problem: sunflower seeds are failing to germinate.
  • Solution: Ensure seeds are planted in well-draining soil and not too deep. Maintain soil moisture without waterlogging. Plant seeds in warm soil (above 50°F) to encourage germination.

2. Yellowing Leaves

  • Problem: Leaves are turning yellow.
  • Solution: This can indicate nutrient deficiencies, often nitrogen. Apply a fertilizer that is balanced to provide essential nutrients. Ensure proper watering, as both overwatering and underwatering can cause yellowing.

3. Pests

  • Problem: Insects such as aphids, beetles, and caterpillars are attacking the plant.
  • Solution: Inspect plants regularly and remove pests by hand or with a strong water spray. To treat severe infestations, use insecticidal soap or neem oil. Encourage natural predators like ladybugs.

4. Diseases

  • Problem: Fungal infections, such as powdery mildew or rust.
  • Solution: Ensure good air circulation by spacing plants appropriately. To prevent wetting the foliage, water the plant from its base. Remove affected leaves promptly and use fungicides if necessary.

5. Weak stems

  • Problem: Stems bend or break easily.
  • Solution: Provide support with stakes or plant sunflowers in a sheltered location to protect against strong winds. Ensure adequate sunlight, as weak stems can result from insufficient light.

6. Wilting

  • Problem: Plants are wilting despite sufficient water.
  • Solution: Check for root rot by examining the roots for decay. Improve soil drainage and avoid overwatering. Mulch around the base to help conserve moisture and regulate soil temperature.

By addressing these common problems with practical solutions, you can enjoy healthy, vibrant sunflowers in your garden. Regular monitoring and proper care are key to overcoming these challenges and ensuring your sunflowers reach their full potential.

Color & Meaning

Sunflowers are not only known for their cheerful and sunny appearance but also for the variety of colors they come in and the meanings associated with these colors. While the classic yellow sunflower is the most recognized, breeders have developed sunflowers in shades of red, orange, white, and even bicolor. Each color can convey a different message or sentiment, making sunflowers versatile for various occasions and expressions.


Yellow Sunflowers
Yellow Sunflowers


Yellow Sunflowers

The classic yellow sunflower is synonymous with happiness, vitality, and intelligence. It’s a symbol of the sun itself, representing warmth, positivity, and strength. Yellow sunflowers are often given to convey admiration and loyalty, as well as to bring joy to someone’s day.


Red Sunflowers
Red Sunflowers


Red Sunflowers

These sunflowers, ranging from deep burgundy to bright red, symbolize strong emotions such as love and passion. They can also represent courage and perseverance. Giving someone a red sunflower is a way to convey deep, passionate feelings or admiration for their strength and resilience.


Orange Sunflowers
Orange Sunflowers


Orange Sunflowers

Those orange sunflowers, with their warm hues, symbolize enthusiasm, energy, and excitement. They can convey a sense of adventure and optimism, making them the perfect gift to encourage someone or celebrate a new beginning.


White Sunflowers
White Sunflowers


White Sunflowers

The white sunflowers are less common and symbolize purity and innocence. They can also represent support and encouragement, making them suitable for occasions that require a touch of elegance or a message of hope and solidarity.


Bicolor Sunflowers
Bicolor Sunflowers


Bicolor Sunflowers

Sunflowers that display two colors, usually a mix of dark red or brown with yellow edges, symbolize contrast and the complexity of emotions. They can represent unity, diversity, and the blend of opposites, making them a thoughtful choice for expressing more nuanced sentiments.

Meaning in Numbers

The number of sunflowers given can also impact the message conveyed.

Choosing Sunflowers for Occasions


Joy and Celebration: Yellow and orange sunflowers are perfect for birthdays, graduations, and other celebratory events to bring cheer and brightness.

Romantic Gestures: Red sunflowers make a unique and meaningful gift for romantic occasions, expressing deep love or desire.

Sympathy and Support: White and bicolor sunflowers can offer a message of hope, purity, and support during challenging times.

Friendship: Yellow sunflowers also symbolize platonic love and appreciation, making them a great gift for friends.

Sunflowers, with their variety of colors and meanings, offer a versatile way to express a range of emotions and sentiments. Whether you’re celebrating a joyous occasion, expressing love, or offering support, there’s a sunflower color that can help convey your message beautifully.


Uses


  • Culinary: Sunflower seeds are a nutritious snack, rich in healthy fats, proteins, fiber, minerals, and vitamins. The seeds can also be processed to extract sunflower oil, a commonly used cooking oil known for its light taste and health benefits.
  • Agriculture: Sunflower crops are vital for producing sunflower oil and seeds for consumption. The plants are also used as forage for livestock.
  • Gardening and Landscaping: Sunflowers are popular in gardens and landscapes for their striking appearance and ability to attract pollinators like bees and birds.
  • Cultural and artistic: Sunflowers have inspired countless artists, most notably Vincent van Gogh, whose series of sunflower paintings are among his most famous works. They symbolize loyalty, adoration, and longevity.
Symbolism

Sunflowers symbolize adoration, loyalty, and longevity, reflecting their nature of being drawn to the sunlight and their usefulness over time. They are often associated with happiness, positivity, and strength, likely due to their bright appearance and sturdy stalks.

Environmental Benefits

Sunflowers are not only aesthetically pleasing but also environmentally beneficial. They can help remove toxins from the soil, such as lead, arsenic, and uranium, through a process called phytoremediation. Moreover, being excellent pollinator attractors, they play a crucial role in supporting biodiversity.

Sunflowers stand out in the plant world for their vibrant beauty, utility, and the joy they bring to people’s lives. From their cultural significance to their environmental benefits, sunflowers continue to be a symbol of sunshine and positivity, making them a cherished presence in gardens and fields around the globe.


FAQ

Why sunflower oil is bad for health?

Sunflower oil can be detrimental to health for several reasons:

  1. High Omega-6 Fatty Acids: Excessive omega-6 fatty acids can lead to an imbalance with omega-3s, promoting chronic inflammation linked to heart disease and other health issues.
  2. Formation of Harmful Compounds: High heat cooking with sunflower oil can produce toxic compounds like aldehydes, which are associated with increased cancer and neurodegenerative disease risks.
  3. Trans Fats: Hydrogenation processes to extend shelf life can create trans fats, raising bad cholesterol (LDL) and lowering good cholesterol (HDL), thus harming heart health.
  4. Adulteration: Sunflower oil is sometimes mixed with cheaper oils, which can introduce additional health risks and lower its nutritional quality.
  5. Nutrient Loss: Refining processes strip away beneficial nutrients, such as vitamins and antioxidants, reducing the oil’s overall health benefits.

Grow and Care Guide for Indoor Lily Flowers

Lilies are a fascinating and varied family of flowering plants that are valued for their grace and beauty in many different cultures. True lilies, which are members of the genus Lilium, are distinguished by their magnificent blossoms that come in a variety of hues, forms, and sizes, as well as their bulbous roots.Throughout history, these evergreens have served as a symbol of transition, rebirth, and purity in many different cultures.

Lilies grow well in gardens, meadows, and wooded places from North America to Europe and Asia, and they do well in moderate regions all throughout the world. Every variety of lily, including the majestic Asiatic, fragrant Oriental, and well-known Easter lily, adds a special appeal to both indoor and outdoor settings. Lilies are prized by gardeners for their comparatively low maintenance requirements and their capacity to enhance.Here are a few notable types:


Asiatic Lilies
Asiatic Lilies

Asiatic Lilies: The Colorful Bloomers

Asiatic lilies, with their wide range of hues that span from pale white to rich crimson and nearly every shade in between, are the vivid first flowers of summer. These are some of the first lilies to appear in the garden and are easily identified by their erect blooms. They require little maintenance and thrive in full sun or partially shaded soil. It’s interesting to note that Asian lilies don’t smell. This makes them a great option for interior arrangements for anyone. Who are allergic to strong smells.

Oriental Lilies
Oriental Lilies

Oriental Lilies: The Fragrant Giants

Having blossoms up to 10 inches in diameter, oriental lilies are the titans of the lily kingdom. They are well known for their captivating scent and eye-catching colors, which include deep reds, pinks, and whites. The late summer blooms of these lilies offer an outstanding culmination to the garden season. They need a little more care with soil drainage and planting depth, and they thrive best in full sun to light shade.


Easter Lilies
Easter Lilies

Easter Lilies: The Symbol of Purity

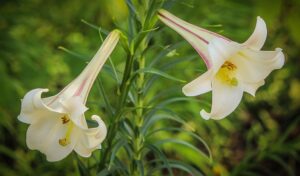
Easter lilies, characterized by their trumpet-shaped, fragrant white flowers, have become emblematic of the Easter holiday, representing purity, hope, and life. Native to Japan, these lilies were introduced to the United States in the early 20th century. They flourish in cooler, coastal climates and prefer well-drained, slightly acidic soil. Although commonly associated with a specific season. Easter lilies can thrive in gardens year-round if provided with the appropriate conditions.


Trumpet Lilies
Trumpet Lilies


Trumpet Lilies: The Majestic Sound of Summer

Trumpet lilies, also known as Aurelian lilies. Their are feature large, trumpet-shaped flowers with a sweet, potent fragrance. These lilies can grow impressively tall, reaching up to 6 feet in height. And their blooms display a spectrum of colors, from soft pastels to vivid yellows and pinks. They thrive in full sun and well-drained soil, and they benefit from staking to support their tall, flower-laden stems.


Tiger Lilies
Tiger Lilies


Tiger Lilies: The Wild Beauties

Tiger lilies, named for their distinctive orange blooms speckled with black dots that resemble a tiger’s coat, are known for their resilience and ability to thrive in less-than-ideal conditions. Often found growing wild, these lilies spread easily through both bulbils, which form in leaf axils, and underground bulbs. They prefer full sun but can tolerate partial shade, and they are not particular about soil type, making them a versatile choice for many gardens.

White Lilies
White Lilies

Purple lilies
Purple Lilies

Purple and White Lilies: A Study in Contrast

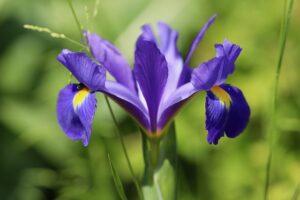
Purple lilies, with their deep, rich hues, bring a touch of mystery and elegance to the garden. In contrast, white lilies symbolize purity and grace. Both colors are found in various lily types, including Asiatic and Oriental, each adding its unique charm to garden compositions and floral arrangements. While care requirements can vary depending on the specific type, most lilies thrive in well-drained soil and prefer sunny to partly shaded locations.


Martagon Lilies
Martagon Lilies

Martagon Lilies: The Shade Lovers

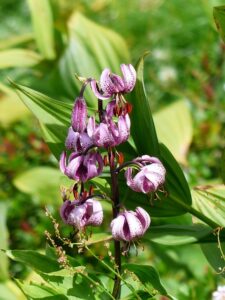
Purple lilies, with their deep, rich hues, bring a touch of mystery and elegance to the garden. In contrast, white lilies symbolize purity and grace. Both colors are found in various lily types, including Asiatic and Oriental, each adding its unique charm to garden compositions and floral arrangements. While care requirements can vary depending on the specific type, most lilies thrive in well-drained soil and prefer sunny to partly shaded locations.

Peace Lilies
Peace Lilies

Peace Lilies: The Indoor Charmer

While not true lilies, peace lilies (Spathiphyllum) are cherished for their ease of care and the striking contrast between their dark green foliage and white, spoon-shaped flowers. These tropical plants make excellent indoor companions, thriving in low light conditions and requiring minimal watering. Additionally, peace lilies improve indoor air quality, making them a popular choice for homes and offices. Their low maintenance and air-purifying qualities make peace lilies a thoughtful and meaningful addition to any space.

Lily Indoor Plant, Grow, and Care


Cultivating indoor lily flowers introduces a realm of elegance and beauty to the interior landscape, a gesture that turns any room into a vibrant, living canvas. These enchanting blooms, synonymous with purity, rebirth, and a plethora of deep-seated meanings across various cultures, can thrive inside under the right conditions, bringing their unique allure and fragrance into your home. This guide offers a comprehensive exploration into the world of indoor lilies, covering everything from selection and planting to ongoing care and troubleshooting, ensuring that your indoor garden flourishes.

Selecting Your Lily


The journey begins with selecting the right lily for indoor cultivation. While not all lilies thrive indoors, several varieties adapt well to indoor life. The Peace Lily (Spathiphyllum), with its striking white spathes and lush foliage, is a popular choice, revered for its air-purifying qualities. The Easter Lily (Lilium longiflorum), celebrated for its trumpet-shaped blooms and sweet fragrance, also makes a wonderful indoor plant, especially when its care requirements are diligently met. Additionally, compact varieties of Asiatic and Oriental lilies can be considered for indoor environments, provided they receive ample care and attention.

The Planting Process


Container and Soil: Choosing the right container and soil mix is crucial for your lily’s health. Select a pot with sufficient drainage holes to prevent water from pooling at the bottom, as lilies detest “wet feet.” A well-draining, fertile potting mix, ideally a blend of peat, perlite, and vermiculite, provides the perfect environment for lily bulbs to thrive.

Planting the Bulb: Plant your lily bulbs in early spring or fall. The depth at which you plant the bulb is important – a general rule is to plant bulbs at a depth thrice their height. Make sure the bulb’s pointed end is facing up.. After planting, water your lily thoroughly to settle the soil around the bulb.

Growing Conditions


Light: Lilies love bright, indirect sunlight. A spot that mimics the dappled sunlight of their natural outdoor environment works best. Avoid direct, harsh sunlight, which can scorch their leaves.

Temperature and Humidity: The ideal temperature range for indoor lilies is between 60°F and 70°F. These plants prefer a humid environment; however, they don’t fare well in excessively dry conditions. Regular misting, a pebble water tray, or a room humidifier can help maintain the humidity levels around your lily.

Watering: Consistent moisture is key, yet overwatering is a common pitfall. Water your lily when the top inch of soil feels dry, allowing the water to drain freely. This mimics the natural moisture cycle lilies experience in the wild.

Fertilization: Feed your lily with a balanced, half-strength liquid fertilizer every four weeks during the growing season. Cease fertilization as the plant begins to go dormant post-bloom to avoid stressing the bulb.

Care and Maintenance


Deadheading and Cleaning: As blooms fade, deadhead them to encourage the plant to focus its energy on growth and future blooms. Keep the leaves clean and dust-free to ensure maximum photosynthesis.

Pruning: After blooming, resist the urge to cut back the plant immediately. Leave the leaves alone until it wilts and becomes yellow. This process enables the plant to store energy in the bulb for the next growing season.

Repotting: Lilies will eventually outgrow their containers. When roots become visible at the drainage holes, or growth appears stunted, it’s time to repot. Choose a new pot slightly larger than the current one, and refresh the potting mix to rejuvenate your plant’s environment.

Troubleshooting Common Issues


Yellowing Leaves: Often a sign of overwatering or poor drainage. Ensure your potting mix is well-draining and adjust your watering schedule accordingly.

Leggy Growth: This indicates inadequate light. Move your lily to a brighter location where it can receive more indirect sunlight.

Pest Infestations: Aphids, spider mites, and scale insects can sometimes trouble indoor lilies. Inspect your plants regularly and treat infestations early with insecticidal soap or neem oil.

Diseases: Fungal diseases like root rot can occur due to overwatering. Ensure proper drainage and avoid letting your lily sit in water.

Propagation


Propagating lilies can be a rewarding endeavor, enabling you to broaden your collection. Division is the most straightforward method for indoor lilies. During repotting, delicately separate any small bulblets from the mother bulb and plant them in their own containers. This process is best carried out during the dormant period, allowing new plants adequate time to establish themselves.


Lily Flowers Color and Meaning

Pink Lily & Meaning

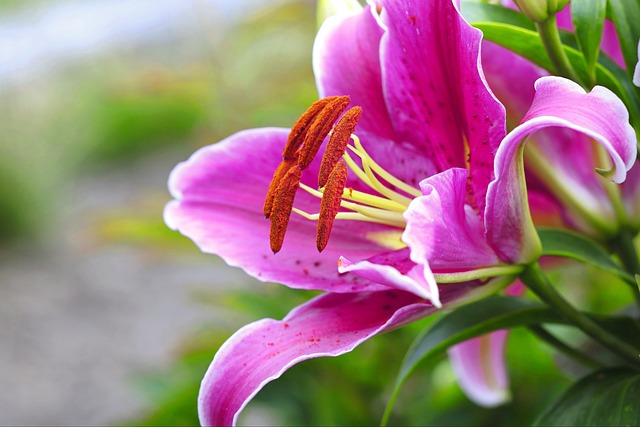
The pink lily represents admiration, prosperity, and abundance. Its delicate, rosy petals convey feelings of love, gratitude, and appreciation. Making it a perfect gift to celebrate achievements or express heartfelt emotions. Pink lilies also symbolize femininity and grace, adding a touch of elegance and warmth to any occasion.
White Lily & Meaning


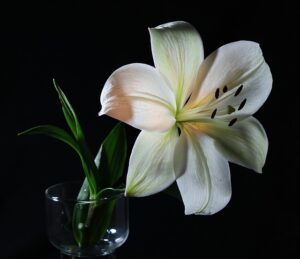
The white lily is a symbol of purity, virtue, and innocence. Revered for its striking beauty and serene appearance, it often represents a return to tranquility and symbolizes a rebirth or new beginnings. In various cultures and religious contexts, the white lily is associated with the divine or the sacred, such as in Christianity, where it is linked to the Virgin Mary, embodying purity and motherhood. Additionally, white lilies are commonly used in both weddings and funerals, signifying love, unity, and the soul’s transition to peace. This versatile flower, with its elegant form and color, conveys messages of hope, renewal, and reverence, making it a poignant choice for many of life’s significant moments.

Yellow Lily & Meaning


The yellow lily, with its vibrant, sun-kissed petals, symbolizes joy, happiness, and the celebration of friendship. It embodies positivity, warmth, and the spirit of renewal—much like the dawn of a new day. In the language of flowers, presenting someone with yellow lilies is often a gesture of appreciation for their friendship and a way to express gratitude, joy, and good wishes. These cheerful blooms can light up any space, making them a popular choice for various occasions that call for a bright and uplifting atmosphere. The yellow lily encourages remembrance of happy moments and anticipation of future joy, making it a deeply meaningful flower in both personal and communal celebrations.

Purple Lily & Meaning


The purple lily is a captivating flower that symbolizes royalty, dignity, pride, and success. The rich, deep hues of purple have long been associated with nobility and luxury, and these meanings extend to the purple lily as well. This flower can also represent admiration and accomplishment, making it an excellent gift for someone who has achieved a significant milestone or whom you hold in high regard. In some cultures, purple lilies carry a spiritual or mystical significance, often associated with enchantment and the pursuit of knowledge. The beauty and distinctive color of the purple lily make it a symbol of uniqueness and a striking statement in any floral arrangement, conveying messages of respect, admiration, and the celebration of achievements.

Red Lily & Meaning


The red lily stands as a vibrant emblem of ardor and deep affection. Its striking red petals are often associated with profound love and enduring passion, making it a favored choice for expressing romantic sentiments. Beyond its romantic connotations, the red lily also symbolizes courage and ambition, reflecting a boldness of spirit and a determination to overcome challenges. This flower, with its rich, captivating color, communicates a powerful message of love, strength, and resilience, making it a meaningful gift in both love and encouragement.

Orange Lily & Meaning


The orange lily, with its fiery blooms, symbolizes confidence, pride, and warmth. It radiates a vibrant energy that can be associated with enthusiasm, passion, and a zest for life. Presenting someone with orange lilies can convey a message of admiration and a desire to express respect for their creativity and daring spirit. These lilies are also often used to celebrate meaningful life changes and milestones, embodying the flames of ambition and the courage to pursue new adventures. The bold and bright hue of the orange lily makes it a beacon of positivity, encouraging and uplifting the spirits of those who receive it.

Blue Lily & Meaning


The blue lily is a symbol of tranquility, harmony, and inspiration. Its unique and rare color in the floral world evokes a sense of mystery and profundity. Blue lilies can convey calm and serenity, making them ideal for spaces meant for reflection or meditation. Additionally, they represent encouragement for creativity and communication, as blue is often linked to the expression of ideas and the sharing of thoughts. Given their rarity, blue lilies also symbolize the unique and the extraordinary, making them a special gift for someone who embodies these qualities or for occasions that call for a touch of the exceptional and thoughtful.

Uses


  • Ornamental Gardening: Lilies are popular for their beauty and variety, often used in gardens and landscapes.
  • Floral Arrangements: Frequently used in bouquets and decorations for their striking appearance and pleasant fragrance.
  • Symbolic Meanings: Lilies often symbolize purity, renewal, and passion, making them common in religious and cultural ceremonies.
  • Medicinal Uses: Some species of lilies have been used in traditional medicine for their purported healing properties.
  • Culinary Uses: Certain lily bulbs, such as tiger lily, are used in Asian cuisine.


FAQ

How to care for a peace lily indoors?


To keep your peace lily flourishing indoors, follow these simple care tips:
  • Lighting: Choose a location with indirect, soft light. Direct sunlight can harm its leaves, while too little light may hinder flowering.
  • Watering: Water your peace lily when the soil feels dry to the touch, usually once a week, allowing for thorough drainage. These plants will visibly droop when thirsty, making them great communicators.
  • Humidity: Being tropical plants, peace lilies thrive in a humid environment. Regularly misting or placing a humidifier nearby can boost their growth.
  • Temperature: Keep the room at a comfortable 65°F to 75°F. Avoid placing your plant near cold drafts or extreme heat sources.
  • Feeding: Fertilize lightly with a balanced fertilizer every 6 to 8 weeks during the growing season to encourage vibrant foliage and blooms.
  • Pruning: Gently remove yellow or brown leaves at the base to keep your plant looking tidy and healthy.
  • Repotting: Repot in a slightly larger container every 1-2 years with fresh soil to give your peace lily room to grow.

These straightforward care steps will help your peace lily thrive, bringing its elegant greenery and serene blooms to your indoor space.


why is my peace lily turning yellow?


Yellowing leaves in your peace lily can stem from a few key issues:

  • Watering Habits: Both too much and too little water can lead to yellow leaves. Ensure a balanced watering routine, allowing the topsoil to slightly dry out between waterings.
  • Light Levels: Excessive direct sunlight can scorch leaves, turning them yellow, while insufficient light weakens the plant.
  • Nutritional Needs: Lack of essential nutrients, particularly if the plant has not been repotted or fertilized in a while, might cause yellowing.
  • Environmental Stress: Extreme temperature fluctuations or drafts can stress the plant, resulting in yellow leaves.
  • Natural Aging: It’s normal for older leaves to yellow and drop off as part of the plant’s growth process.

Adjusting care practices based on these potential causes can help restore your peace lily’s vibrant green foliage.


why is my peace lily leaves turning brown ?


Brown leaves on a peace lily can indicate several issues, often related to environmental factors or care routines:

  • Underwatering: While peace lilies are somewhat drought-tolerant, consistently dry soil can lead to brown leaf tips and edges.
  • Overfertilization: Too much fertilizer can cause chemical burns to the roots, leading to brown leaves.
  • Low Humidity: Peace lilies prefer higher humidity levels. Dry indoor air, especially in winter, can cause leaf tips to turn brown.
  • Poor Water Quality: Tap water containing high levels of fluoride or chlorine can harm the plant, resulting in brown tips or margins.
  • Direct Sunlight: Although they need light, direct sunlight can scorch peace lily leaves, causing them to turn brown.
  • Pests or Disease: Infestations of pests or diseases can also lead to brown spots or patches on the leaves.

Identifying the specific cause is crucial to addressing the problem effectively. Adjusting your care regimen, such as improving watering practices, modifying fertilization, or increasing humidity, can help prevent further browning and encourage healthy growth.