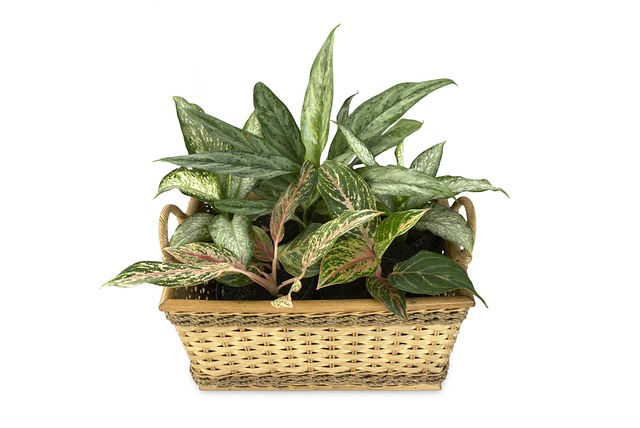
Dieffenbachia, commonly known as Dumb Cane, is a popular houseplant appreciated for its striking foliage and easy-care nature. Native to the tropical regions of the Americas, Dieffenbachia spp. is a diverse genus with several species and cultivars that make attractive additions to indoor spaces. This article provides a detailed overview of Dieffenbachia varieties, care requirements, and propagation methods.

| Common Names | Dieffenbachia, dumb cane |
| Botanical Name | Dieffenbachia spp. |
| Family | Araceae |
| Plant Type | Herbaceous, perennial |
| Mature Size | 3–10 ft. tall, 2–3 ft. wide |
| Sun Exposure | Partial |
| Soil Type | Well-drained |
| Soil pH | Acidic |
| Bloom Time | Spring, summer |
| Flower Color | White |
| Hardiness Zones | 10–12 (USDA) |
| Native Area | Caribbean, South America |
| Toxicity | Toxic to people, pets2 |
Types of Dieffenbachia
1. Dieffenbachia seguine
- Description: Features large, oblong leaves with a blend of green, white, and yellow patterns.
- Size: Typically grows 3 to 6 feet tall.
- Features: One of the most common species, known for its striking leaf patterns.
2. Dieffenbachia amoena
- Description: Robust species with dark green leaves marked by white or cream variegation.
- Size: Can grow taller than 6 feet indoors.
- Features: Popular for its large size and dramatic foliage.
3. Dieffenbachia ‘Camille’
- Description: Compact cultivar with creamy-centered leaves edged in dark green.
- Size: Ideal for smaller spaces due to its compact growth.
- Features: Known for its distinctive and attractive variation.
4. Dieffenbachia ‘Tropic Snow’
- Description: Features large, glossy leaves with creamy white variegation and green margins.
- Size: Grows up to 5 feet tall.
- Features: Prized for its lush and full appearance.
5. Dieffenbachia ‘Sterling’
- Description: Silver-gray leaves with dark green edges provide a unique look.
- Size: Moderate growth, making it suitable for indoor settings.
- Features: Eye-catching foliage due to its contrasting colors.
6. Dieffenbachia ‘Reflector’
- Description: Dark green leaves adorned with bright lime-green spots.
- Size: Reaches up to 3 feet tall.
- Features: Stunning contrast in leaf pattern makes it a standout plant.
Dieffenbachia varieties offer a range of sizes, colors, and patterns, making them versatile and appealing choices for indoor gardening. Each type has its won unique charm, ensuring there’s a Dieffenbachia suitable for every plant enthusiast’s taste and space.
Dieffenbachia Care
Dieffenbachia, commonly known as “dumb cane,” is a beloved houseplant celebrated for its lush, variegated leaves. Native to the tropical regions of Central and South America, this plant adds a touch of exotic beauty to any indoor space. While Dieffenbachia is relatively easy to care for, understanding its specific needs will help it thrive and enhance your home with its striking foliage.
Light Requirements
Dieffenbachia thrives in bright, indirect light. Placing it near an east or north-facing window is ideal, as too much direct sunlight can scorch its leaves. If natural light is limited, Dieffenbachia can adapt to low light conditions, but its growth may slow, and its leaves may lose some vibrancy. To prevent legginess and maintain its lush appearance, rotate the plant periodically to ensure even light exposure.
Watering
One of the key aspects of Dieffenbachia care is proper watering. The soil should be regularly moist but not soggy. Water your plant when the top inch of soil is dry to the touch. During the growing season (spring and summer), this may mean watering once a week, while in the dormant period (fall and winter), watering can be reduced. Always use room-temperature water to avoid startling the roots.
Humidity and Temperature
Dieffenbachia prefers high humidity, mirroring its tropical origins. To maintain adequate humidity levels, mist the leaves regularly or place the plant on a humidity tray. Alternatively, using a humidifier in the room can create a more stable environment. As for temperature, keep your Dieffenbachia in a room where the temperature stays between 65-75°F (18-24°C). Protect it from drafts, air conditioning vents, and sudden temperature changes, which can stress the plant.
Soil and Fertilization
A well-draining potting mix is crucial for Dieffenbachia. A blend designed for houseplants or a mix of peat, perlite, and vermiculite works well. During the growing season, feed your Dieffenbachia monthly with a balanced, water-soluble fertilizer. This regular feeding schedule will support its growth and maintain vibrant leaf coloration. Reduce fertilizing during the fall and winter months when the plant’s growth naturally slows.
Pruning and Repotting
Regular pruning helps maintain Dieffenbachia’s shape and removes any yellow or damaged leaves. To cut precisely, use clean, sharp scissors or pruning shears. If your plant becomes too tall or leggy, you can trim the stems to encourage bushier growth. Repotting should occur every 2-3 years, or when the plant outgrows its existing container. Choose a pot that is one size larger and refresh the potting mix to provide new nutrients.
With its stunning foliage and manageable care requirements, Dieffenbachia is a wonderful addition to any indoor garden. By providing the right light, water, humidity, and care, you can enjoy a healthy, vibrant Dieffenbachia that enhances the beauty of your home for years to come.
Propagating Dieffenbachia
Propagating Dieffenbachia, commonly known as dumb cane, can be done using stem cuttings. Here’s a step-by-step guide to help you propagate your Dieffenbachia:
Materials Needed:
- Sharp, sterile knife or scissors
- Rooting hormone (optional)
- Potting mix or water
- Pots or containers
- Plastic bag or humidity dome (optional)
Steps:
-
Choose a healthy stem:
Select a healthy stem from the mother plant. It should be free from any diseases or pests and have at least one leaf.
2. Cut the stem:
Using a sharp, sterile knife or scissors, cut a section of the stem about 4-6 inches long. Make sure the cutting has at least one node (a small bump where leaves or roots can grow).
Optional:
- Apply rooting hormone
- Dip the cut end of the stem in rooting hormone to promote rapid root growth.
3. Choose Your Medium:
- You can root Dieffenbachia in either water or soil.
- Water Method: Place the cutting in a jar of water, making sure the node is submerged but the leaves are not. To maintain freshness, refresh the water every few days.
- Soil Method: Plant the cutting in a pot filled with well-drained potting soil. Bury the node about an inch deep.
4. Provide humidity:
- If rooting in soil, cover the pot with a plastic bag or use a humidity dome to maintain high humidity. Make sure the plastic does not contact the leaves.
5. Place in indirect light:
- The cutting should be placed in a well-lit, indirect region. Place the cutting in a place with good, indirect lighting.
Monitor and Wait: - Keep the soil moist but not soggy if using the soil method. For the water method, ensure the water level stays constant. Roots should start to grow in a few weeks.
6. Transplanting:
Once the roots are a few inches long, you can transplant the cutting from water to soil. If propagating in soil, you may notice new growth, indicating successful rooting.
Tips:
Be patient; roots can take many weeks to form. Keep an eye out for any signs of rot, especially if using the water method. If the cutting starts to rot, remove the affected part and re-submerge the healthy section.
Overwintering
Overwintering is the process of protecting plants from cold winter weather to ensure they survive until spring. Here are the key steps:
- Bring Indoors: Move potted plants indoors to a cool, frost-free area with light.
- Mulch: Apply a thick layer of mulch around outdoor plants to insulate roots.
- Prune: Trim dead or damaged parts to prevent disease.
- Watering: Water plants sparingly; overwatering can cause rot.
- Cover: Use fabric or plastic covers for outdoor plants to shield them from frost.
Common Pests
Spider Mites
- Identification: Tiny red or brown insects, fine webbing on leaves.
- Symptoms: yellow speckles on leaves, leaf drop.
- Treatment: Increase humidity, wash leaves, use insecticidal soap or neem oil.
Aphids
- Identification: small green, black, red, or white insects.
- Symptoms: curled or yellow leaves, sticky honeydew, stunted growth.
- Treatment: Wipe off, spray with water, use insecticidal soap or neem oil, and introduce ladybugs.
Mealybugs
- Identification: White, cotton-like masses on stems and leaves.
- Symptoms: stunted growth, yellow leaves.
- Treatment: Dab with rubbing alcohol; use insecticidal soap or neem oil.
Scale Insects
- Identification: Small brown or tan bumps on stems and leaves.
- Symptoms: yellowing leaves, sticky honeydew, reduced vigor.
- Treatment: Scrape off; use horticultural oil or insecticidal soap.
Thrips
- Identification: Tiny slender black, brown, or yellow insects.
- Symptoms: silver streaks or spots on leaves, leaf deformities.
- Treatment: Remove affected leaves, use insecticidal soap or neem oil, and set sticky traps.
Common Problems
Yellow Leaves
- Causes: overwatering, underwatering, poor lighting, nutrient deficiencies.
- Solutions: Adjust the watering schedule, ensure proper lighting, and fertilize as needed.
Brown Leaf Tips
- Causes: low humidity, fluoride in water, overfertilization.
- Solutions: Increase humidity, use distilled or rainwater, and reduce fertilizer use.
Drooping Leaves
- Causes: underwatering, root rot, temperature stress.
- Solutions: Water thoroughly, check for root rot, and maintain stable temperatures.
Leggy Growth
- Causes: Insufficient light.
- Solutions: Provide more indirect light; rotate the plant regularly.
Preventive Measures
- Regular Inspection: Frequently check for pests and early signs of problems.
- Cleanliness: Keep the plant and the surrounding surroundings clean.
- Isolation: Prior to introducing new plants to your collection, quarantine them.


Your point of view caught my eye and was very interesting. Thanks. I have a question for you.
Your point of view caught my eye and was very interesting. Thanks. I have a question for you.
Thank you for your sharing. I am worried that I lack creative ideas. It is your article that makes me full of hope. Thank you. But, I have a question, can you help me?
I don’t think the title of your article matches the content lol. Just kidding, mainly because I had some doubts after reading the article. https://accounts.binance.com/en-NG/register?ref=JHQQKNKN